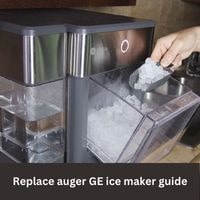
Replace auger GE ice maker
Replace auger GE ice maker. If the auger in your GE ice maker is not functioning properly, it can be frustrating and inconvenient.
The auger is responsible for moving the ice from the ice maker to the ice bucket, and a malfunctioning auger can prevent the ice maker from producing ice or cause the ice to become stuck in the ice maker.
In this article, we will provide a detailed step-by-step guide on how to replace the auger in a GE ice maker, including solutions for common issues that may arise during the repair process.
Replace auger GE ice maker

Preparation: Before beginning any repairs, make sure the ice maker is unplugged and the water supply is turned off. Remove any ice from the ice bucket and take out the ice bucket itself.
Remove the ice maker cover
Locate the screws that hold the ice maker cover in place and remove them using a screwdriver.
If the screws are stripped or difficult to remove, you may need to use a penetrating oil to loosen them or replace them with new screws. Carefully lift the cover off of the ice maker.
Disconnect the wiring harness
Locate the wiring harness that connects the ice maker to the control panel and carefully unplug it. If the wiring harness is stuck or difficult to unplug, you may need to gently wiggle it back and forth to loosen it.
Remove the auger motor
The auger motor is located in the back of the ice maker and is responsible for driving the auger. Locate the mounting screws that hold the auger motor in place and remove them using a screwdriver.
If the screws are stripped or difficult to remove, you may need to use a penetrating oil to loosen them or replace them with new screws. Carefully lift the auger motor out of the ice maker.
Remove the old auger

The auger is located inside the ice maker and is connected to the auger motor.
Carefully remove the auger from the ice maker, taking care not to damage any other components.
If the auger is stuck or difficult to remove, you may need to gently wiggle it back and forth to loosen it.
Install the new auger
Carefully insert the new auger into the ice maker, making sure it is properly aligned with the auger motor. If the auger is not properly aligned, it may not function properly or may become stuck.
Reinstall the auger motor
Carefully place the auger motor back into position in the ice maker and secure it with the mounting screws.
Make sure the screws are tightened securely, but be careful not to overtighten them as this can strip the screws or damage the auger motor.
Reconnect the wiring harness
Plug the wiring harness back into the control panel and make sure it is securely connected.
Reinstall the ice maker cover
Carefully place the ice maker cover back onto the ice maker and secure it with the screws. Make sure the cover is properly aligned and that all of the screws are tightened securely.
Test the ice maker
Once all of the repairs are complete, plug the ice maker back in and turn the water supply back on. Allow the ice maker to run a full cycle and check to make sure the auger is functioning properly and moving the ice from the ice maker to the ice bucket.
By following these steps, you can successfully replace the auger in your GE ice maker and get it functioning properly again. If you encounter any issues or are unsure of how to complete the repair, it is recommended to seek the assistance of a qualified appliance repair technician.
Conclusion
In conclusion, replacing the auger in a GE ice maker is a repair that can be completed by most homeowners with basic tools and knowledge. However, if you are unsure of how to complete the repair or encounter any issues, it is recommended to seek the assistance of a qualified appliance repair technician. By following the steps outlined in this article and taking the necessary precautions, you can successfully replace the auger in your GE ice maker and get it functioning properly again.
Related Guides


