How to vent a microwave on an interior wall. The fragrance of a delicious supper is appealing to the senses. However, if you retain this aroma on your clothes, would anybody who can smell you be attracted to it?
Of course not! This might entice others to torment or be seen as an invitation to make you the center of attention.
If the food from the oven lingers in your house, you’ll need to find a way to get rid of it. We’ll show you how to vent a microwave on an interior wall in this post.
How to vent a microwave on an interior wall

What You’ll Need (Items)
- Hammer drills.
- Hole saws ranging from 2 inch – 16 inch.
- Utility Knives.
- Adjustable Wrench. (or channel locks)
- Long Crowbar or Large Screwdriver.
Safety Tools
- Dust masks.
- Respirators that filter hazardous particles.
- Safety kits such as eye protection glasses. (so you don’t get debris in your eyes later on after finishing venting it through the wall)
1. Find the Best Place to Vent It
Climb the ladder inside your attic. Examine the walls of your kitchen, and see if they’ll let you install a microwave exhaust fan without drilling too many holes in them.
Measure how much space there is between studs on your wall. Then compare this with mounting pipe lengths which you will need later on. You can find these parts at any home improvement store, along with screws and bolts for mounting it all together.
2. Find Out About Building Codes

As you go through this process, try to understand all local building codes that apply to vents on an exterior wall before actually installing anything on or into yours.
If somebody sees part or all of your project – run away as fast as you can! In general, if the flue or vent goes through an exterior wall – it needs to be round.
However, any openings penetrating a wall from inside should have a protective cover over them, so no debris falls out.
3. Mark Where your Studs Are
When you go around the perimeter of your kitchen with a measuring tape and note down locations where they intersect with exterior walls or other ones at 16-inch intervals, you won’t make any mistakes later on.
For instance, let’s say that there are four studs in between each window set (these are usually 24 inches apart too).
If two of these measurements were identical on both sides of the house, you’d place one mounting pipe at either end plus another in the middle. This isn’t always the case, so do your best, and you’ll be fine.
4. Drill Holes Through the Exterior Wall

Once again, go back down into your kitchen and start measuring sections on the ceiling where insulation is thickest.
In between these sections, put a hole saw up to its widest setting inside your drill.
Use lubricant as needed before cutting from both sides of the wall to make sure not to break it at any time afterward.
You now have an opening large enough for mounting pipe, which will push out all steam from your microwave oven in a minute or two after cooking anything at all! Easy as Pie!
5. Hanging Pipe Through A Wall
Get yourself a length of threaded steel, and push it into the hole that you just cut from the inside. You’ll then use this as a guide for placing screws around its perimeter with your drill/driver.
If you have an adjustable wrench handy, tighten each of these screws to at least 20 foot-pounds – or more, depending on how thick the exterior wall is.
6. Finishing Up The Installation
When you’ve measured twice before cutting once with a reciprocating saw or chainsaw, place a length of around vent pipe over each screw head which pushes it outwards through the exterior wall itself.
When using a metal blade on either tool – keep it as straight as possible by sighting down both ends first.
7. Mounting the Exhaust Fan

Drill holes 3 inches (or more if needed) away from its edges with a spade point or Forstner bit.
These bits cut metal like buttah, so you’ll have no problems whatsoever!
You could also turn it upside down and use your circular saw with an abrasive blade installed too.
8. Installing The Fan
Mounting fans should always be done by professionals who know what they’re doing, so don’t let anybody else do it unless they have experience working up there in your attic at least once before!
Once all four bolts have been tightened up to at least 20 foot-pounds, put the tape measure away and start thinking about what you’ll build next!
How to Remove Old Microwave Vent

Before locating the vent, we’ll need to disconnect the power supply and unplug your unit.
1. Disconnect Power
After that, you’ll have to remove the cover on top of your microwave oven. It has captive screws or is held up with plastic clips, making it easy to take off without tools.
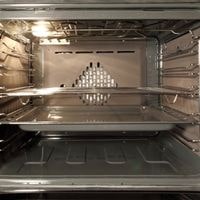
2. Inside View
Make sure there’s nothing left inside your oven before closing its door and blocking it shut with a bungee cord or rope.
3. Taking Off Vent Pipe
You can now take out all covers and parts surrounding the ventilation system and exhaust pipes. Remember that most models come in two pieces; you’ll also need to detach them from each other, as a sealant connects them.
4. Removing the Vent Pipe
Once you’ve removed all covers and parts, you’re free to extract the vent pipe from its place. Don’t forget to do this slowly and carefully! Note that it’s attached with another sealant and glue, so prying it out shouldn’t be too difficult.
5. Removing the Exhaust Hole
When the old vent is gone, remove screws holding your microwave in place. Afterward, take a hammer or putty knife and start working on peeling back the insulation from around the exhaust hole.
If other coverings are blocking your way, keep at them until they give up as well! The more tiles or boards you can pull off while removing the primary barrier, the easier your life will get.
6. Exhaust Hole
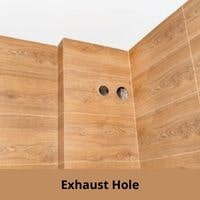
When all insulation is pulled back, you’ll locate the exhaust hole.
It should just be a small section of drywall that can easily be replaced with a fresh sheet of fiberglass.
We recommend not only cutting it out but also another tile beside it for more support and stability.
7. Vent Pipe Connections
Now, disconnect them from each other when you’ve located both ends of the vent pipe. Keep in mind that most models are held together by some sealant or glue, so prying them apart may prove difficult without tools.
8. Looking Inside
Once the pieces are detached, take a peek inside your unit at where the old vent pipe used to be. How much insulation do you think needs to be pulled back from the hole?
Just enough to attach your new vent or a little more? Keep in mind that it will have to look nice, so making a mess inside is not an option.
9. Vent Pipe
Now, use your duct tape and seal up one side of each piece of your newly acquired vent system. You can also putty knife the ends together if they fit tightly into place.
But using glue should work as well if their diameter isn’t too big. In any case, keep both ends sealed, so moisture doesn’t seep out!
10. Final Steps
Once you’ve attached your two pieces properly, allow them to dry for a few hours. Afterward, you can attach the pieces back together and seal them up tightly with duct tape on each side. Your new vent system should now be ready for use!
Note!
Keep in mind that microwave oven-mounted vents usually come with two separate components; one part is attached to an exhaust hole or pipe, while another goes outside your home.
Make sure to go through all steps carefully before attaching both pieces! Or else you might end up having to do everything again, which would be dumb.
Why Should you Vent your Microwave?
When you cook food or reheat leftovers, microwaves produce steam. This moist air steams up the appliance and can make your kitchen uncomfortable to be in. To get rid of it, ventilate the inside of the unit by opening doors and windows.
There are some cases when this doesn’t work. You might need to install a proper ventilation system that directs expelled warm air outside your house.
Otherwise, people who live around you will complain about smells coming from your microwave oven and your clothes as well.
What NOT to Do with Venting Microwaves?
You can place a box next to the microwave or hang a spool of thread. They’re common suggestions found on the internet, but these tips are outdated and useless.
Why? Let’s imagine that you hung up a large spool or placed an empty box next to your unit. As soon as you hit the Start button, steam would fill this container in seconds.
The next day, when nobody is around, you’ll punch both ends out about how full the box was overnight! If there’s another way to vent it without drills or screws involved – feel free to use it! However, if DIY is not your trade, then follow our instructions instead.
Conclusion
In this article, we’ve shown you how to vent a microwave on an interior wall. An essential thing in the process is not damaging or breaking your unit while installing or taking off old venting.
As it turns out, removing a smaller section of drywall around the hole for more support is a good idea when putting everything back together! Using screws instead of nails also gives you some wiggle room if something doesn’t fit right.
That being said, if you have any questions about replacing your own microwave’s exhaust pipe, feel free to ask them in our comments section below!
Have a nice day! Also, be sure to let us know if this guide was helpful to you or not – we hope our guide was worth your time.
Related Guides