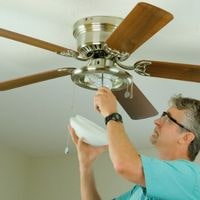
How to oil a ceiling fan without taking it down. Ceiling fans beautify your home and help you save money on energy bills throughout the year. The majority of consumers are unaware that ceiling fans require oil as part of their regular maintenance process.
Lubricating the fan is essential for most rotating components to function effectively; therefore, it’s important to oil it regularly. However, new ceiling fans don’t require any oiling for the first couple of years; after that, you should oil them once a month.
Read on for more information on how to oil a ceiling fan without taking it down.
How to oil a ceiling fan without taking it down

It’s possible for you to oil the motor of your ceiling fan, even if you don’t have any experience dealing with motors or electronics.
Whether you own an old-school model that uses ball bearings or one that uses roller bearings, the general process is quite similar. The steps are as follows:
Step 1: Find the parts to oil
If you notice some cap on top of it, remove this by pressing on both sides simultaneously before tipping out any excess oil inside the compartment.
Alternatively, your ceiling might not have a cap at all, and instead, use a screwdriver to unscrew this piece first.
Step 2: Use a finger to add few drops

If your fan uses roller bearings, grab a cloth and wipe the oil off by applying pressure with your finger or thumb while rotating it around in small circles.
Roller bearings need at least 10 minutes to soak up the right amount of oil into their compartment, so you might have to wait before installing it back onto your ceiling.
If your fan uses ball bearings, drop around 3-4 drops of oil directly onto the bearing for every 100 hours of use.
You can also use an old toothbrush or soft bristle brush and dip it into the oil so you can spread the lubricant all over its interior surface area before wiping out any excess with a clean cloth.
Step 3: Install the motor back

Make sure to take out whatever cap or screwdriver that was obstructing its way from entering before you tip in the excess oil inside the compartment.
If you have a remote control, make sure this is close to hand before plugging it in and pressing down on a button for a few seconds for a test run.
Step 4: Optional
If you own a ceiling fan with lights, make sure to oil their internal lighting bulbs by turning them upside down and adding one drop every three months.
This only applies if your light comes with a sprinkler-like fixture that can be replaced with a new bulb once this breaks or stops working altogether.
Step 5 :Perform a test run
Turn your fan on again and watch to see if it runs smoothly using an oscillating model. If not, wait for another three minutes, then turn the fan back on before checking again.
Do this until you get satisfactory results before turning it off for good.
Note!
If your ceiling fan still has lights attached to it, remember to add silicon spray every couple of months or so if it keeps on getting dimmer instead of brighter when turned on.
How Much Time Does It Take to Oil a Ceiling Fan?
The entire process takes about 20 minutes to complete. It only requires three steps – cleaning, lubricating, and testing the fan afterward.
The best time to lubricate a ceiling fan If you want to fish out airborne pollutants before they get mixed with any airborne dust particles inside your home, make sure to lubricate each of your ceiling fans once every two weeks for optimum results.
Why Should You Oil a Ceiling Fan?
Ceiling fans reduce the cost of your heating and cooling expenses and can be used to save money on your electric bill.
In the past, ceiling fans circulate warm air from a room to cool it down, which is why most people associate ceiling fans with summer.
However, if you live in an area with hot summers followed by cold winters, a well-maintained ceiling fan might help you save money on energy costs throughout the year.
In addition to saving you loads of money; regular oiling will extend the life expectancy of your ceiling fan. Replacing a broken or damaged one can become quite expensive these days, so it’s best to keep your existing one running at optimum efficiency.
How Often Should You Oil a Ceiling Fan?
Most manufacturers recommend oiling your ceiling fan twice a year, even if it’s only been used for a few days.
If you have an oscillating model that runs at least three or four hours daily, consider oiling your fan every three months. The frequency of regular maintenance depends on the amount of use and how dirty your room is.
The type of oils used in a ceiling fan varies from manufacturer to manufacturer; however, most will require some electric motor oil or non-detergent 30-weight motor oil because these fit their needs best. In addition to these oils, some models might also need 3-in-1 machine oil, which can run your fan like clockwork.
FAQs
How often should I oil my fan?
It would be best to lubricate your fan at least once every year to keep its motor bearings running smoothly. This prevents prematurely replacing the entire unit if its parts are damaged because of excessive wear and tear.
You can also clean each blade with a little bit of mild dishwashing liquid after removing any dust build-up before wiping.
What type of motor grease should I use?
You don’t have to use the same motor grease lubricating your car or other machinery. Any standard cooking oil will work just fine, but only if you’re not allergic to any food oils because they can leave an unpleasant odor inside your house.
How safe is it to lubricate my ceiling fan?
It’s very safe to lubricate your ceiling fan. All you need is an empty container and a few drops of motor oil or cooking grease.
If you want to ensure that your fan blades don’t get stuck in their original position, wipe out any leftovers before reattaching each one back into its original position.
What tools do I need to lubricate my fan?
All you need is a damp cloth, a few drops of cooking oil, and your ceiling fan’s manual for future reference if you want to know what type of lubricant it uses internally or externally. You can also use an open-end wrench to remove each of its bolts.
Where do I need to put the grease in the ceiling fan?
You can add oil to your fan’s motor case or directly through each of its holes. This way, you can ensure that all its blades are kept spinning smoothly while keeping all the parts from wearing away prematurely.
However, adding a little bit of cooking grease to each blade is a great way to stop them from getting stuck or allow them to move more smoothly than before.
What should I do if my ceiling fan is too hard to turn on?
If your ceiling fan isn’t turning on, you might want to check each of its light switch fuses before even considering replacing any parts inside it.
Otherwise, you can lubricate each motor bearing to overcome this problem. Make sure to use the right type of oil every time you lubricate your fan.
Can ceiling fans get wet?
Ceiling fans can get sprayed with water but only from a safe distance. If you want to bring back its glow without spending too much on maintenance or cleaning costs, make sure not to spray it directly when cleaning it.
Conclusion
How to oil a ceiling fan without taking it down. Ceiling fans are designed to circulate warm air downwards. This makes it easier to maintain a colder house through the winter because heat naturally rise. So any warm air that doesn’t escape now and then tends to cause surrounding walls or building materials to become damp, leading to mold formation if not aired out well enough.
If you’re worried about how often you should oil your ceiling fan, remember that dirt and dust build-up can cause parts of your fan to wear out prematurely if you don’t pay close attention to it. Cleaning the entire thing is much cheaper than buying a new ceiling fan altogether, so be sure to lubricate it time by time.
https://www.youtube.com/watch?v=Ayw3TAjmoyA&t=22s
Related Guides