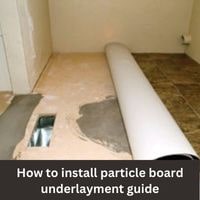
How to install particle board underlayment, Installing particle board underlayment is a great way to create a stable and level surface for flooring materials such as tile, hardwood, and laminate.
This type of underlayment is made from wood fibers that are compressed and bonded together with resin. It is a cost-effective option that is easy to install and provides good sound insulation and moisture resistance.
How to install particle board underlayment
Particle board underlayment is a type of engineered wood product that is commonly used as a substrate for flooring materials.
It is made from wood fibers that are compressed and bonded together with resin.
This type of underlayment is an affordable and easy-to-install option that provides good sound insulation and moisture resistance. It is commonly used in residential and commercial construction projects.
Step 1: Prepare the Subfloor
The first step in installing particle board underlayment is to prepare the subfloor. This includes removing any old flooring materials, cleaning the surface, and checking for levelness. Any uneven or damaged areas should be repaired before installing the underlayment.
Step 2: Measure the Room
Next, measure the room to determine the amount of particle board underlayment needed. It is important to purchase extra material to allow for cuts and mistakes.
Step 3: Cut the Particle Board
To fit the particle board underlayment to the room, you will need to cut it to size. A circular saw or jigsaw can be used for this task.
Step 4: Lay the Underlayment
Begin by laying the particle board underlayment in the corner of the room. It is important to stagger the end joints of the underlayment for added stability. Secure the underlayment to the subfloor using adhesive and nails or staples.
Step 5: Install Seam Tape
To ensure that the underlayment is secure and stable, install seam tape over the end joints. This will help to prevent movement and separation of the underlayment.
Step 6: Install Flooring Material
After the particle board underlayment has been installed and the seam tape has been applied, the flooring material of your choice can be installed. This can be tile, hardwood, or laminate, among other options.
FAQs
What is particle board underlayment?
Particle board underlayment is a type of engineered wood product that is commonly used as a substrate for flooring materials.
It is made from wood fibers that are compressed and bonded together with resin. This type of underlayment is an affordable and easy-to-install option that provides good sound insulation and moisture resistance.
What are the benefits of using particle board underlayment?
Some benefits of using particle board underlayment include cost-effectiveness, ease of installation, good sound insulation, and moisture resistance.
It also provides a stable and level surface for flooring materials.
Can I install particle board underlayment on top of an existing concrete subfloor?
Yes, particle board underlayment can be installed on top of an existing concrete subfloor. However, it is important to ensure that the concrete surface is clean, level, and free of any cracks or damage.
Is particle board underlayment suitable for use in a bathroom or kitchen?
Particle board underlayment is suitable for use in a bathroom or kitchen as long as it is properly sealed and protected from moisture.
It is also important to ensure that the flooring material installed on top of the underlayment is also resistant to moisture.
How long will particle board underlayment last?
The lifespan of particle board underlayment can vary depending on the quality of the product, the proper installation, and the conditions it is exposed to. With proper care and maintenance, particle board underlayment can last for several years.
Conclusion
In conclusion, installing particle board underlayment is a simple and cost-effective way to create a stable and level surface for flooring materials. By following these steps, you can ensure that your underlayment is installed correctly and that your flooring will look great for years to come.
Related Guides