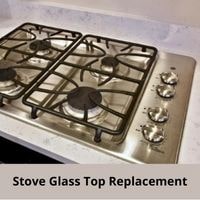
Stove glass top replacement. Glass-top stoves are beautiful and functional. Glass offers an even distribution of heat, is elegant-looking, and is easy to clean.
Of course, Glass doesn’t last forever (though it certainly lasts much longer than other stove surfaces!) – it may occasionally need to be replaced.
Glass-top stoves rely on a tempered glass surface manufactured to withstand high temperatures – but you never know when a break or bad scratch could happen, and replacement may be necessary.
Fortunately, replacing a tempered glass top stove is similar to replacing standard heating elements, though it may take a bit more time.
Stove Glass Top Replacement

We will discuss here the steps of replacing the glass top.
Step 1: Order a New Glass-Top
Before starting, you will need to find replacement glass for your stove. You might be able to find a model number or serial number on the back or inside of the appliance so that you can order replacement parts online and have them delivered.
Step 2: Unplug the Stove
Slide the stove out into the kitchen and away from the countertop after unplugging it from the wall. Under the stove panel, two screws attach to a metal rod.
To completely remove these screws, you will need a screwdriver. Fortunately, you ought to be able to locate one in a drawer close to where you took your oven mitts.
Open the oven door after ensuring no power is running to the stove.
Step 3: Remove the Burners and Glass-top
Undo the screws keeping your stove’s glass top in place after removing two bolts with a Phillips-head screwdriver.
Remember where you put the screws and nuts before setting them aside since we’ll need to put them back when it’s time to reassemble.
You must first properly disconnect any gas burners on your glass top by adhering to the manufacturer’s recommendations.
Lift on the edge of each burner until you hear it click if there are no gas burners attached. Don’t try to take the stove top off all at once; instead, move it off the support structure with one hand at each end.
Step 4: Put the New Glass in Place
To install the cooktop, insert the back of the glass top into the stove frame. Notice there are notches that match up where on edge.
Remove burners from the old shelter with a screwdriver and attach them to the new top. Insert the bottom of the glass top into a frame. Position prop under front burners.
Do not detach any wires. Place in burner area and push down gently to rest firmly on bottom of stove frame.
Repeat for rear burners, positioning each one in the respective holes and pushing them down firmly onto burner assembly until they snap into place.
FAQs
Can you still use a glass top stove if it’s cracked?
Using an old stove like the one pictured here is NOT safe! You have a crack directly above the word “Rock,” as seen in the photograph.
Even with your eyes, you could see that it is dangerous to use because of other cracks that we cannot notice. Your stove needs to be replaced because it probably wouldn’t get better if it cracked once.
Can a broken glass cooktop be repaired?
A glass cooktop can be repaired after being damaged without needing to be completely replaced.
It would help if you waited for the repairs or dried glue to fully cure before using your cooktop again for health and safety reasons. Scratches on the surface of melted objects on top of it can be mended immediately.
Conclusion
As you can see, repairing or replacing a glass-top stove doesn’t have to be daunting. If your glass-top stove is not heating like it used to, the issue might be an electrical problem (rather than an issue with the glass top itself) – in that case, and you should contact a professional. We would be happy to give you a quote and help you get your glass-top stove back in tip-top shape!
Related Guides