Great 4th of July nails do not require a professional nail technician. They do not require a full set of gel tools, a UV lamp, or years of nail art experience. They require a steady hand, the right colors, and the right technique for each design. These 15 simple 4th of July nail ideas were chosen specifically for that standard. Every single one of them is genuinely achievable at home. Every one uses basic nail polishes and simple tools available at any drugstore or beauty supply shop. And every finished result looks intentional, festive, and genuinely beautiful in every photograph taken from the afternoon cookout to the evening fireworks. Simple does not mean boring. These nails prove it.
The Nail Ideas
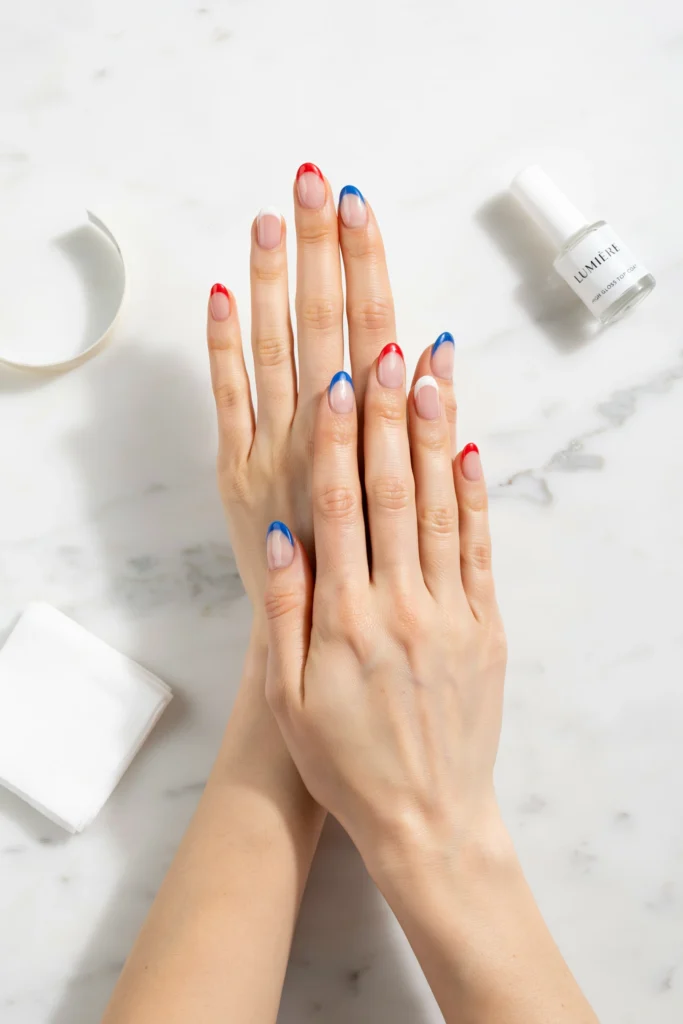
1. Red White and Blue French Tips T
he patriotic French tip replaces the standard white tip with a rotating sequence of red, white, and blue across the full set. Each finger gets a different tip color. The result is simultaneously classic, festive, and completely polished looking.
How to Do It: Apply a nude or sheer pink base coat to all nails and allow to dry completely. Use a French tip guide strip or a piece of nail art tape to mask off the smile line on each nail. Paint the tips in the following sequence: red, white, blue, red, white repeating across all ten nails. Remove the guide tape while the tip color is still slightly wet for the cleanest edge. Apply a glossy top coat over every nail once the tips are fully dry.
Styling Tip: Keep the smile line of every French tip as consistent and as even as possible across the full set. A consistent smile line at the same height on every nail is the single detail that separates a professional-looking French tip from an amateur one. Use tip guides on every nail rather than attempting to paint freehand.
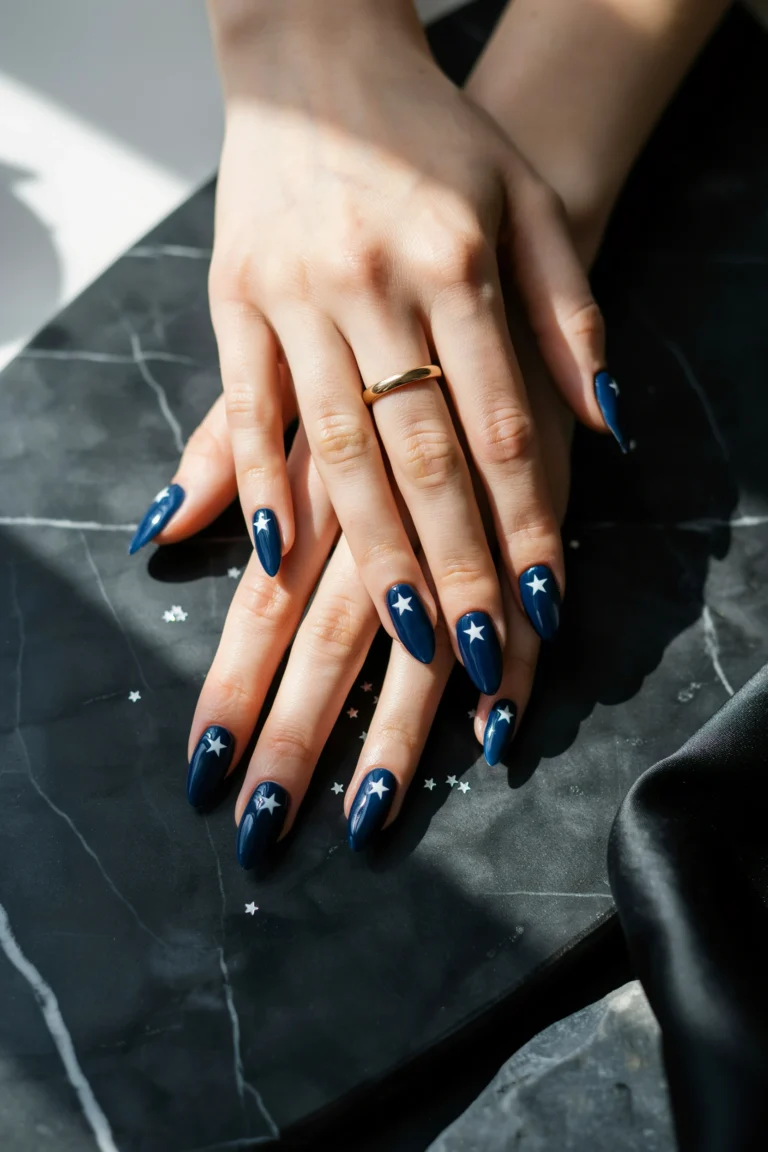
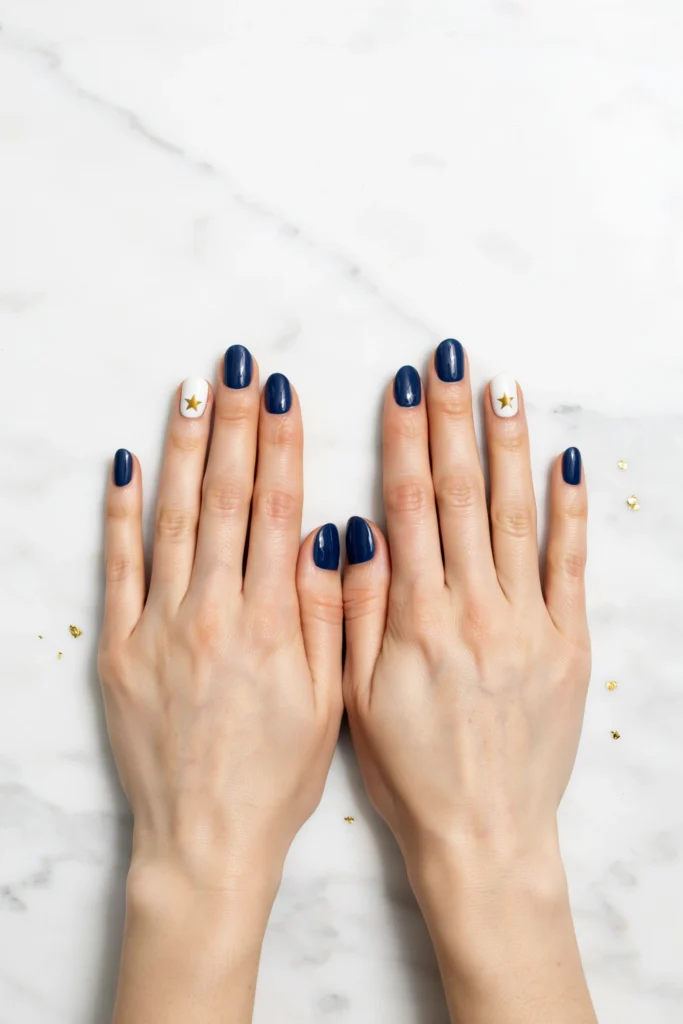
2. Simple Star Accent Nail
A single accent nail on each hand featuring a hand-painted or sticker-applied star on a contrasting background against a simple solid color on the remaining nails is one of the most effortlessly festive and the most consistently beautiful simple 4th of July nail ideas available.
How to Do It: Paint all nails in a solid navy blue base coat and apply two coats for full, even coverage. Allow to dry completely. On the ring fingernail of each hand apply two coats of white or red polish as the accent nail base. Once fully dry apply a single gold or white star to the center of each accent nail using a star-shaped nail sticker or by painting a small star using a fine detail brush dipped in gold or white nail art paint. Seal all nails with a glossy top coat.
Styling Tip: Place the star sticker or the painted star precisely at the center of the accent nail rather than at the top, the bottom, or to one side. A centered star on an accent nail looks deliberate and designed. An off-center star looks like a placement mistake regardless of how cleanly it was applied.
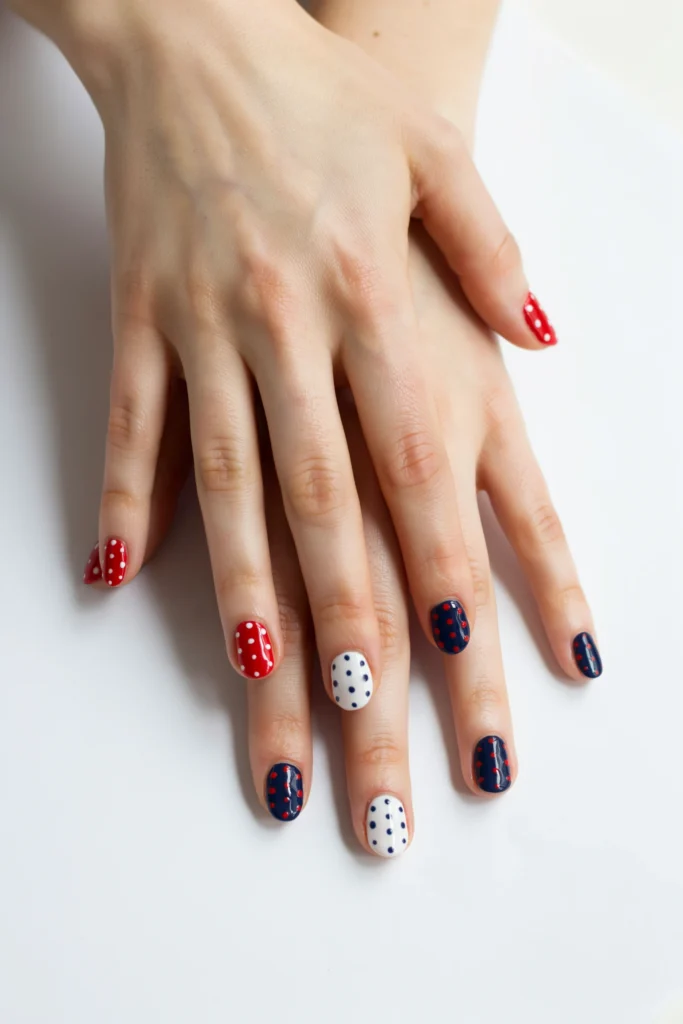
3. Patriotic Polka Dot Nails
Polka dot nails in the patriotic palette are one of the most cheerful and the most genuinely beginner-friendly 4th of July nail designs available. They require nothing more than a dotting tool or the blunt end of a bobby pin and three nail polish colors.
How to Do It: Paint nails in alternating solid base colors across the full set. Three nails in red, three in white, and four in navy blue. Allow each base to dry completely. Using a dotting tool or the blunt end of a bobby pin dipped in contrasting nail polish, apply evenly spaced dots across the surface of each nail. Use white dots on the red nails. Use red dots on the navy nails. Use navy dots on the white nails. Space the dots in a clean, even grid pattern across every nail surface. Seal with a glossy top coat.
Styling Tip: Load the dotting tool with the same amount of polish for each dot by dipping it in the polish and touching it to a piece of paper first to check the dot size before applying to the nail. Consistent dot sizes across every nail are what make polka dot nails look designed and deliberate. Inconsistent dot sizes make them look haphazard regardless of how evenly they are spaced.
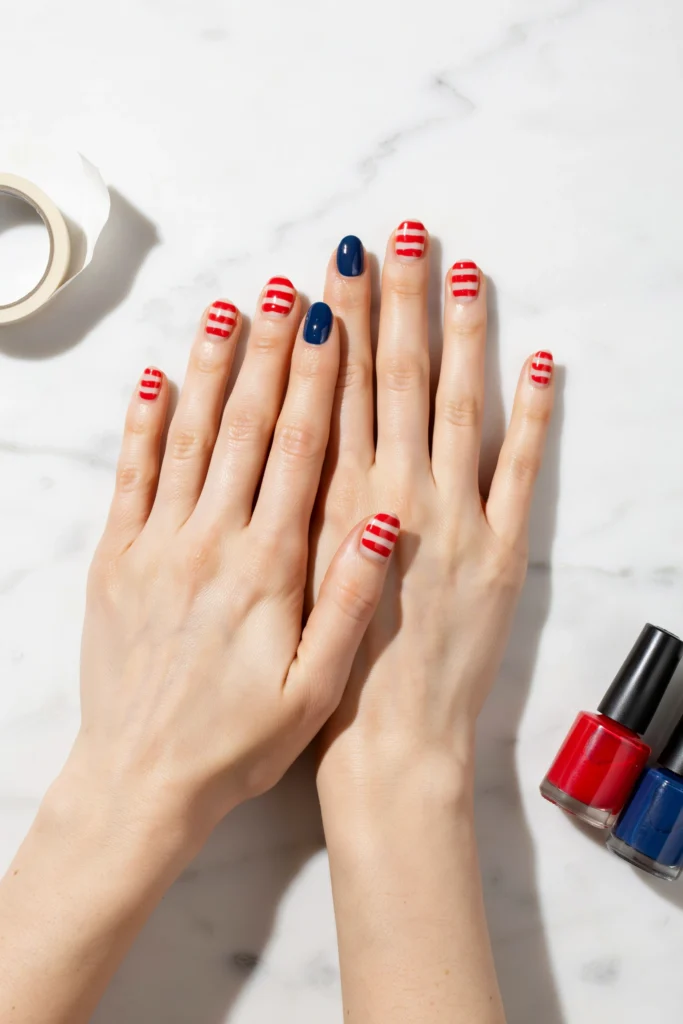
4. Red and White Stripe Nails
Classic red and white horizontal stripe nails with a navy blue accent nail on the ring finger create the most directly flag-inspired simple nail design available. The stripes are clean and graphic. The navy accent nail adds the final patriotic color in the most deliberate and the most effective position.
How to Do It: Paint all nails with a white base coat and allow to dry completely. Use thin nail art tape or striping tape laid in horizontal lines across each nail at even intervals. Paint over the full nail surface with red nail polish. Allow to dry for two full minutes. Remove the tape carefully by pulling it at a forty-five degree angle away from the nail surface to reveal clean white stripe lines beneath. On the ring fingernail of each hand apply two coats of navy blue rather than the stripe design. Seal all nails with a glossy top coat.
Styling Tip: Remove the striping tape while the red polish is still slightly wet rather than waiting for it to fully dry. Tape removed from fully dry polish tears the dried paint at the tape edge and creates a jagged stripe boundary rather than the clean, crisp line that tape removed from slightly wet polish always produces.
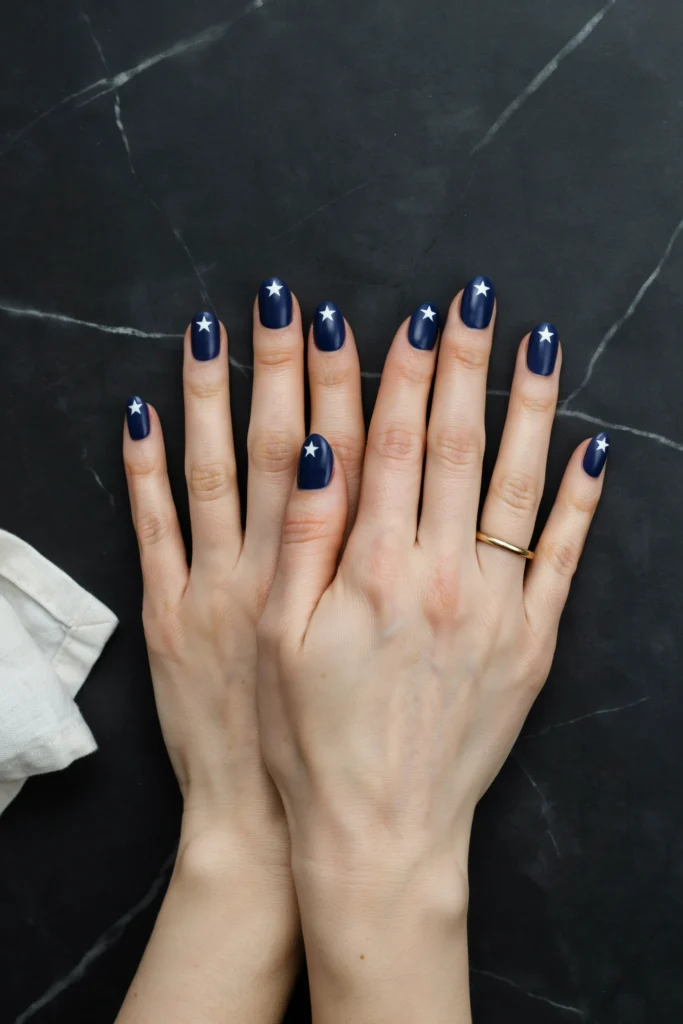
5. Simple Navy Blue with White Star
An all-navy blue manicure with a single white painted or stamped star on every nail is one of the most cohesive and the most elegantly simple patriotic nail looks available. The navy and white combination is simultaneously patriotic, sophisticated, and genuinely wearable beyond the holiday itself.
How to Do It: Apply two coats of deep navy blue nail polish to all ten nails. Allow to dry completely between coats and after the final coat for a minimum of ten minutes. Using a fine detail brush dipped in white nail art paint or a small star-shaped nail stamp and white stamping polish, apply a single small star to the center of every nail. Keep the star size consistent across all ten nails. Apply a matte or a glossy top coat depending on the preferred finish.
Styling Tip: Choose a matte top coat over this design rather than a glossy one for the most sophisticated and the most contemporary result. A matte navy blue with white stars reads as genuinely elevated nail art. The same design under a glossy top coat looks beautiful but the matte finish adds a specific depth and a specific quality that makes the design look more considered and more intentionally styled.
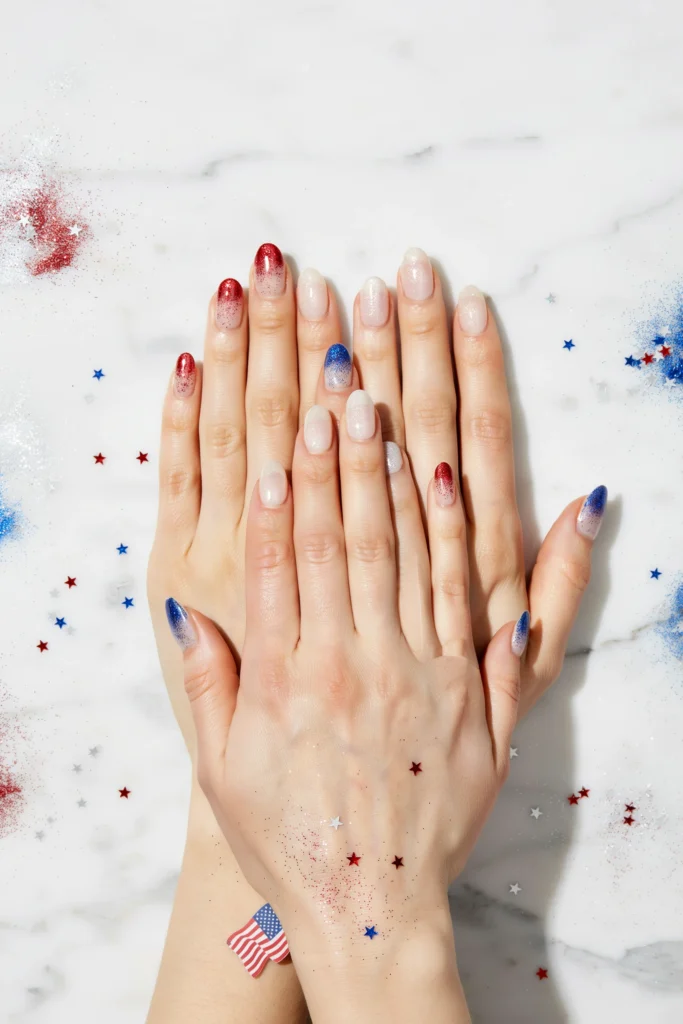
6. Patriotic Glitter Tip Nails
Glitter tip nails in the patriotic palette replace the standard French tip with a glitter gradient at the tip of each nail creating a sparkling, festive, and completely effortless patriotic nail look. Red glitter, white glitter, and blue glitter tips rotate across the full set for a complete patriotic color display.
How to Do It: Apply a nude or sheer base coat to all nails. Dip a small makeup sponge into red glitter polish and dab it onto the tip of the first nail in a gradient from heavily applied at the very tip to lightly applied moving toward the center of the nail. Repeat on alternating nails using white glitter and blue glitter polishes respectively. Build the glitter intensity through two to three sponge applications per nail rather than one heavy application. Seal with a gel top coat or two thick coats of a regular glossy top coat to smooth the glitter surface completely.
Styling Tip: Apply additional top coat specifically to the tip edge of each nail where the glitter ends to prevent snagging. Glitter polish has a naturally rough, raised surface at its outer edge. Two extra layers of top coat applied specifically to that transition edge smooths it completely and prevents the glitter from catching on fabric throughout the day.
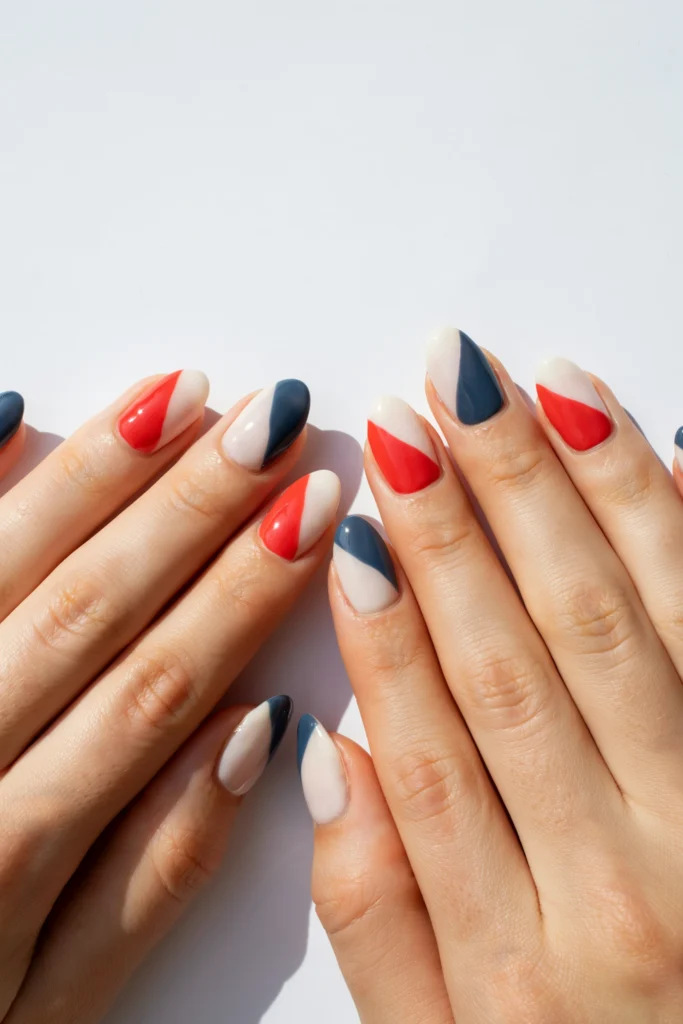
7. Red White and Blue Color Block Nails
Color block nails divide each nail into two or three distinct color sections using tape for clean geometric edges. The patriotic color block nail is one of the most graphic and the most contemporary simple nail designs available and one that looks significantly more technically demanding than it actually is.
How to Do It: Paint all nails with a white base coat. Allow to dry completely. Apply a diagonal strip of nail art tape across the center of the first nail. Paint the exposed lower section red. Remove the tape while slightly wet. Reapply tape at the opposite diagonal on the second nail. Paint the exposed lower section navy. Remove tape. Leave the third nail plain white. Repeat this three-nail sequence across the full set. The result is a rotating diagonal color block sequence of red, navy, and white across all ten nails.
Styling Tip: Apply the diagonal tape in a consistent direction and at a consistent angle across all the red nails and all the navy nails separately so the color block direction reads as deliberate throughout the set rather than random. Consistent tape angle communicates a designed system. Random tape angles make the set look accidental.
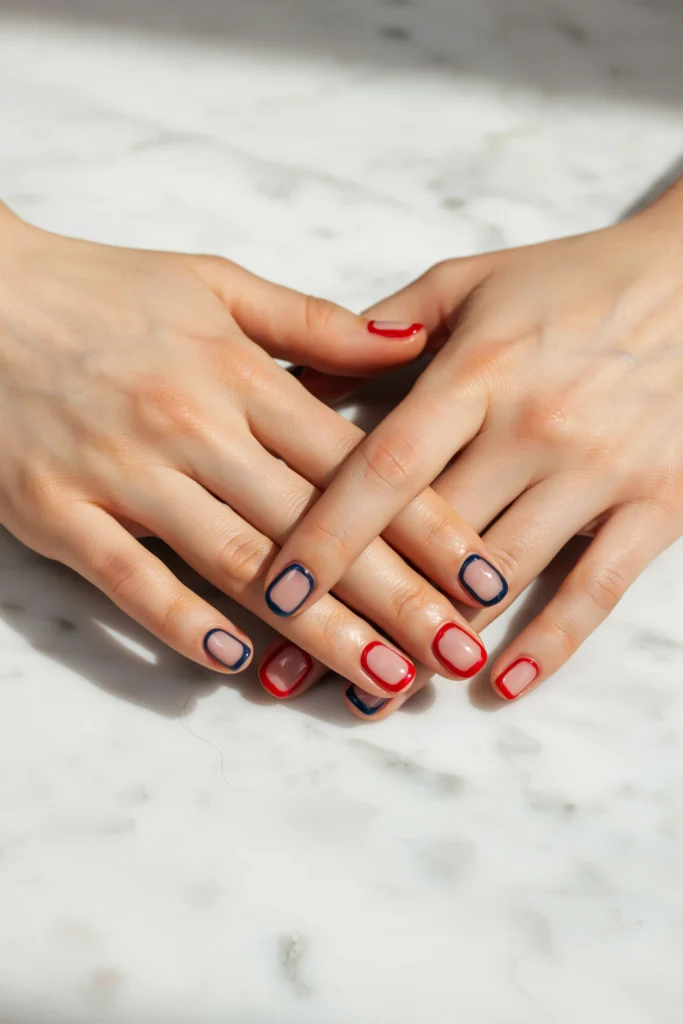
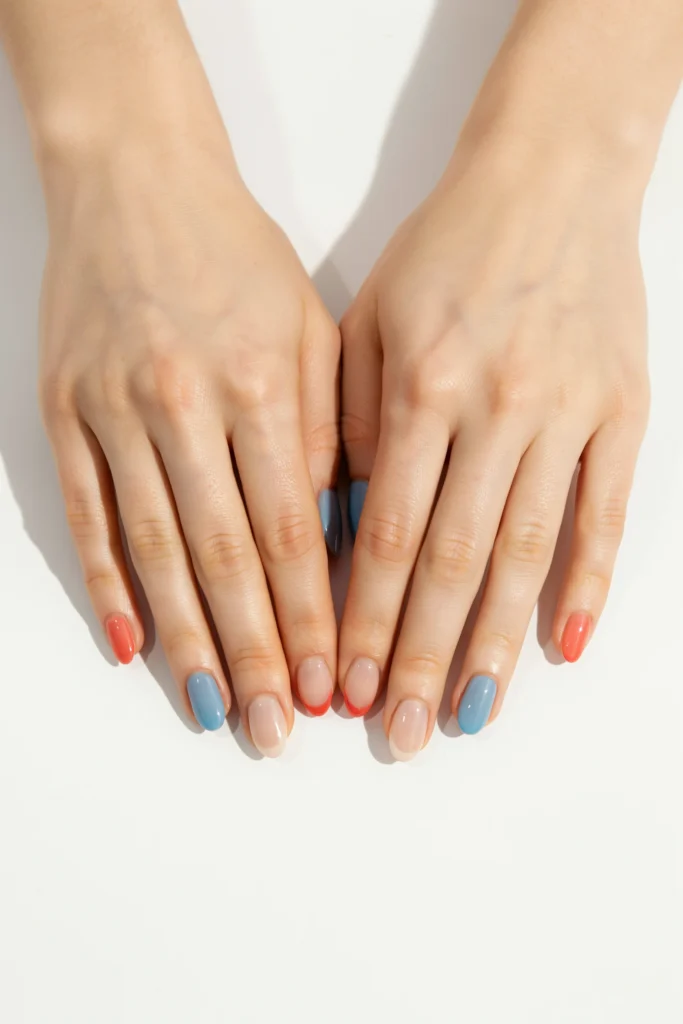
8. Simple Patriotic Negative Space Nails
Negative space nails use the natural nail as a design element by leaving sections of the nail unpainted. The patriotic version uses red and blue polish with deliberately unpainted negative space sections to create a simple, modern, and genuinely beautiful nail design that requires no nail art tools beyond a steady hand and two polish colors.
How to Do It: Apply a clear base coat to all nails. Allow to dry. Using nail art tape create a rectangular or diagonal frame on each nail leaving the center or one side section of the nail bare. Paint the exposed nail edges red on some nails and navy on others. Remove the tape carefully. The unpainted natural nail sections create the negative space design. Seal with a glossy top coat applied carefully over both the painted and the unpainted sections.
Styling Tip: File and buff the natural nail to a clean, smooth surface before beginning because the unpainted negative space sections of the nail are fully visible in the finished design and any surface ridges, discoloration, or uneven texture in the natural nail will be equally visible and equally prominent in the finished look. The preparation of the natural nail surface is more important in a negative space design than in any other nail art technique.
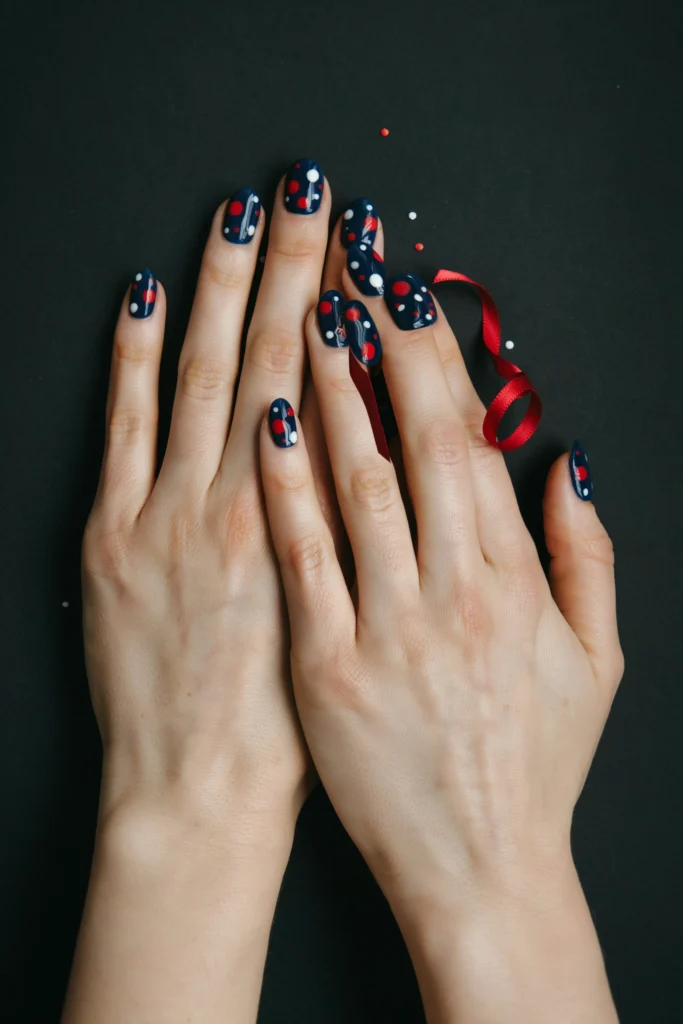
9. Navy Base with Red and White Dots
A deep navy blue base with red and white dots applied in a random, scattered pattern across every nail creates one of the most festive and the most effortlessly assembled patriotic nail looks available. The dots look like confetti or firework bursts on a night sky base and photograph beautifully in every light condition.
How to Do It: Apply two coats of deep navy blue nail polish to all nails. Allow to dry completely. Using a dotting tool or the blunt end of a bobby pin dipped alternately in red and white nail polish, apply dots of varying sizes in a random, scattered arrangement across every nail. Vary the dot sizes deliberately using more polish on the dotting tool for larger dots and less for smaller ones. Aim for approximately three large and four to five small dots per nail. Seal with a glossy top coat.
Styling Tip: Vary the dot sizes across every nail deliberately. A combination of large and small dots in a random scattered arrangement looks like a genuine firework burst. All dots at the same size look like a polka dot pattern and the distinction between those two aesthetics is entirely in the deliberate size variation.
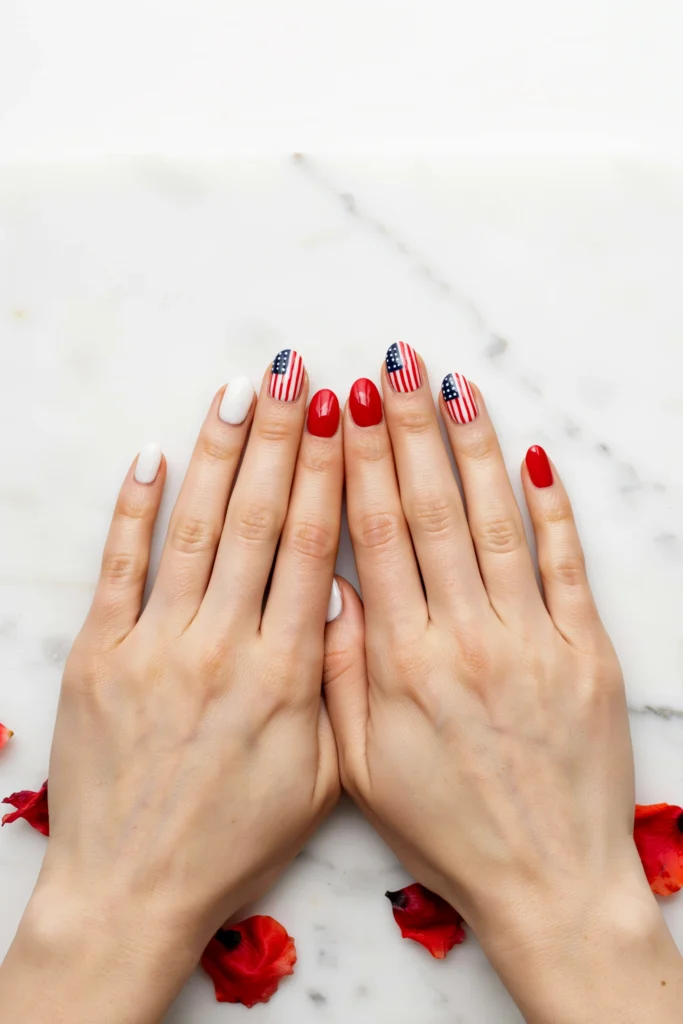
10. Simple American Flag Accent Nail
A single detailed American flag design on the ring fingernail of each hand against simple solid red, white, and blue alternating nails on the remaining fingers is one of the most classic and the most consistently admired simple patriotic nail looks available. The accent nail does all the detailed work. The remaining nails stay completely simple.
How to Do It: Paint the thumb and index finger nails red, the middle and pinky nails white, and the ring fingernail with a white base coat on each hand. Allow all base coats to dry completely. On the ring fingernail paint horizontal red stripes using a thin nail art brush across the right two thirds of the nail surface. Paint the upper left corner navy blue. Apply small white dots in a neat row or grid across the navy section using a dotting tool or a toothpick. Seal all nails with a glossy top coat.
Styling Tip: Use a magnifying glass if available when painting the flag detail on the accent nail because the scale of the American flag design at nail size genuinely benefits from visual magnification. A flag detail painted with magnification shows cleaner lines, a more accurate layout, and a more recognizable final design than the same detail painted at normal viewing distance without any visual aid.
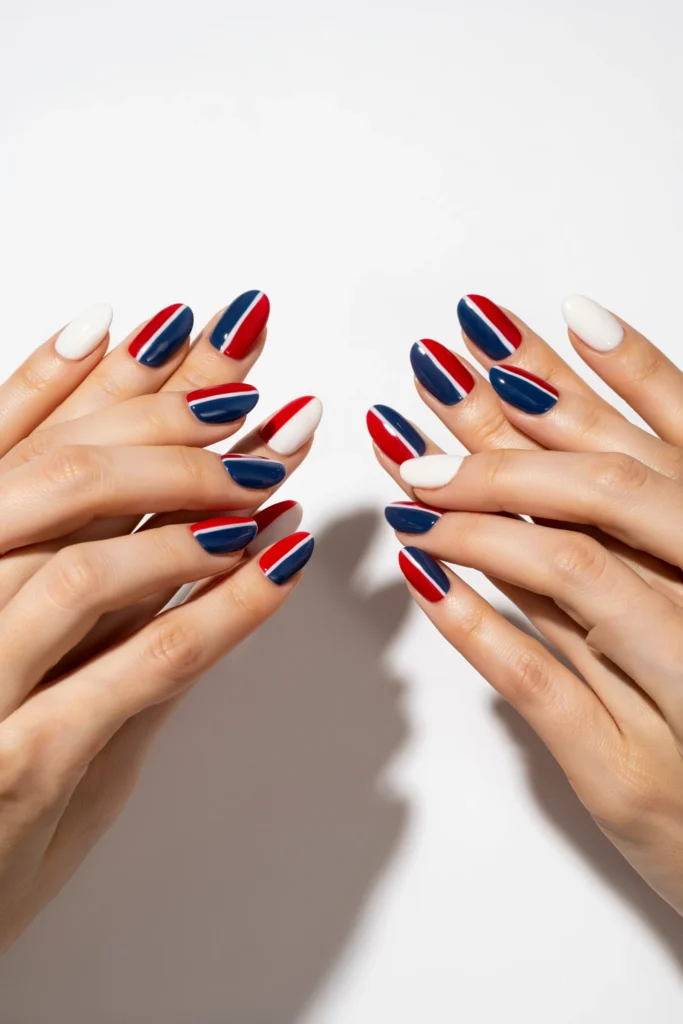
11. Red and Blue Diagonal Split Nails
A clean diagonal split nail dividing each nail exactly in half between red on one side and blue on the other with a white nail alternating between creates one of the most graphic and the most contemporary simple patriotic nail designs available. The diagonal split requires only tape and two polish colors.
How to Do It: Apply a white base coat to all nails. Allow to dry. Place a single diagonal strip of nail art tape across the center of the first nail from the lower left to the upper right corner. Paint the upper left half red. Remove tape while wet. Once dry reapply tape from upper left to lower right on the second nail. Paint the lower right half navy. Remove tape. Leave the third nail plain white. Repeat this three-nail sequence across the full set. Seal with a glossy top coat.
Styling Tip: Press the nail art tape firmly along its full length before painting over it to prevent the polish from bleeding under the tape edge and creating a blurred rather than a sharp diagonal split line. Run a fingernail or a wooden cuticle stick along the full length of the tape edge immediately after applying it for the firmest possible adhesion and the cleanest possible paint edge.
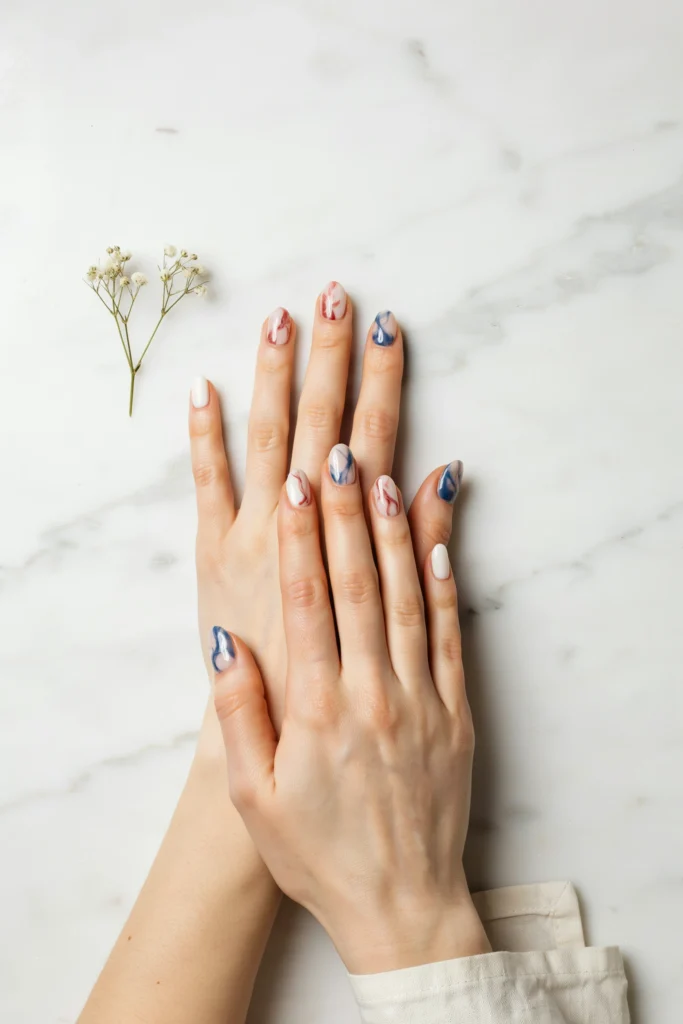
12. Simple Patriotic Marble Nails
A white base with soft red and blue veining creates a patriotic marble nail that is simultaneously sophisticated and simple. The marble technique looks complex but requires only a thin brush and slightly thinned nail polish to create convincing, beautiful veining lines.
How to Do It: Apply two coats of white nail polish to all nails and allow to dry completely. Thin a small amount of red nail polish very slightly with nail polish thinner until it flows freely from a fine liner brush. Draw irregular, branching vein lines in red across two nails on each hand using the fine liner brush in single, confident strokes rather than building lines from multiple short strokes. Repeat with navy blue thinned polish on two other nails. Leave one nail plain white on each hand. Apply a glossy top coat over every nail.
Styling Tip: Draw every veining line in a single, continuous confident stroke rather than building it from multiple short strokes because a vein drawn in a single confident motion looks organic and genuine while one built from short overlapping strokes looks deliberate and mechanical. Practice the vein stroke on paper before applying it to the nail so the motion is familiar and confident when it matters.
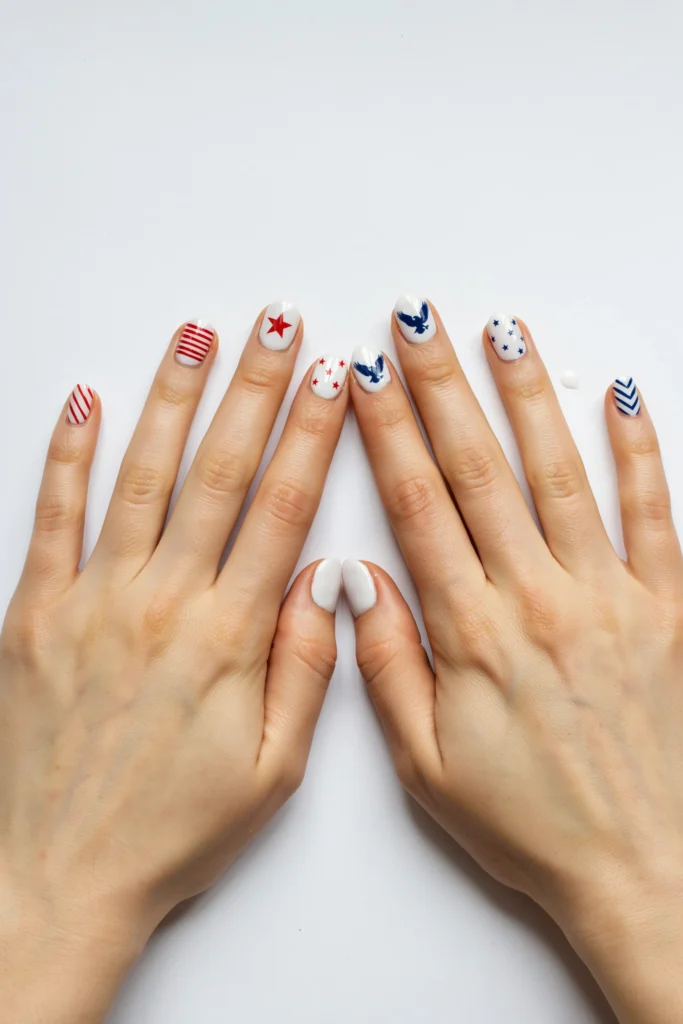
13. White Nails with Red and Blue Stamping
Stamped nail art uses a nail stamping plate and a stamper tool to transfer precise, detailed designs onto a plain nail polish base. For patriotic nails it is one of the fastest ways to achieve a genuinely impressive result because the stamp does the design work for you.
How to Do It: Apply two coats of white nail polish to all nails. Allow to dry completely and cure for at least ten minutes before stamping. Apply red stamping polish to a patriotic-themed stamping plate section, stars, stripes, flag elements, using a scraper to remove excess. Press the stamper firmly onto the stamping plate design. Roll the stamper firmly onto the nail surface in a single forward motion without rocking. Lift cleanly. Stamp red designs on half the nails and navy stamping polish designs on the remaining nails. Seal immediately with a fast-dry top coat formulated for use over stamping.
Styling Tip: Use a stamping polish rather than a standard nail polish for the stamping step because stamping polishes are specifically formulated to be opaque enough to transfer cleanly from the plate to the stamper to the nail in a single application. Standard nail polishes are too thin and too transparent to transfer with sufficient opacity and the stamped design will be faint, incomplete, or entirely invisible against the white base.
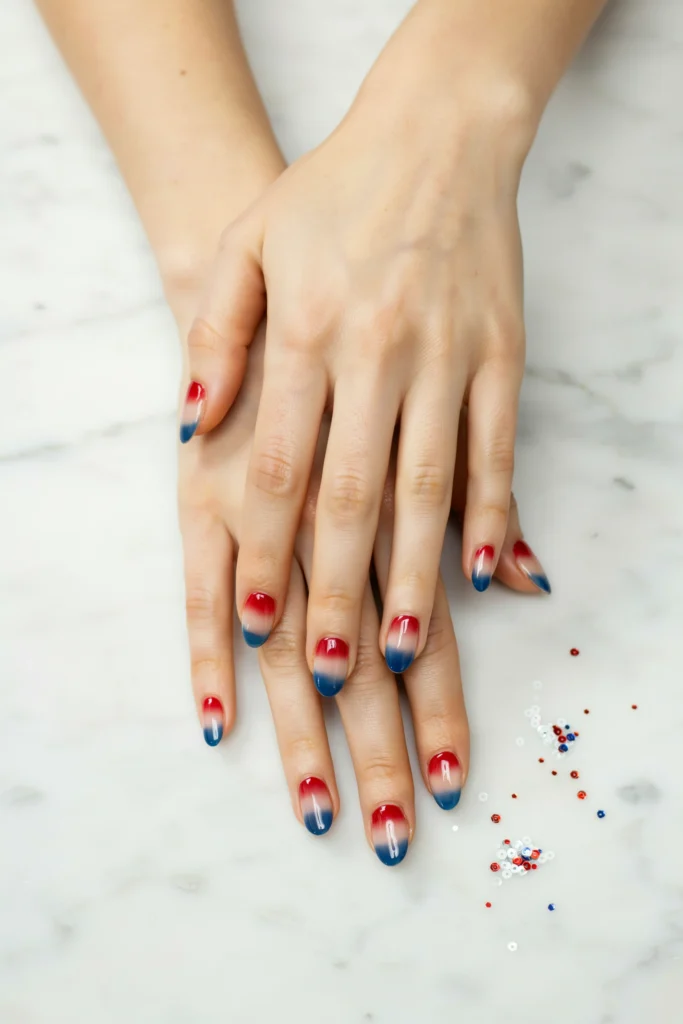
14. Simple Patriotic Ombre Nails
A soft red to white to blue ombre across each nail using a makeup sponge creates one of the most beautiful and the most visually striking simple patriotic nail designs available. The color transition reads as both festive and genuinely sophisticated when executed with care.
How to Do It: Apply a white base coat to all nails. Allow to dry completely. On a small piece of foil or a palette, apply a short stripe of red polish, a short stripe of white polish, and a short stripe of blue polish directly beside each other. Dab a small makeup sponge onto the three polish stripes to pick up all three colors simultaneously. Dab the loaded sponge firmly onto the nail surface three to four times building the color gradually. The sponge blends the three colors at their boundaries creating the ombre effect. Repeat for every nail. Remove the excess ombre from the skin around the nail with a cotton bud dipped in acetone. Seal with a glossy top coat.
Styling Tip: Build the ombre color through multiple light sponge applications rather than one heavy application. Three to four light dabs per nail produces a smooth, blended gradient. One heavy dab produces a patchy, unblended result where the three colors sit as visible sections rather than merging into a genuine gradient. Patience in the building process is the single most important technical requirement of a beautiful ombre nail.
15. Red White and Blue Jelly Nails
Sheer jelly-finish nails in rotating red, white, and blue create one of the most modern, the most translucent, and the most quietly beautiful simple patriotic nail looks available. The jelly finish communicates a glass-like, contemporary aesthetic that is completely of-the-moment in nail trends.
How to Do It: Choose sheer, jelly-finish nail polishes in red, white, and blue rather than opaque versions. The jelly finish requires a sheer formula that allows the natural nail to show through the color. Apply three to four thin coats of each color to the appropriate nails building the translucent color gradually. Apply red jelly to the thumb, index, and middle fingers on one hand. Apply white jelly to the index and ring fingers on the same hand. Apply blue jelly to the remaining nails. Adjust the color distribution however desired. Seal with a glossy top coat for the full glass-effect finish.
Styling Tip: Apply each jelly nail coat as thinly as possible because the translucent jelly quality depends on the thinness of each individual layer and a thick single coat destroys the transparency that defines the jelly nail aesthetic. Three thin coats of a jelly polish always produces a more beautiful result than one thick coat regardless of the quality of the polish being used.
Bottom Line
Simple 4th of July nails are not a compromise. They are a choice. The choice to look genuinely beautiful without spending hours at a nail salon or mastering complex techniques. Every design on this list was chosen because it proves that the most festive and the most beautiful patriotic nails require only basic polishes, basic tools, and the willingness to take a little care with the application. Choose the design that excites you most. Take your time with it. And enjoy the particular satisfaction of looking down at your nails throughout the 4th of July celebration and knowing that what is at the ends of your fingers is genuinely beautiful and genuinely yours.