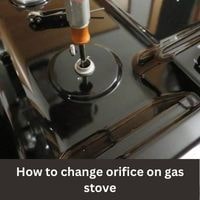
How to change orifice on gas stove. If you have a gas stove and need to change the orifice, you may be wondering how to do it safely and effectively.
The orifice is a small, brass fitting that controls the flow of gas to the burners on the stove and it is important to ensure that it is properly sized and functioning properly.
In this article, we will provide a step-by-step guide on how to change the orifice on a gas stove, including the tools and precautions you will need to take.
How to change orifice on gas stove
Here is a step by step guide:
Step 1: Turn Off the Gas and Disconnect the Power
Before you begin any work on a gas stove, it is important to turn off the gas and disconnect the power to the stove to prevent any accidents or injuries. Here’s how:
- Locate the gas shut-off valve for the stove. It is typically located near the stove or behind it, near the gas line.
- Turn the gas shut-off valve to the “off” position by turning it clockwise.
- Disconnect the power to the stove by unplugging it from the wall outlet or turning off the circuit breaker in the breaker box.
Step 2: Remove the Burner Grates and Burner Caps
Once the gas and power are turned off, you will need to remove the burner grates and burner caps to access the orifices. Here’s how:
- Locate the burner grates and burner caps on the stove. They are typically located on the top surface of the stove.
- Carefully lift the burner grates and burner caps off the stove by grasping them firmly and pulling them straight up.
- Set the burner grates and burner caps aside in a safe place.
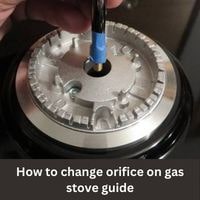
Step 3: Locate the Orifices
With the burner grates and burner caps removed, you will be able to locate the orifices. The orifices are typically located under the burner caps and are small, brass fittings that control the flow of gas to the burners.
Step 4: Remove the Old Orifices
Once you have located the orifices, you will need to remove the old ones. Here’s how:
- Carefully loosen the old orifices by turning them counterclockwise using a pair of pliers.
- Once the orifices are loose, gently pull them out of the burner caps.
Step 5: Install the New Orifices
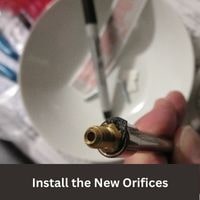
With the old orifices removed, you can install the new ones. Here’s how:
- Carefully insert the new orifices into the burner caps.
- Tighten the new orifices by turning them clockwise using a pair of pliers.
- Repeat the process for all of the burners on the stove.
Step 6: Reassemble the Burner Caps and Burner Grates
Once you have installed the new orifices, you will need to reassemble the burner caps and burner grates. Here’s how:
- Carefully place the burner caps back onto the stove, aligning them with the burners.
- Secure the burner caps in place by tightening them clockwise using a pair of pliers.
- Place the burner grates back onto the stove, aligning them with the burners.
- Secure the burner grates in place by pressing down firmly until they snap into place.
Step 7: Turn On the Gas and Power
With the burner caps and burner grates reassembled, you can turn the gas and power back on. Here’s how:
- Turn the gas shut-off valve to the “on” position by turning it counterclockwise.
- Plug the stove back into the wall outlet or turn the circuit breaker back on in the breaker box.
Step 8: Test the Burners
Once the gas and power are turned back on, you will need to test the burners to ensure that the new orifices are functioning properly. Here’s how:
- Turn on one of the burners on the stove.
- Observe the flame on the burner. It should be steady and blue, indicating that the gas is flowing properly.
- Repeat the process for all of the burners on the stove.
Conclusion
Changing the orifice on a gas stove is a relatively simple process that can be done safely and effectively with the right tools and precautions. By following the steps outlined in this guide, you should be able to change the orifice on your gas stove and restore it to its proper function. If you are uncertain about any aspect of the process or if you encounter any problems, it is best to consult a professional appliance repair technician for assistance.
Related Guides