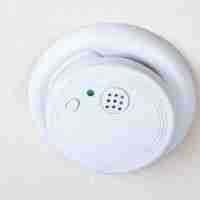
Flashing Green Light On Smoke Detector
Flashing green light on smoke detector. Smoke detectors use different technologies to detect small particles in the air and trigger the alarm when the number of particles exceeds a certain range set.
Smoke detectors are the best way to protect yourself from certain dangers. Different functions are set with other lights, indicating the issue is occurring.
A green light blinking is a common issue occurring in the smoke detectors. A green light mostly indicates that a battery is low or needs replacement.
However, some other issues cause the green light to blink in the smoke detector. In this article, we’ll be discussing the commonly occurring problem with smoke detectors and how to handle them.
Flashing Green Light On Smoke Detector

Before going down for a fix, you should make sure the following three things:
- There isn’t smoke where the detector is installed.
- The smoke detector’s cover isn’t loose.
- If there is dust built up, remove it.
The Battery Is Low
If your smoke detector blinks green every 10 seconds, it indicates that the battery is low and needs to be charged.
Here, there are two things:
- If you have a wireless smoke detector, you have to remove and recharge/replace the battery. If your smoke detector has a 9V battery installed, it should be recharged twice a year.
- If the smoke detector is wired, you should see the cables on the ceiling. If you have rats at home, there is a possibility that the wire has been torn.
Incoming Power Issue
As we discussed above, if the smoke detector is hard-wired, there is the possibility that a rat has torn up the wire. It is also possible that due to heat, the wire got burnt.
So, you should remove and inspect it. Here is how to remove the smoke detector:
- Turn the detector off.
- Take a ladder long enough to reach the target area.
- Remove the smoke detector’s cover.
- You’ll see the battery inside. Remove it.
- You’ll see two screws. Unscrew them and remove the brace.
- Now remove the ceiling and inspect the inner wires.
Dirty Unit

If you don’t clean the unit more often, dust and debris accumulate in the hardware, the unit blinks green light, and the unit stops working in severe cases.
You have to clean the smoke detector to get rid of this issue. Also, remember that the unit needs to be cleaned once a week.
Step Guide to Clean the Smoke Detector
Smoke detectors need cleaning as it senses particle in the air, and the particles get stuck on the sensor. Time by time, a layer is built up on the surface and stops working.
It’s best practice to clean the smoke detector once a week to ensure it works properly and is up to mark. Here is our guide on how to clean the smoke detector.
Remove the Unit
Open the unit’s cover and remove the battery. You’ll see the screws. Unscrews them and unmounts the smoke detector.
Do Initial Dusting
Use a piece of cloth to remove dust from the outer surface. You can also use the brush for narrow areas where dusting can’t be done.
Note: Be gentle while brushing the inner surface. The circuit IC can get damaged.
Use Air Blower
To clear the dust built up, use an air blower. Make sure you set it to medium speed; otherwise, you will damage the circuit.
Mount It Back
Mount the battery, put it back in position, and tighten the screws.
Conclusion
Smoke detectors can save you bucks and, most importantly, your life. They are designed to detect the smoke in case of unusual activity and turn the alarm ON.
We hope this guide helped track and solve the issue at your end. If so, don’t forget to share it with friends, family, and loved ones.
Related Guides


