The front door is the first thing every guest sees. Before the food, before the decorations inside, before the fireworks in the evening sky, they see the door. A door hanger that stops people in their tracks before they have even knocked tells them everything they need to know about the celebration waiting inside. These 13 4th of July door hanger ideas were chosen because every single one of them delivers that first impression beautifully. Each one is achievable with basic craft supplies and a few hours of creative time. Each one suits a different home aesthetic, from farmhouse to coastal to modern minimalist. And every single one of them will make the front door the most admired detail of the entire celebration before the party has even begun.
The 4th of July Door Hanger Ideas
1. Patriotic Burlap Star Door Hanger
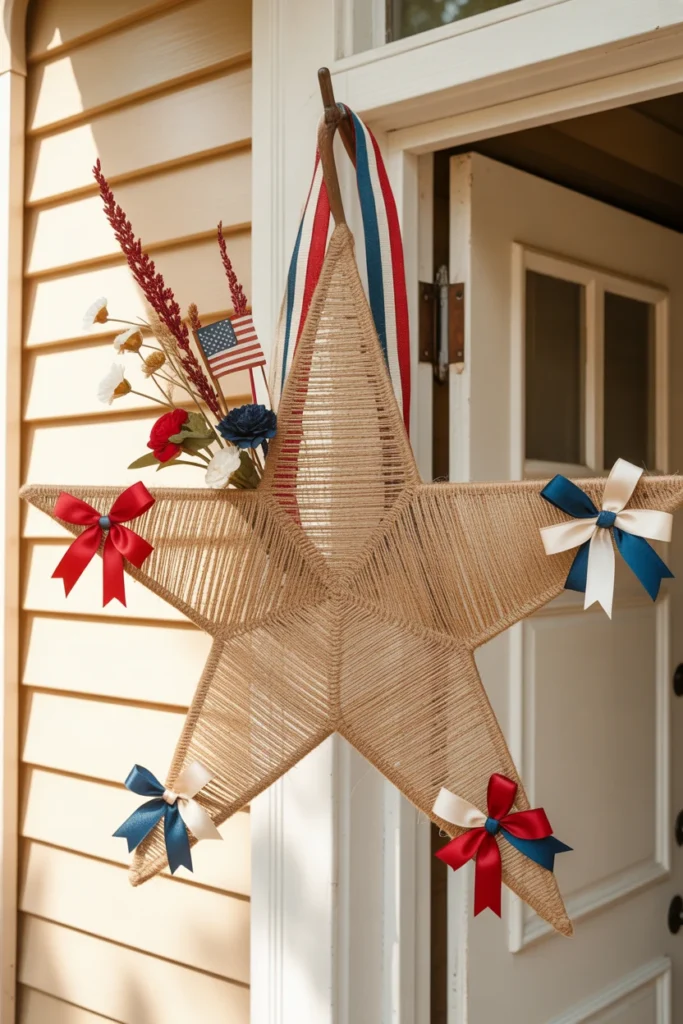
Cut a large star shape from a piece of thick foam board or wooden plywood. Cover the entire surface with strips of natural burlap fabric hot-glued in overlapping layers for a textured, farmhouse-quality base. Add red, white, and blue ribbon bows wired at the five star points. Press patriotic silk flowers, small American flag picks, and dried red florals into the burlap surface at the center of the star. Attach a wide red and blue grosgrain ribbon loop at the top point for hanging. The finished burlap star hanger looks like a boutique purchase and costs under eight dollars to make.
Craft Tip: Apply the burlap strips in a consistent diagonal direction across the star surface rather than randomly so the texture of the burlap reads as a deliberate design choice rather than a hurried covering. Consistent strip direction gives the finished surface a woven, intentional quality that random strip placement never achieves regardless of how completely the base is covered.
Styling Tip: Choose ribbon bows in three different textures within the patriotic palette, a velvet red, a grosgrain white, and a satin blue, rather than three bows in identical ribbon types so the five star point bows have a collected, curated quality that coordinated identical bows never produce.
2. Red White and Blue Rope Knot Hanger
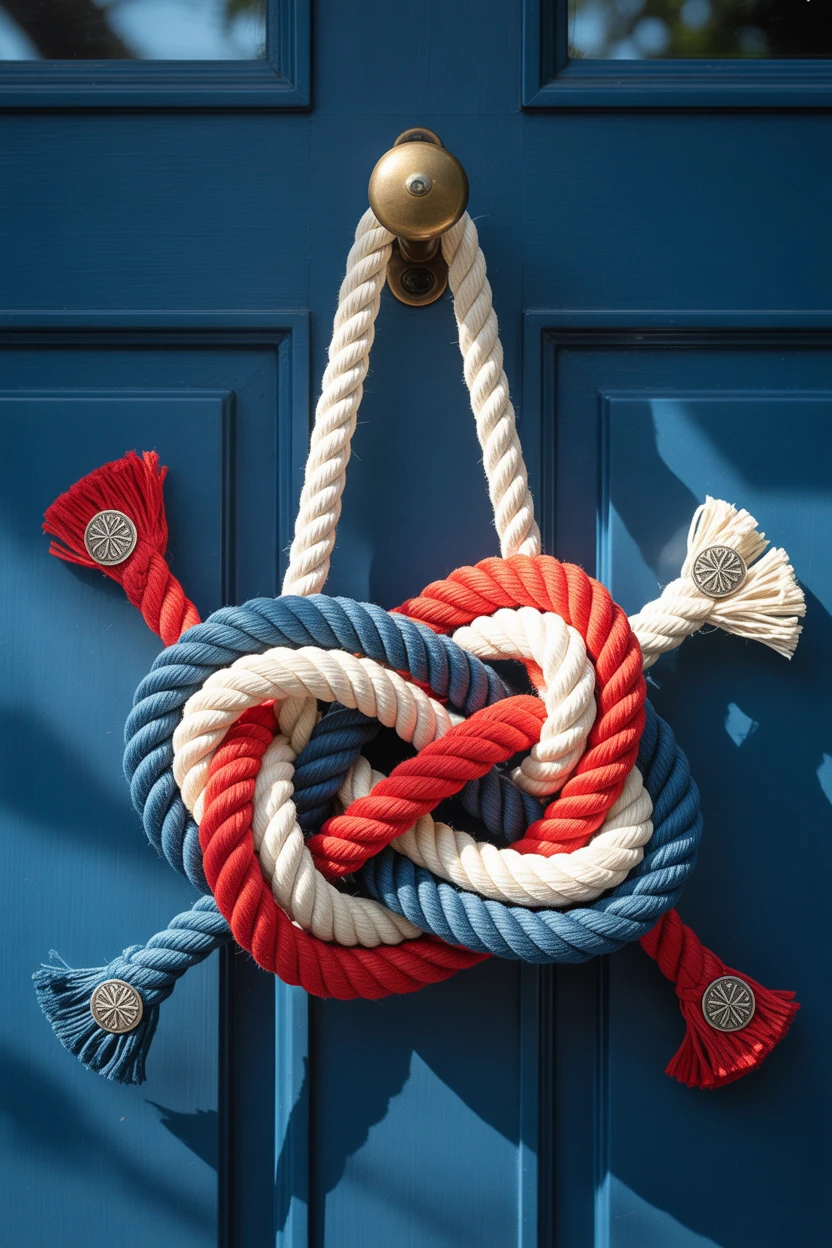
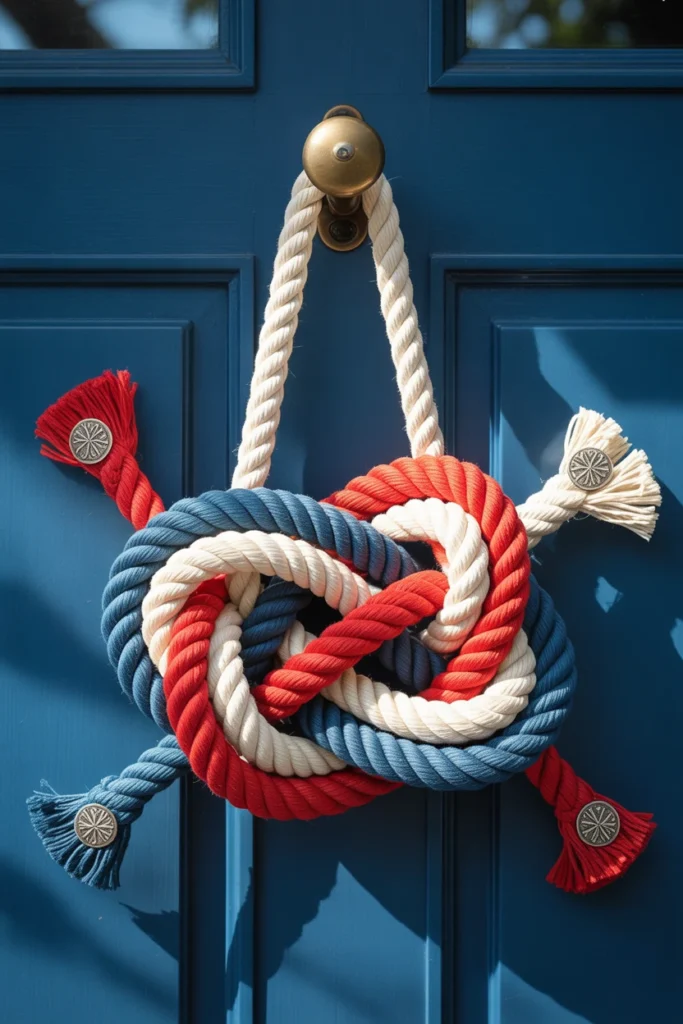
Source a length of thick natural cotton rope in white or natural and knot it into a large decorative sailor knot formation approximately thirty to forty centimeters in diameter. Dye or paint sections of the rope in red and blue before knotting so the finished knot displays all three patriotic colors woven through its structure. Thread small star-shaped metal charms onto the rope ends before completing the final knot. Add a simple loop at the top for hanging from the door hook. The rope knot hanger is the most coastal and the most unexpected door hanger on this list and produces an immediate conversation-starter response from every guest who sees it.
Craft Tip: Dampen the rope slightly with water before attempting the decorative knot formation. Damp rope is significantly more flexible and more cooperative during complex knotting than dry rope and produces a cleaner, tighter finished knot that holds its circular form under the weight of its own hanging. Dry rope stiffens during knotting and produces a knot that springs outward rather than lying flat in the intended circular display shape.
Styling Tip: Display the rope knot hanger against a navy blue or deep red painted door rather than a white one so the natural color of the undyed rope sections is visible against a contrasting background and the three-color dye effect of the patriotic rope reads clearly from a normal viewing distance. The door color behind the hanger is as important as the hanger itself in achieving the full visual impact of this particular design.
3. Americana Sunflower and Flag Hanger
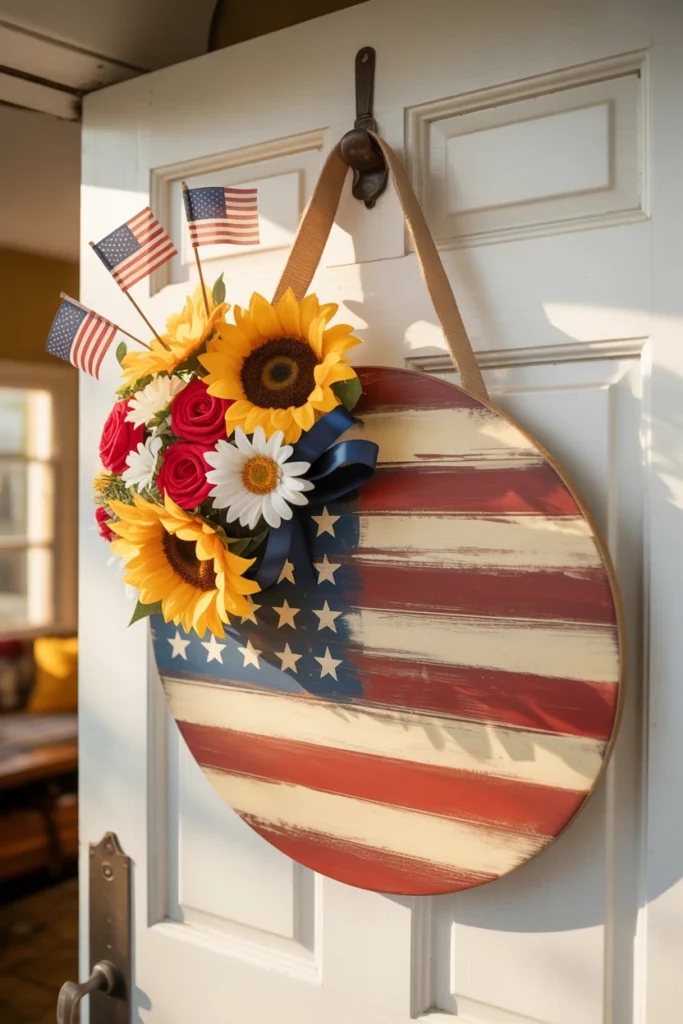
Cut a circular wooden disc approximately thirty-five centimeters in diameter from plywood or purchase a pre-cut wooden round. Paint the surface with a faded, vintage-style American flag design using a dry-brush technique in red, white, and blue so the wood grain shows subtly through the paint for an authentic aged quality. Hot-glue a generous cluster of large faux sunflowers around the upper half of the circle, interspersed with red roses, white daisies, and small American flag picks. Add a wide navy blue ribbon bow at the twelve o’clock position where the floral cluster meets the painted flag surface. Attach a jute or burlap ribbon loop at the back for hanging.
Craft Tip: Apply the flag paint using a dry-brush technique by loading only a small amount of paint onto a wide flat brush and dragging it lightly across the wooden surface in a single direction rather than applying full coverage brushstrokes. The dry-brush technique deposits paint on the raised grain of the wood while leaving the recessed grain unpainted and the resulting aged, distressed effect is what makes the flag design look genuinely vintage rather than freshly painted.
Styling Tip: Position the sunflower cluster so it covers approximately the upper third of the flag-painted circle rather than the full surface so the painted flag design remains clearly visible below the flowers and both the floral and the patriotic elements of the hanger read as equally important rather than one completely obscuring the other.
4. Stars and Stripes Wooden Round Hanger
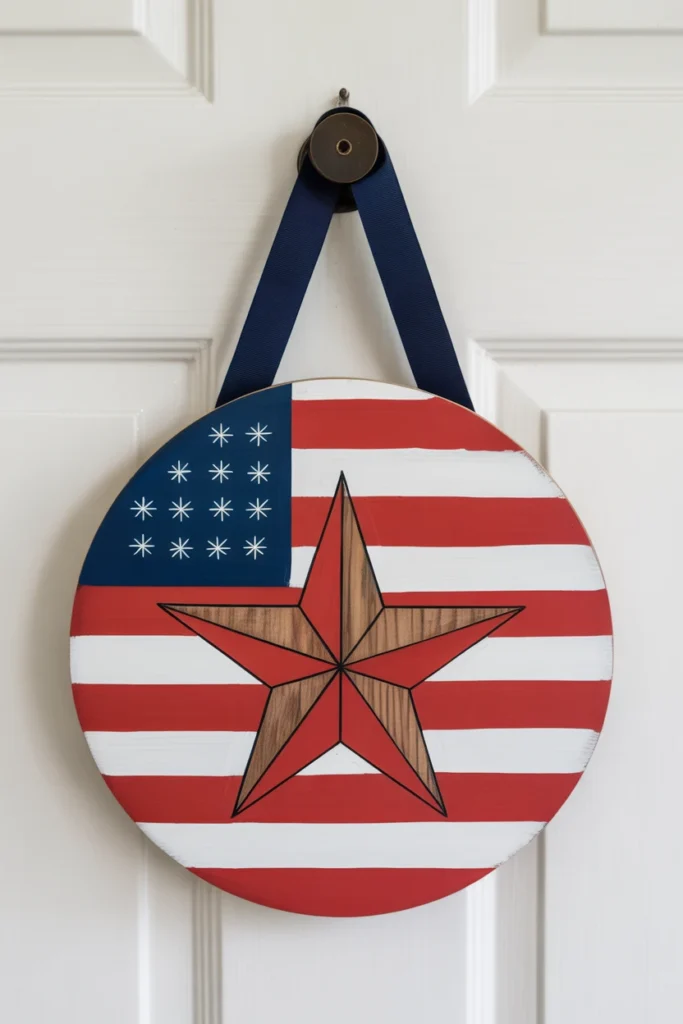
Purchase a pre-cut wooden round from a craft store. Use a wood burner or a laser cutter to engrave a large five-pointed star at the center of the disc surface. Paint the star red. Paint alternating horizontal stripes of red and white across the lower half of the disc. Paint the upper left quarter navy blue and add small white dot stars using the eraser end of a pencil dipped in white paint. Sand the edges of the entire disc lightly after painting for a slightly worn, intentional finish. Seal with a matte varnish. The finished wooden round is the most graphic and the most precisely patriotic door hanger on this list.
Craft Tip: Tape off each stripe section with painter’s tape before applying each color so the stripe edges are sharp and clean when the tape is removed rather than the soft, blurred edges that result from attempting to paint clean lines freehand on a wooden surface. Remove the tape while the paint is still slightly wet rather than fully dry to prevent the dried paint from lifting away from the wood surface along with the tape when it is removed.
Styling Tip: Add a wide ribbon hanger in the same palette as the painting, deep red, navy, or a combination of both, rather than a plain jute or natural fiber hanger so the hanging mechanism of the door round contributes to the patriotic design of the piece rather than sitting as a neutral, unrelated element above the carefully painted surface below it.
5. Patriotic Deco Mesh Door Hanger
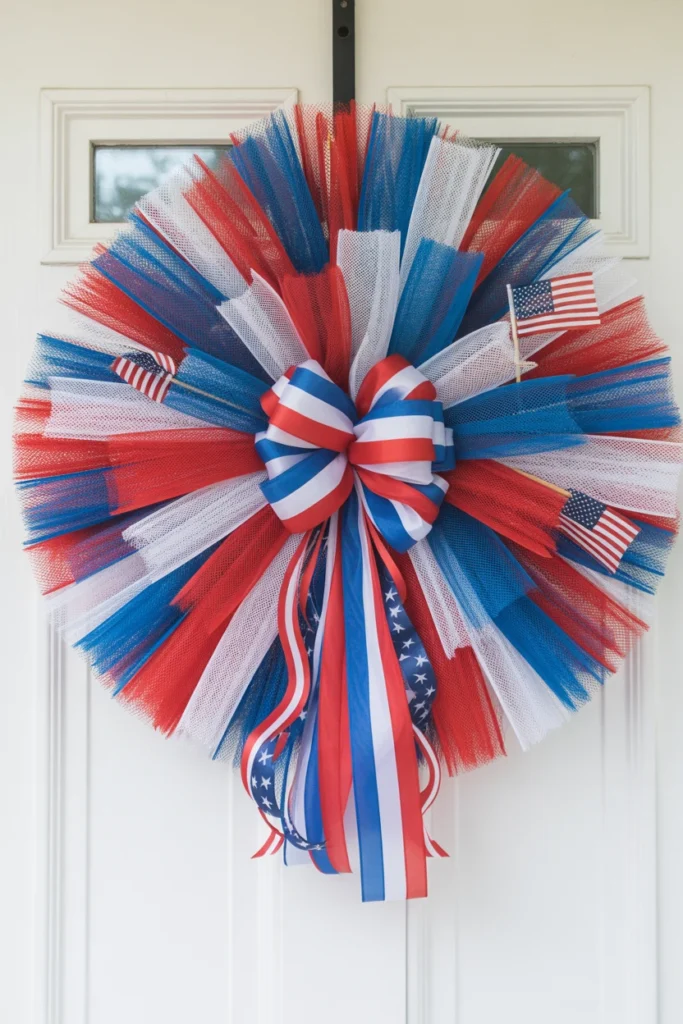
Attach a wire door hanger form or a wire wreath frame to a door hook as the base. Push loops of red deco mesh through the frame at regular intervals around the full circumference by poking each loop through with a pencil and pulling it open to create volume. Repeat with white and then blue deco mesh in alternating sections until the frame is completely covered in a full, fluffy tri-color deco mesh display. Add a large red, white, and blue fabric bow wired to the top of the frame as the focal point. Tuck patriotic ribbon streamers, star picks, and small flag accents into the mesh body throughout the finished hanger.
Craft Tip: Work in sections of no more than five to six loop placements before fluffing and separating the individual mesh loops outward from the frame surface. Fluffing as you go rather than applying all loops first and fluffing at the end produces a more even, more uniformly full mesh coverage because each section is properly volumized before the adjacent section is added on top of it.
Styling Tip: Use three distinctly different shades within the blue section of the deco mesh, a bright sky blue, a medium cornflower blue, and a deep navy, rather than a single shade of blue throughout the blue section because multi-shade blue mesh sections produce a depth and a dimensional quality in the finished hanger that single-shade sections cannot achieve.
6. Red White and Blue Floral Wreath Hanger
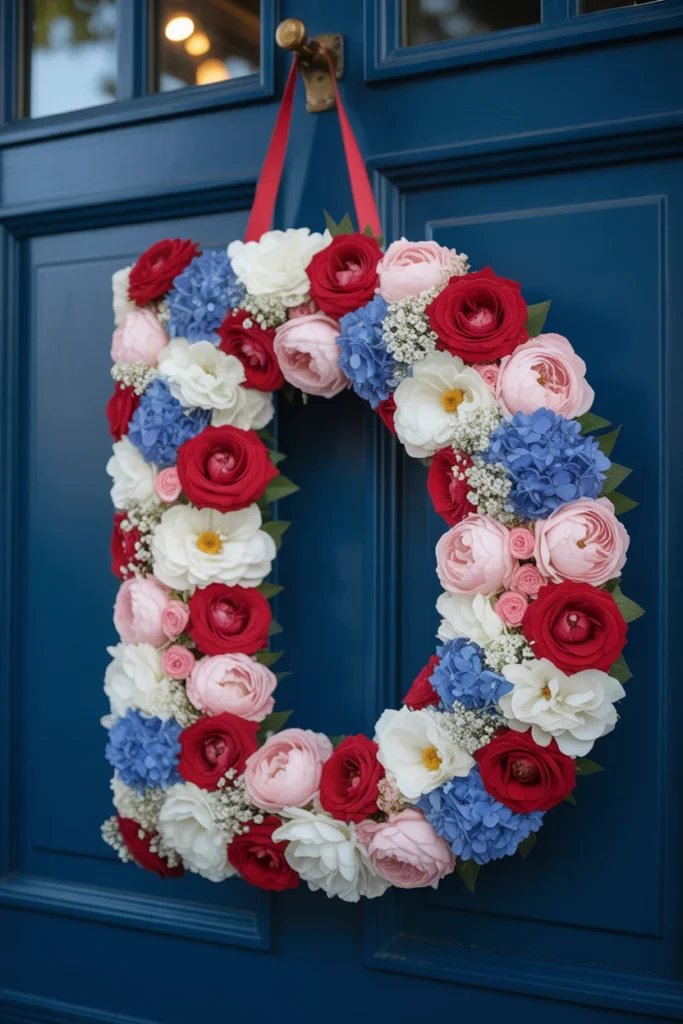
Attach a letter D cut from thick foam board or wood as the door hanger base. Cover the D shape completely with tightly packed faux or dried flowers in the patriotic palette, red roses and ranunculus, white peonies and baby’s breath, and blue hydrangeas and delphinium, hot-glued in overlapping clusters that completely conceal the base. The finished letter D becomes a floral monogram door hanger that is simultaneously a patriotic decoration and a personalized welcome. Replace the D with any letter relevant to the hosting family’s name for a completely personalized variation.
Craft Tip: Hot-glue the flowers in size order from largest to smallest, placing the largest blooms first to establish the overall shape and coverage of the letter form, followed by medium blooms to fill the majority of the remaining surface, and smallest blooms and filler flowers last to complete every remaining gap between the larger placements. Largest-to-smallest hot-gluing always produces a more professional and a more fully covered floral letter than any other sequencing approach.
Styling Tip: Add a narrow ribbon loop attached at the back of the letter top rather than a visible hanging mechanism at the front so the floral surface of the hanger reads as a complete, uninterrupted floral display from the front with no hardware or hanging mechanism visible to break the surface of the design.
7. Americana Buffalo Plaid Bow Hanger
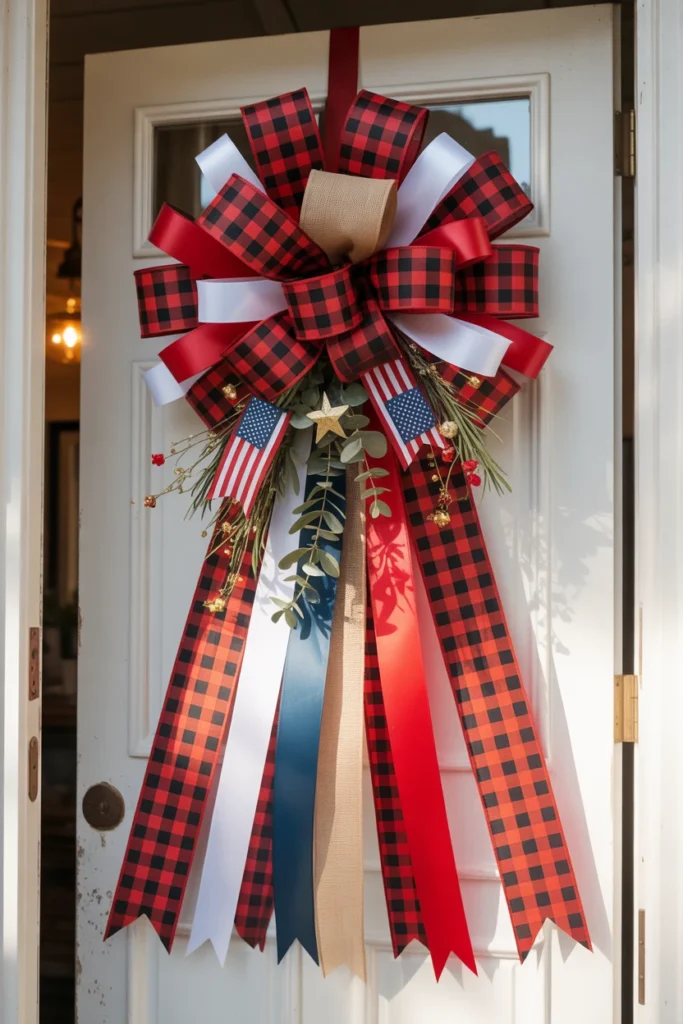
Make a very large, multi-loop bow from red and black buffalo plaid ribbon, approximately sixty centimeters wide when fully assembled, by stacking and wiring multiple loops of ribbon at their center points before fanning them outward into a full, dramatic display. Wire additional loops of red satin, white grosgrain, and blue burlap ribbon into the bow center for a multi-texture, multi-color focal point. Add long trailing ribbon streamers of varying widths hanging from the bow center down the door surface. Tuck small American flag picks, star ornaments, and a sprig of dried cotton or eucalyptus into the bow center. Hang from a simple over-door hook.
Craft Tip: Make the bow significantly larger than feels comfortable during the making process because a bow that looks too big while it is being assembled on the work table is almost always the correct size when it is hung on a door and viewed from a standing distance. A bow that looks proportionally correct on the work table will look too small on the door. Size up at every stage of the bow assembly and the finished result will always reward the boldness.
Styling Tip: Cut the trailing ribbon streamers at varying lengths and finish each one with a diagonal cut or a V-shaped notch at the end rather than a straight cut for a more deliberate, styled finish. Notched ribbon ends communicate that the trailing streamers were cut with intention and design consideration. Straight-cut ends communicate that they were cut with whatever scissors were nearest and no further thought was applied.
8. Stars and Stripes Shiplap Sign Hanger
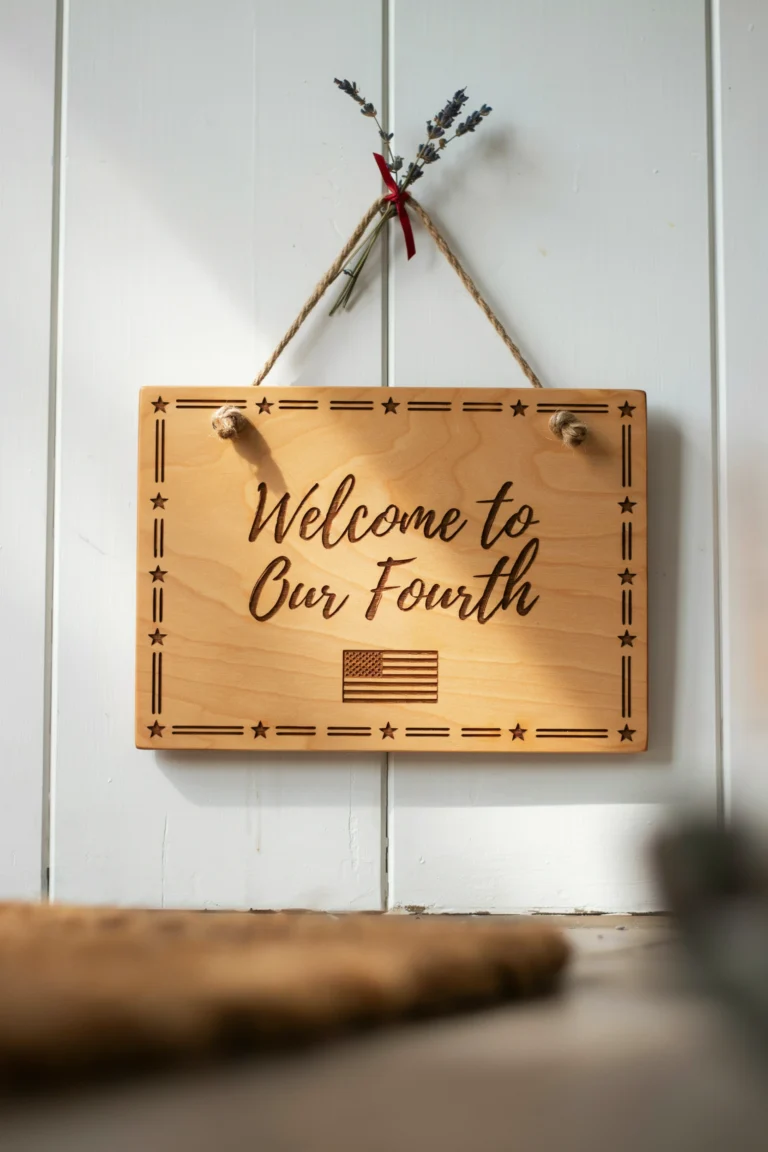
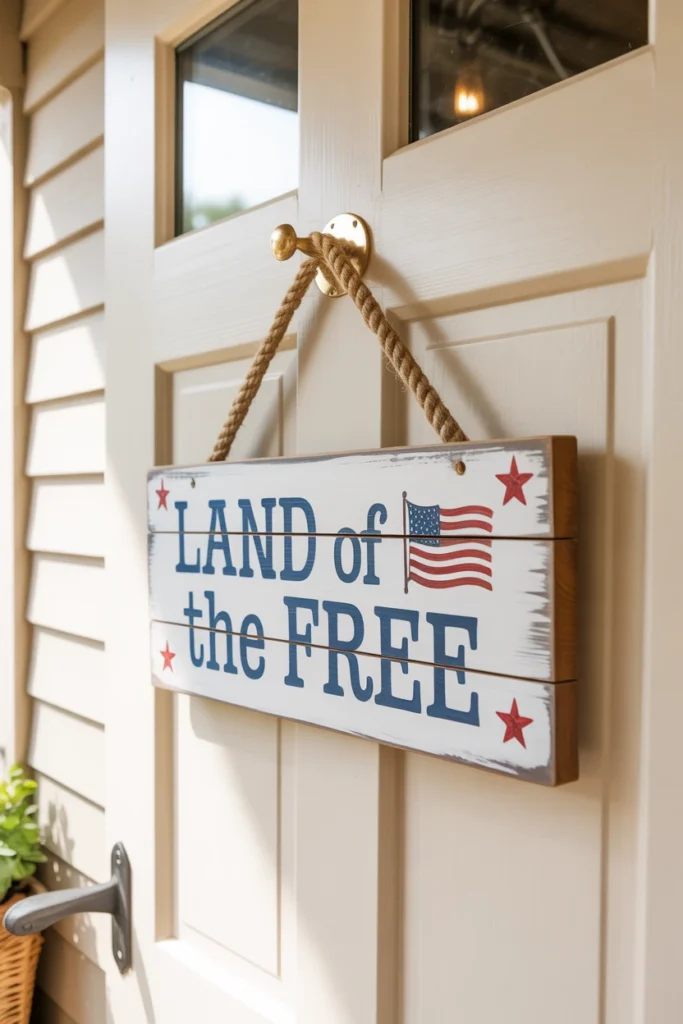
Cut a rectangular piece of thin shiplap or tongue-and-groove wood paneling to approximately forty by twenty-five centimeters. Sand all edges smooth. Paint the surface white. Use stencils or freehand lettering to paint a patriotic message or phrase in red and navy onto the white shiplap surface. Add hand-painted star details at the corners and a small American flag illustration at one side of the text. Distress the painted edges lightly with sandpaper for a farmhouse-worn quality. Attach a length of jute rope through two drilled holes at the top of the sign as the hanging loop. The finished sign hanger is both a door decoration and a patriotic statement piece that suits any home with a farmhouse or coastal interior aesthetic.
Craft Tip: Choose a short, punchy phrase rather than a long sentence for the shiplap sign text so the lettering is large enough to be readable from a normal door-approach distance. A three to five word message such as Land of the Free, Happy Fourth, or Stars and Stripes Forever reads immediately and clearly from the street level. A longer phrase requires smaller lettering that becomes illegible from the distance at which a door hanger is typically first viewed.
Styling Tip: Distress the painted sign surface with fine-grit sandpaper in the areas of the shiplap surface that would naturally receive the most wear over time, the edges, the corners, and the raised grooves of the shiplap lines, rather than sanding randomly across the entire surface so the distressing effect looks like genuine aged wear rather than a uniformly applied craft technique.
9. Patriotic Galvanized Star Hanger
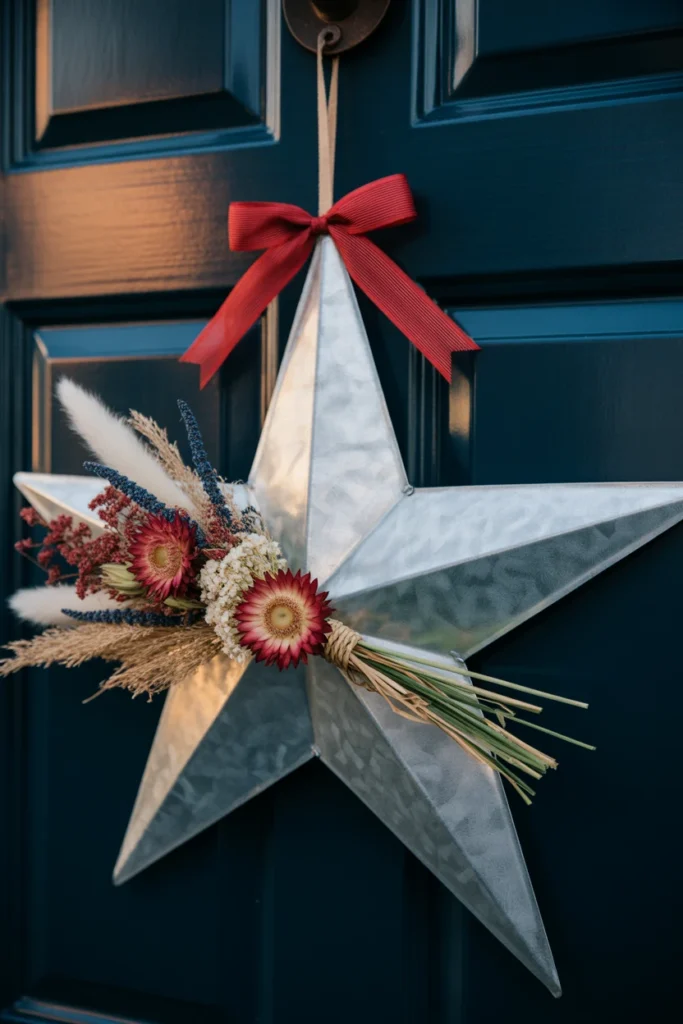
Source a large galvanized metal star shape approximately forty centimeters point-to-point from a craft store or a metal fabricator. Leave the natural galvanized finish on the star surface for an industrial-rustic quality. Wire a generous cluster of dried and preserved botanicals in the patriotic palette, dried red strawflowers, white pampas grass, and dried blue salvia, to the center of the star front. Add a wide red ribbon bow at the top point of the star. Thread a leather or jute cord through a hole at the top point for hanging. The combination of industrial metal and soft botanicals creates a door hanger with a genuinely distinctive and genuinely beautiful aesthetic contrast.
Craft Tip: Apply a thin coat of clear outdoor varnish to the botanical cluster wired to the galvanized star before hanging outdoors so the dried flowers are protected from moisture and maintain their color and their structural integrity throughout the full summer season rather than fading and becoming brittle within the first week of outdoor exposure to morning dew and afternoon humidity.
Styling Tip: Leave the galvanized metal star completely unpainted so the natural grey-silver of the galvanized finish provides the white element of the patriotic palette through the reflective metallic quality of the surface itself rather than through applied paint. The untreated galvanized surface also ages beautifully with outdoor exposure, developing a subtle, warm patina over the summer season that adds character to the hanger rather than degrading its appearance.
10. Red White and Blue Lambs Ear Hanger
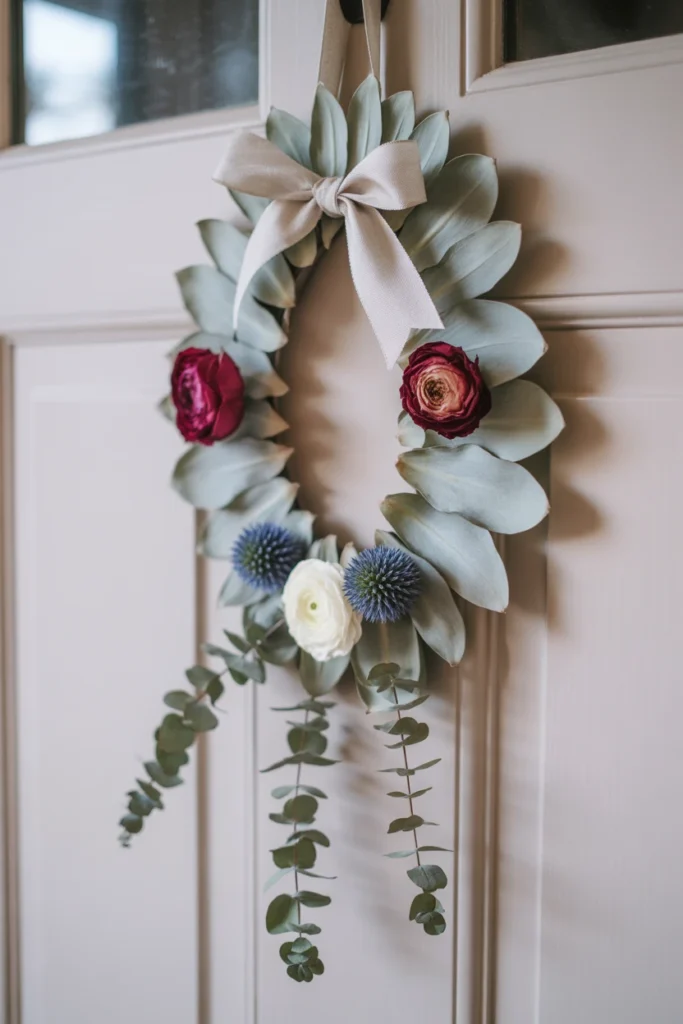
Build a door hanger base from a wire form or a foam board oval approximately thirty-five centimeters tall. Cover the entire surface with overlapping layers of soft silvery lambs ear leaves attached with floral pins or hot glue. Wire clusters of deep red dried roses, white dried ranunculus, and blue dried globe thistle into the lambs ear surface at irregular intervals. Add a simple white linen bow at the top of the oval and a few trailing stems of preserved eucalyptus flowing from the lower section of the hanger. The soft, tactile quality of the lambs ear surface makes this the most texturally beautiful and the most genuinely botanical door hanger on the list.
Craft Tip: Source fresh lambs ear leaves and allow them to air-dry flat between sheets of paper for forty-eight hours before attaching them to the hanger base rather than using fresh undried leaves. Fresh lambs ear leaves contain significant moisture and will shrink, curl, and detach from the base surface as they dry after attachment. Pre-dried leaves lie flat, attach firmly, and maintain their silver-grey color and their soft texture throughout the full display period.
Styling Tip: Arrange the botanical clusters at asymmetric positions across the lambs ear surface, one large cluster at the upper right, one medium cluster at the lower left, and one small cluster at the center, rather than distributing them symmetrically so the botanical placement reads as a natural, organic arrangement rather than a deliberately patterned one.
11. Americana Chalkboard Door Hanger
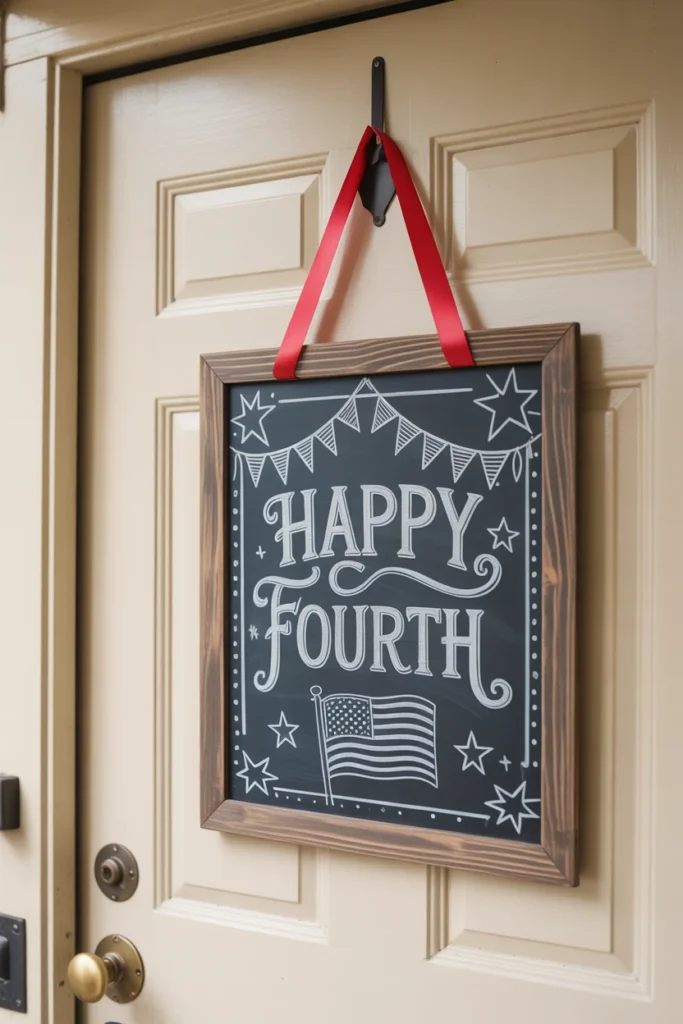
Cut an oval or rectangular shape approximately thirty-five by twenty-five centimeters from MDF or thick plywood. Apply two coats of black chalkboard paint. Season the surface by rubbing the side of a piece of chalk across the entire board and wiping clean before the first use. Use chalk pens or regular chalk to draw a patriotic design combining hand-lettered text, star illustrations, bunting details, and a simple flag graphic. Seal the finished chalk design with a clear matte chalk fixative spray to prevent smudging during outdoor display. Add a rustic wood or rope frame around the chalkboard surface and attach a wide red ribbon loop at the top for hanging.
Craft Tip: Plan the chalkboard design on paper at full scale before committing it to the board so the text is centered, proportioned, and visually balanced across the available surface. Transfer the planned layout to the board by sketching the basic positions lightly in regular chalk before applying the final chalk pen design on top. The planning and transfer steps take under ten minutes and eliminate the frustration of a misaligned or disproportionate design that cannot be corrected without starting the entire board over from scratch.
Styling Tip: Seal the finished chalkboard design with a chalk fixative spray rated for outdoor use rather than a standard indoor fixative because outdoor humidity and morning dew will smudge even a sealed design if the fixative was not formulated for exterior conditions. The correct outdoor fixative is the single most important supply decision for any chalkboard door hanger intended for outdoor use throughout the full Fourth of July holiday season.
12. Stars and Stripes Macrame Hanger
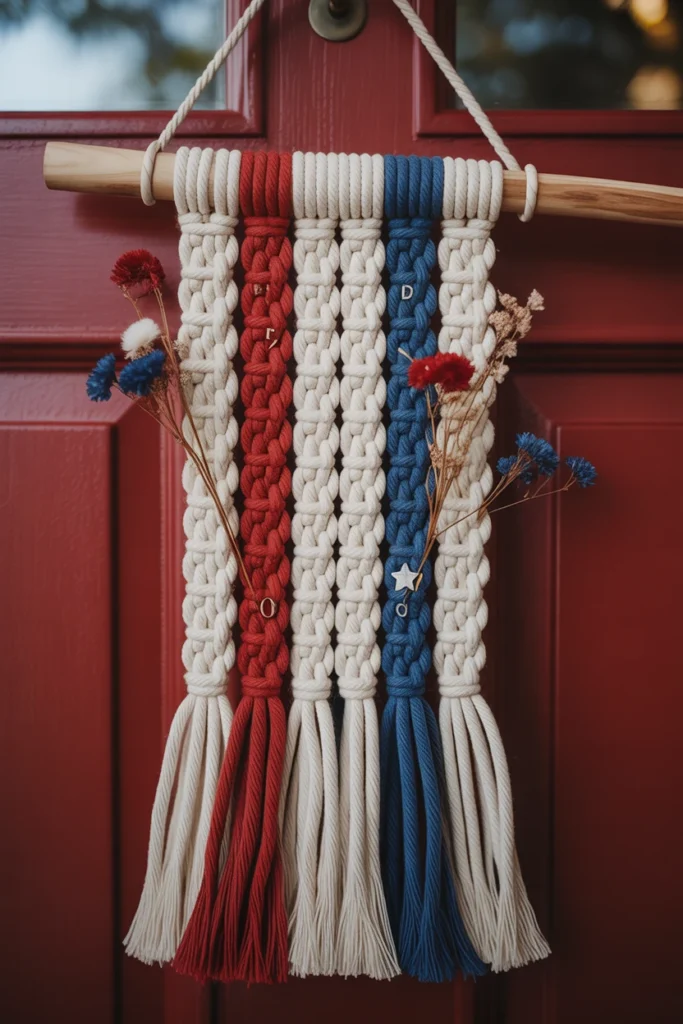
Using natural cotton macrame cord, knot a simple macrame wall hanging pattern to create a door hanger approximately forty centimeters long. Dye sections of the finished macrame in red and blue using fabric dye before the final assembly so the natural white cord and the dyed sections create the three patriotic colors throughout the knotted structure. Add a wooden dowel at the top as both the hanging support and the visual header of the piece. Fringe and trim the lower section of the macrame into a neat, even tassel. Wire small star-shaped metal charms and a few dried red and blue flowers into the knot sections throughout the piece for additional patriotic detail.
Craft Tip: Dye the macrame cord sections before knotting rather than attempting to dye the finished knotted piece because the overlapping and crossing of knotted sections prevents dye from penetrating uniformly into a finished knot structure. Pre-dyed cord sections produce consistent, saturated color throughout every knot and every crossing because the dye has fully penetrated the cord fiber before the knotting compresses and seals the fiber surfaces against each other.
Styling Tip: Hang the macrame door hanger against a solid-colored door surface, navy blue, deep red, or warm white, rather than a patterned or textured door surface because the intricate knotwork pattern of a macrame piece requires a clean, contrasting backdrop to read clearly. A patterned door surface behind a patterned macrame piece creates a visual competition between the two surfaces that reduces the clarity and the impact of both simultaneously.
13. Patriotic Twig Star Door Hanger
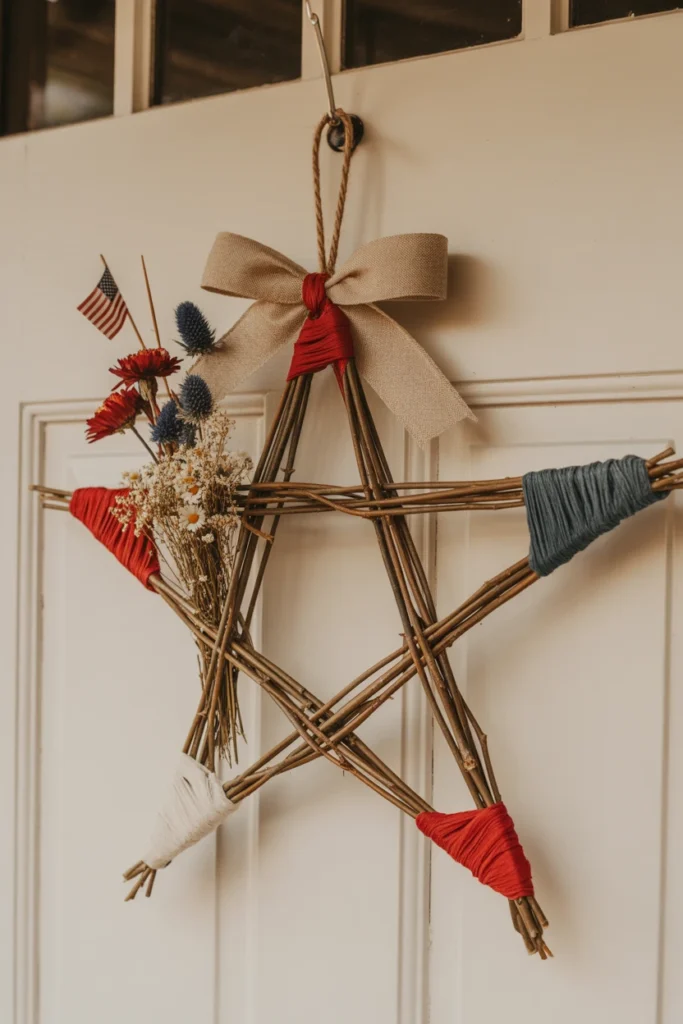
Gather a bundle of flexible thin twigs or willow branches. Soak in water for thirty minutes to increase flexibility. Bend and wire into a five-pointed star shape approximately forty centimeters point-to-point, securing each star point with dark floral wire that recedes visually into the twig color. Wrap sections of the twig star frame with red, white, and blue fabric strips or ribbon in varying widths. Tuck dried florals, small flag picks, and preserved botanicals into the wrapped sections throughout the star. Tie a large fabric bow at the top point. Attach a length of jute cord for hanging. The organic, handmade quality of the twig star makes it the most genuinely artisanal door hanger on this list.
Craft Tip: Soak the twigs for a minimum of thirty minutes rather than a shorter period because inadequately soaked twigs will crack and snap at the sharp corner angles of each star point rather than bending cleanly into the V-shape that each point requires. Thirty minutes of soaking produces twigs that bend without resistance at any angle required. Fifteen minutes produces twigs that bend partially and then crack at the point where the wood fiber has not yet been fully softened by the water absorption.
Styling Tip: Leave sections of the twig frame unwrapped between the ribbon-wrapped sections so the natural brown of the twig and the organic texture of the branch surface contribute a neutral, earthy visual element that grounds the patriotic ribbon colors and prevents the finished star from looking over-decorated or saturated with color at the expense of its most beautiful quality, the raw, organic material from which it was made.
Bottom Line
A door hanger is a small thing that does a large job. It is the first decoration every guest sees and the one that sets every expectation for the celebration waiting inside. Every idea on this list was chosen because it delivers that first impression beautifully, on a budget, with materials anyone can find, in a style that suits any home. Choose the one that feels most like you. Make it well. Hang it with pride. And know that before the first firework lights the sky this Fourth of July the most admired decoration at your celebration will already be hanging on your front door.