Children do not need much to have an extraordinary afternoon. They need materials. They need permission to make a mess. They need a project with a beginning, a middle, and an end that produces something they can hold in their hands and feel proud of. And on the Fourth of July they need all of those things in red, white, and blue. These 15 4th of July kids crafts were chosen because every single one of them delivers exactly that combination. Each craft is genuinely achievable for children from toddlers through tweens. Each one uses affordable materials available at any craft store, dollar store, or supermarket. Each one produces a finished result that children are genuinely proud of and that parents are genuinely happy to display. Some of the crafts on this list become party decorations. Some become keepsakes that families keep for years. Some become wearable accessories for the evening celebration. And some simply give children an hour of completely absorbed, completely joyful creative time during the long afternoon between the morning parade and the evening fireworks when the energy of the day needs somewhere productive and beautiful to go. Set up the craft table before the first child arrives. Lay out the materials. Step back. And watch what happens when children are given the right tools, the right colors, and the complete freedom to make something that is entirely their own.
The Craft Ideas
1. Patriotic Paper Plate Shield Craft
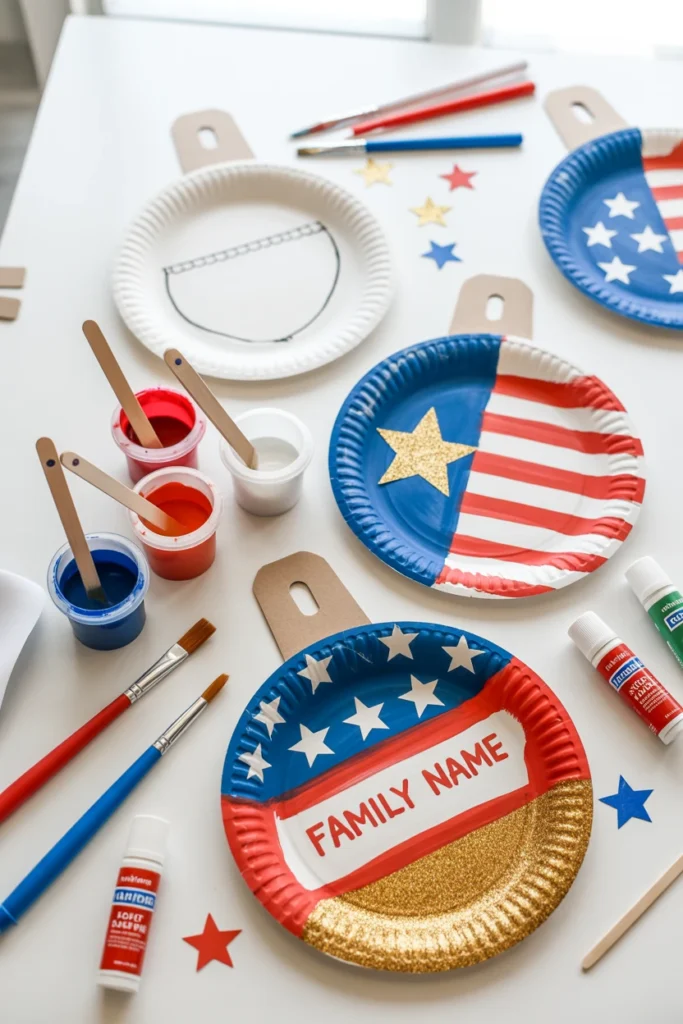
Give each child a white paper plate and a selection of red, white, and blue craft supplies. Children decorate the plate as a patriotic shield using paint, markers, star stickers, and glitter glue. Once dry attach a cardboard handle to the back using strong tape so the shield can be held and carried. Encourage children to add their own name, their family name, or a personal patriotic motto to the shield surface. The finished shields can be carried in the afternoon neighborhood parade or displayed on a wall as part of the party decoration.
Craft Tip: Pre-draw a simple shield outline in pencil on each paper plate before the craft session begins so children have a clear boundary for their decoration rather than a completely blank round surface. A pencil shield outline gives younger children a structural starting point while leaving complete creative freedom for the color, pattern, and decoration choices within the outline boundary.
Display Tip: Punch a small hole at the top of each finished shield and thread a length of red, white, and blue ribbon through it so the shield can be hung on a wall or a fence as part of the party decoration display. A displayed shield tells every child that their creation was considered worthy of the party space and that their individual creative effort contributed to the collective celebration.
2. Red White and Blue Handprint Flag Art
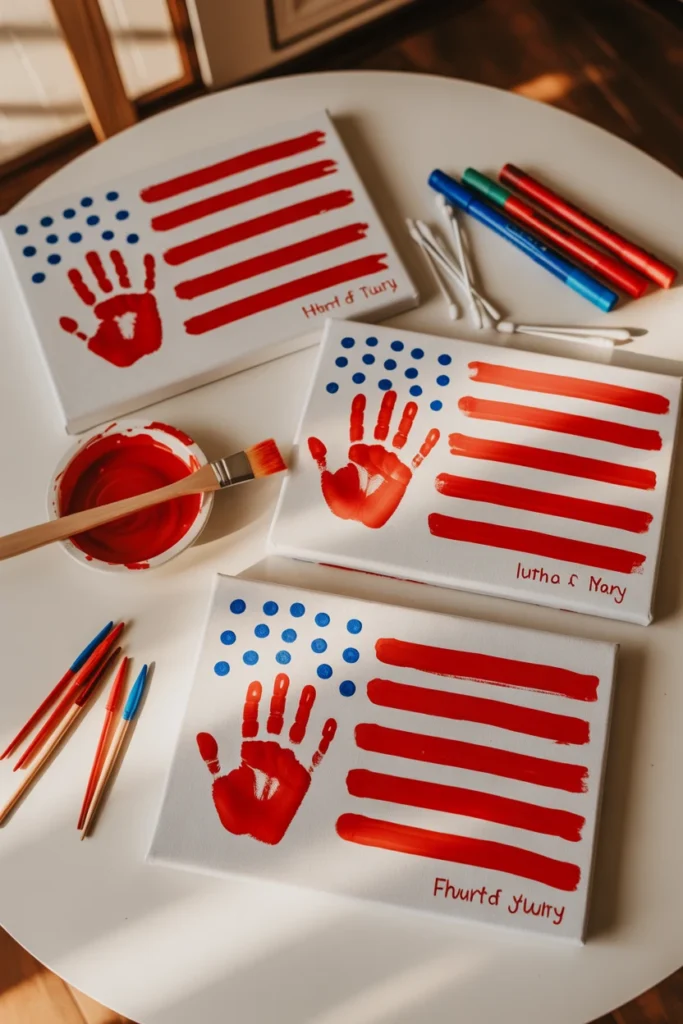
This craft creates a genuinely beautiful and genuinely sentimental keepsake that parents will keep for years. Paint each child’s hand with red paint and press it firmly onto the left side of a piece of white canvas or quality cardstock. Allow to dry. Add blue paint dots with a cotton swab in the star field area above the red handprint fingers. Use a ruler and a red marker to draw the horizontal stripes across the right side of the canvas. Write the child’s name and the year in small text at the bottom corner of the finished artwork. The handprint flag is simultaneously an art piece, a patriotic decoration, and a dated record of how small the child’s hand was at this specific moment in time.
Craft Tip: Apply the paint to the child’s hand using a foam brush rather than asking the child to dip their own hand into a paint tray because a foam-brushed hand produces a cleaner, more complete print with defined finger outlines rather than the blurred, overloaded print that a tray-dipped hand typically produces. The quality of the handprint is the single most important visual element of the finished artwork and the foam brush application is the technique that ensures it.
Keepsake Tip: Date every handprint flag artwork at the bottom with the year before the paint is dry using a permanent marker so the date becomes a permanent part of the artwork rather than a detail added later that could be forgotten. A handprint flag with the year visible in the finished composition is a dated keepsake that families look back at across decades. One without the year is a beautiful artwork that loses a significant dimension of its sentimental value within a few years of being made.
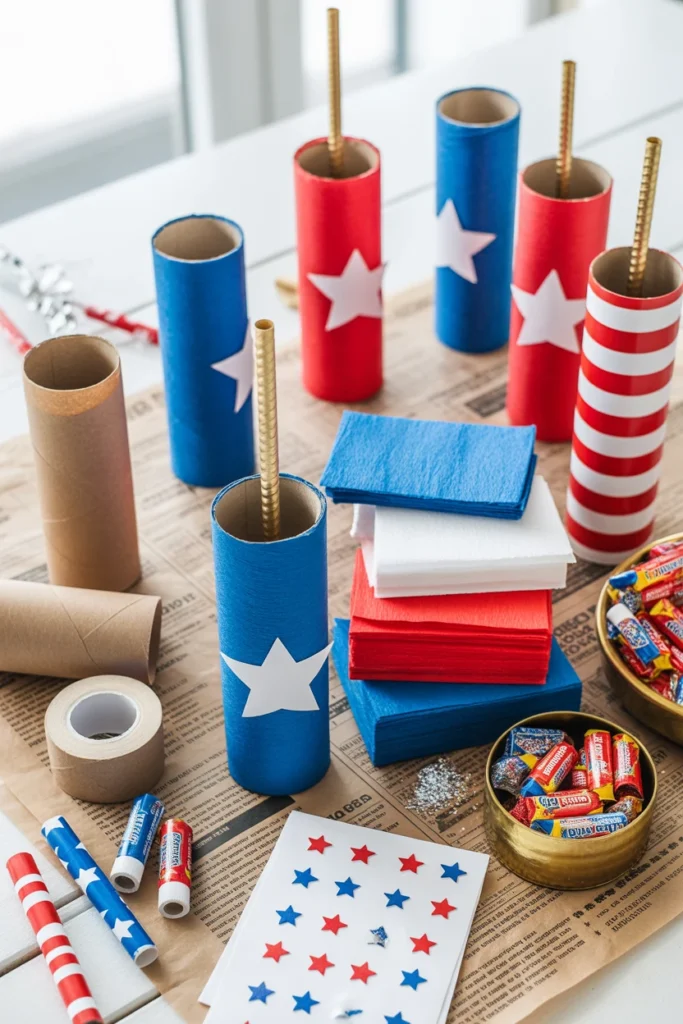
3. Stars and Stripes Toilet Roll Firecrackers
Collect empty toilet paper rolls before the party. Cover each roll in red, white, or blue crepe paper by wrapping it around the roll and securing with a small piece of tape. Twist and tie the top end with metallic ribbon or gold tinsel to create the fuse. Fill the roll with small candies, confetti, or stickers before tying the bottom end closed in the same way. Children can decorate the outside of their wrapped roll with star stickers, washi tape in patriotic patterns, and glitter glue before the ends are tied. The finished firecracker is both a craft project and a take-home favor containing a small surprise inside.
Craft Tip: Pre-cut the crepe paper into rectangles sized exactly to wrap each toilet roll once with a small overlap before the craft session begins. Children can then wrap their own roll independently without needing an adult to measure and cut paper for each individual project. Pre-cut materials eliminate the waiting time between children at a busy craft station and allow every child to begin their project at the same moment rather than queuing for adult assistance with the cutting step.
Favor Tip: Fill the toilet roll before giving it to the child to decorate rather than asking children to fill their own rolls at the craft station because filling the roll before the decoration step prevents candy from falling out during the craft process and means every finished firecracker arrives at the take-home stage already complete. A pre-filled firecracker handed to a child at the end of the party is a complete, self-contained favor. An empty firecracker given to a child to fill themselves at the craft table produces both a mess and a delay.
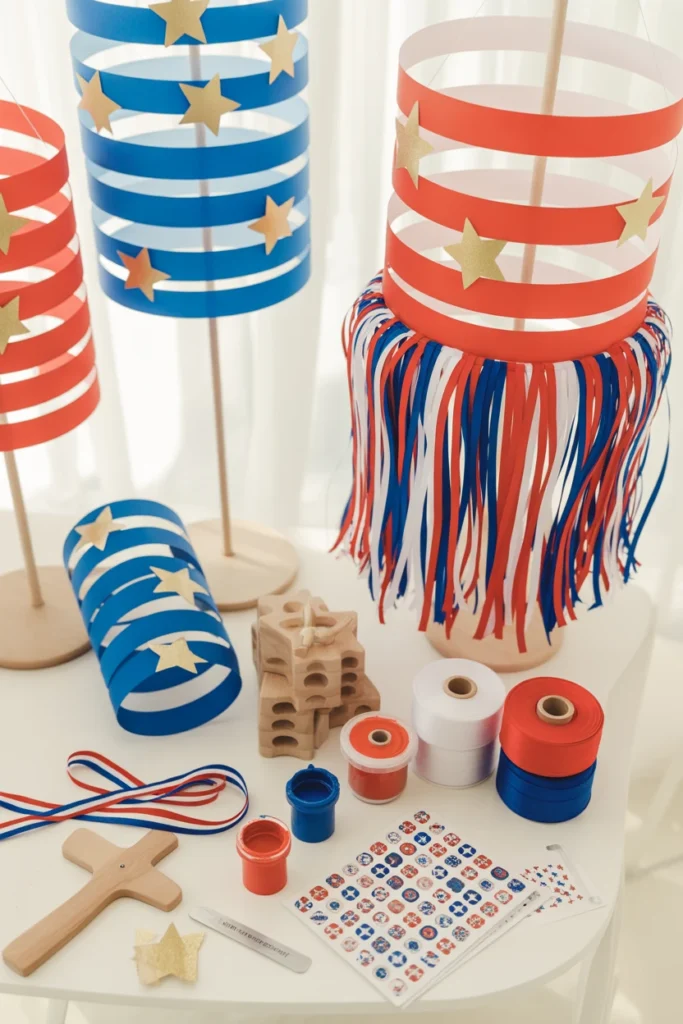
4. Patriotic Windsock Craft
Cut a rectangle of white cardstock into a tube shape and staple or tape the ends together to form a cylinder. Children decorate the cylinder with red and blue stripes, star stamps, and patriotic stickers. Punch four evenly spaced holes around the base of the cylinder. Cut lengths of red, white, and blue ribbon or crepe paper streamers and thread one through each hole, tying them in place. Punch two holes at the top of the cylinder on opposite sides and thread a length of yarn through both holes to create the hanging string. The finished windsock hangs from a porch railing, a tree branch, or a fence post and streams beautifully in the summer breeze throughout the Fourth of July celebration.
Craft Tip: Use foam stamps rather than brush-painted stars for the star decoration on the windsock cylinder because foam stamps produce consistently shaped, clean star impressions that children of every skill level can apply successfully without any of the unevenness and dripping that often occurs when younger children attempt to paint small detailed shapes with a standard brush. Foam star stamps are available at any craft store for under two dollars and they genuinely elevate the quality of the finished decoration.
Hanging Tip: Pre-punch the hanging holes at the top of each cylinder before distributing the craft materials to children because punching neat, evenly spaced holes through cardstock requires a craft punch or a sharp hole punch that most children cannot operate safely or effectively independently. Pre-punched holes mean the hanging string can be added by the child themselves as the final craft step and every finished windsock leaves the craft station ready to hang immediately without any additional adult assistance required.
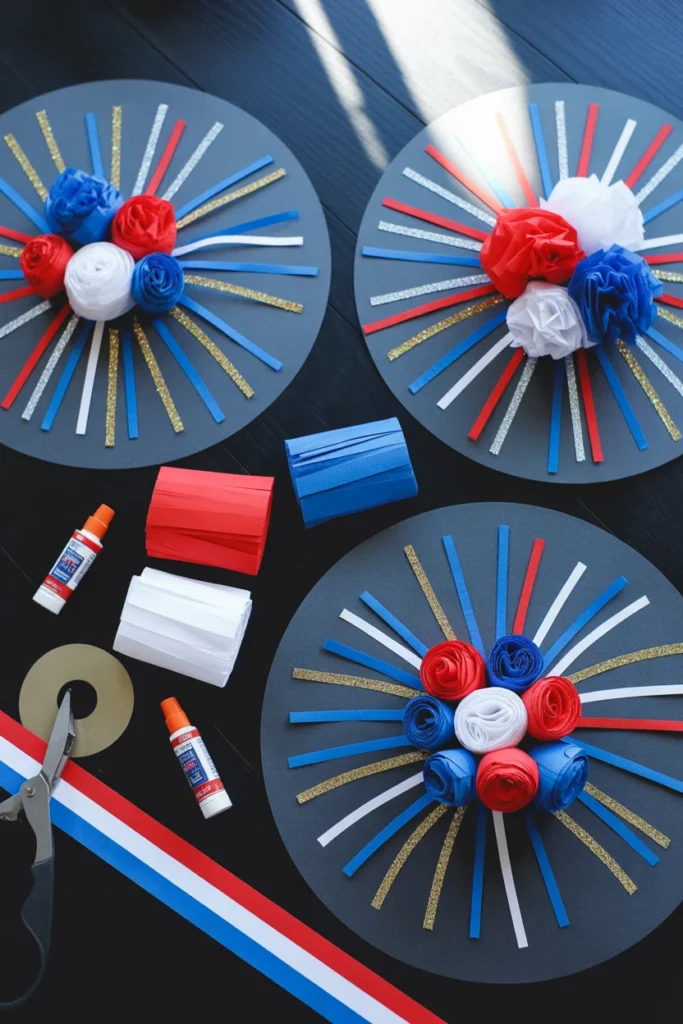
5. Red White and Blue Tissue Paper Fireworks
Cut circles of different sizes from black or dark navy cardstock. Give each child a set of red, white, and blue tissue paper squares. Children scrunch each tissue paper square into a small ball and glue them onto the dark cardstock circle in radiating burst patterns, alternating the three colors outward from the center to create a firework explosion effect. Add silver or gold glitter glue trails between the tissue paper balls for additional sparkle. The finished firework artworks are displayed as individual pieces on a wall or strung together as a garland along a fence or a porch railing.
Craft Tip: Pre-cut the tissue paper into consistent small squares before the craft session rather than providing full sheets for children to tear themselves because pre-cut squares produce a more consistent and more beautiful firework burst effect than irregularly torn pieces. The uniformity of the tissue paper squares is what gives the finished firework artwork its graphic, deliberate quality and the pre-cutting step takes under five minutes for a full class set of materials.
Display Tip: String all finished firework artworks on a length of red, white, and blue ribbon using a hole punch at the top of each cardstock circle so the complete collection of every child’s firework hangs as a communal display installation. A wall of individual children’s firework artworks displayed together is significantly more visually spectacular than any single piece and the collective display communicates that every child’s contribution mattered equally to the beauty of the finished installation.
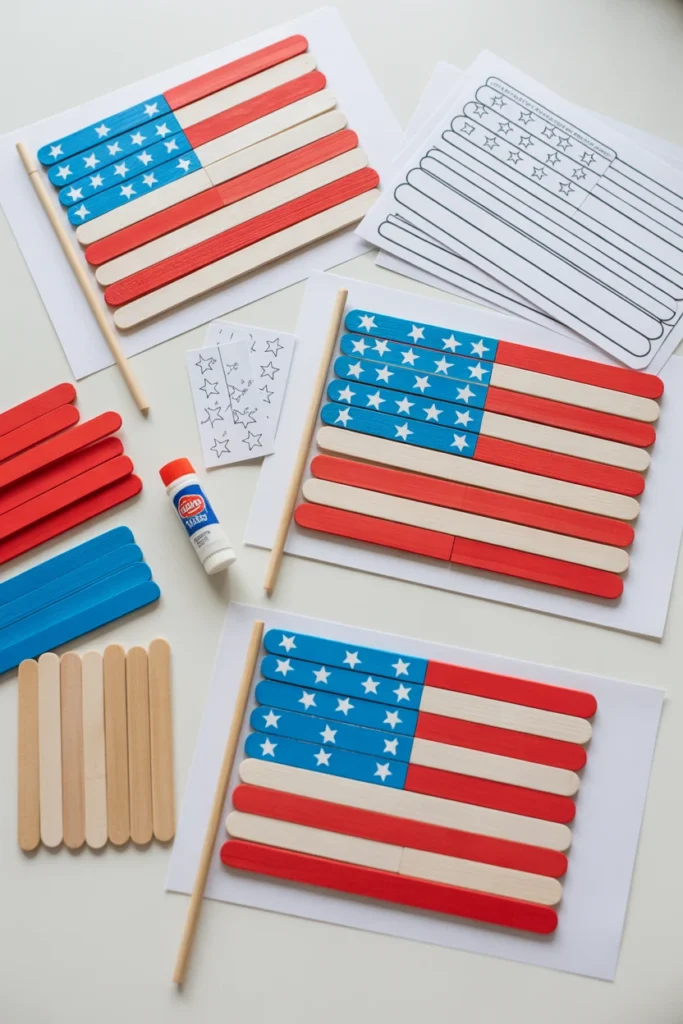
6. Patriotic Popsicle Stick Flag
Give each child fifteen to seventeen popsicle sticks. Paint thirteen sticks in alternating red and white to form the stripe section of the flag and paint four sticks in blue to form the canton section. Allow all sticks to dry completely. Arrange the painted sticks on a sheet of cardstock or foam board and glue them in place in the correct flag layout. Add small white star stickers or hand-painted white dots to the blue canton section. Allow the glue to dry completely before trimming the cardstock backing to the edge of the flag. Add a thin wooden dowel or an extra popsicle stick as the flag pole at the left side of the backing. The finished popsicle stick flag is a beautifully detailed and completely portable patriotic craft.
Craft Tip: Paint the popsicle sticks the evening before the party rather than at the craft station during the event because wet painted sticks cannot be assembled until they are completely dry and a craft that requires a drying wait in the middle of its construction loses the attention and the engagement of younger children during the pause. Pre-painted and pre-dried sticks arrive at the craft station ready for immediate assembly and the project moves from beginning to finished result in a single uninterrupted creative session.
Assembly Tip: Provide each child with a pre-drawn flag layout template on their backing cardstock showing exactly where each stripe and the canton section should be positioned before the sticks are glued down. A layout template ensures every child’s flag has the correct proportions and the correct color sequence regardless of their age or their knowledge of the American flag design. The template takes thirty seconds to draw per card and saves significantly more time in mid-session corrections and reconstructions.
7. Stars and Stripes Washi Tape Canvas Art
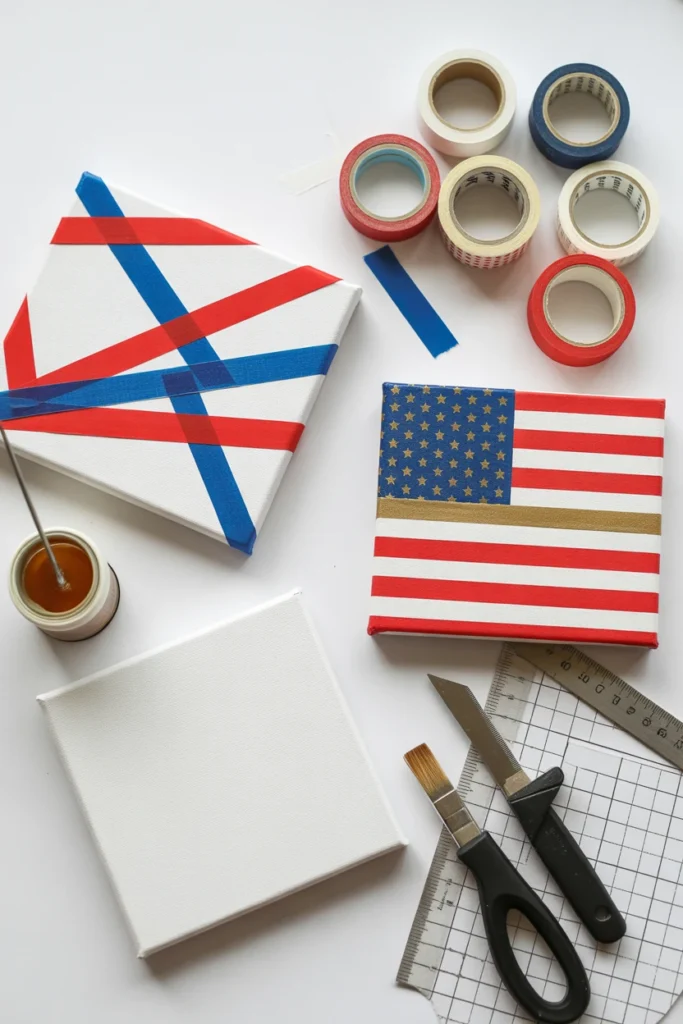
Give each child a small white stretched canvas. Provide a selection of washi tape rolls in red, white, blue, and gold star patterns. Children apply strips of washi tape across the canvas in horizontal lines to create a stripes pattern, diagonal lines for an abstract geometric pattern, or a complete American flag layout using the tape strips as the stripes and star-patterned tape for the canton section. The finished canvas is a clean, graphic, genuinely beautiful piece of art that requires no painting skill whatsoever and produces a result that looks professional regardless of the age or the artistic ability of the child who made it.
Craft Tip: Encourage children to press each washi tape strip firmly along its full length immediately after applying it to prevent lifting at the edges and to ensure clean, straight lines. A tape strip pressed firmly at the moment of application stays exactly where it was placed and produces the clean, graphic quality that makes washi tape canvas art so consistently beautiful. A tape strip pressed loosely and left to be smoothed later lifts at the corners and edges within minutes of application and produces a canvas that looks unfinished rather than deliberately graphic.
Display Tip: Apply a thin coat of Mod Podge over the entire finished canvas surface to seal all the tape strips permanently to the canvas so the artwork can be handled, displayed, and moved without any of the tape strips lifting over time. A sealed washi tape canvas is a permanent, durable artwork. An unsealed one begins to lift and peel within days of completion and loses its beautiful graphic quality progressively over the weeks and months following the craft session.
8. Patriotic Pinecone Bird Feeder
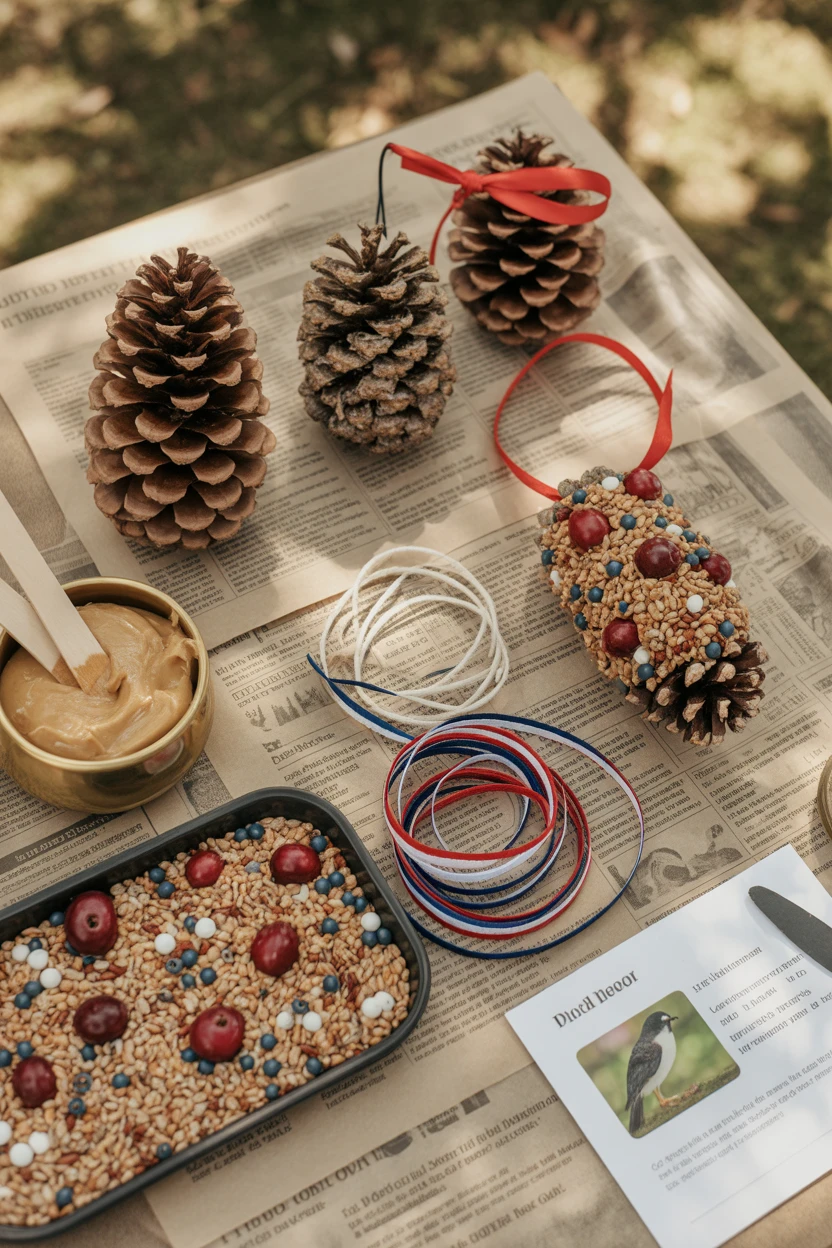
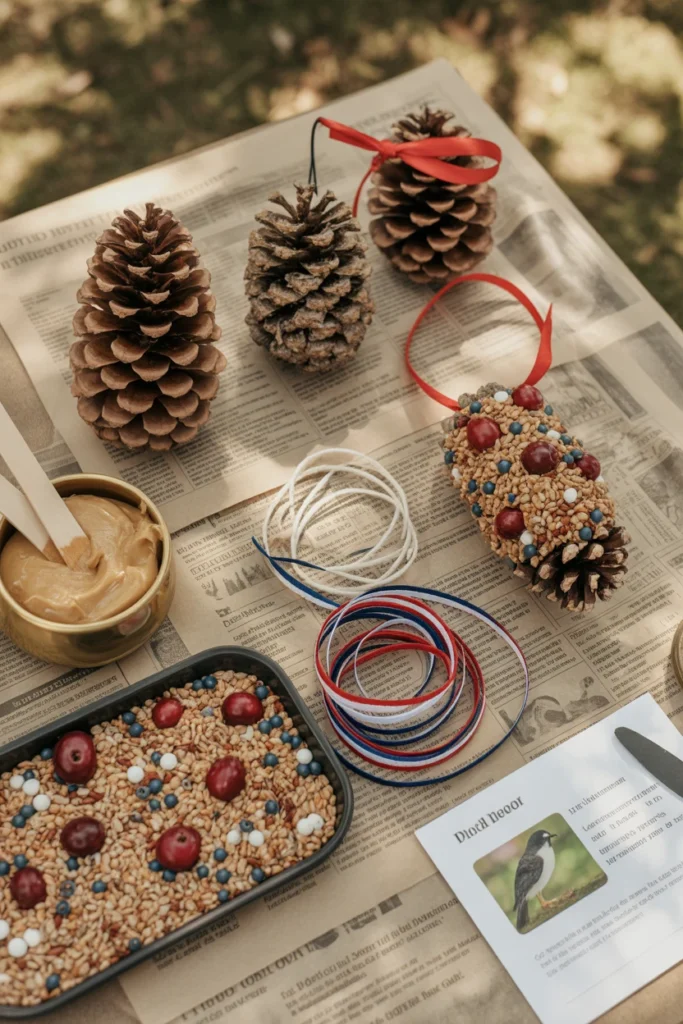
Collect large, open pinecones before the party. Give each child a pinecone, a length of red, white, or blue ribbon for hanging, and a small bowl of peanut butter or a nut-free alternative. Children coat their pinecone generously with the spread using a craft stick. Roll the coated pinecone in a mixture of birdseed, red dried cranberries, and white and blue seed beads for a patriotic color effect in the seed coating. Tie the ribbon around the top of the pinecone as the hanging loop. The finished bird feeder hangs from a tree branch in the garden and feeds the local birds throughout the summer while giving children the satisfaction of having made something for a living creature rather than for display alone.
Craft Tip: Use a nut-free sunflower seed butter rather than peanut butter as the coating medium for any party where nut allergies are a possibility among the child guests. Sunflower seed butter has the same sticky, spreadable quality as peanut butter and adheres the seed coating to the pinecone surface equally effectively. It is completely nut-free and safe for any guest with a peanut or tree nut allergy and its use requires no modification to any other element of the craft.
Nature Tip: Provide each child with a small printed card identifying the birds most likely to visit the feeder in your local area so the child knows which specific birds to watch for after hanging their feeder at home. A bird feeder craft accompanied by a local bird identification card teaches children something genuinely interesting about the natural world alongside the craft skill and extends the learning and the engagement of the activity far beyond the single afternoon of the party.
9. Red White and Blue Ribbon Wand
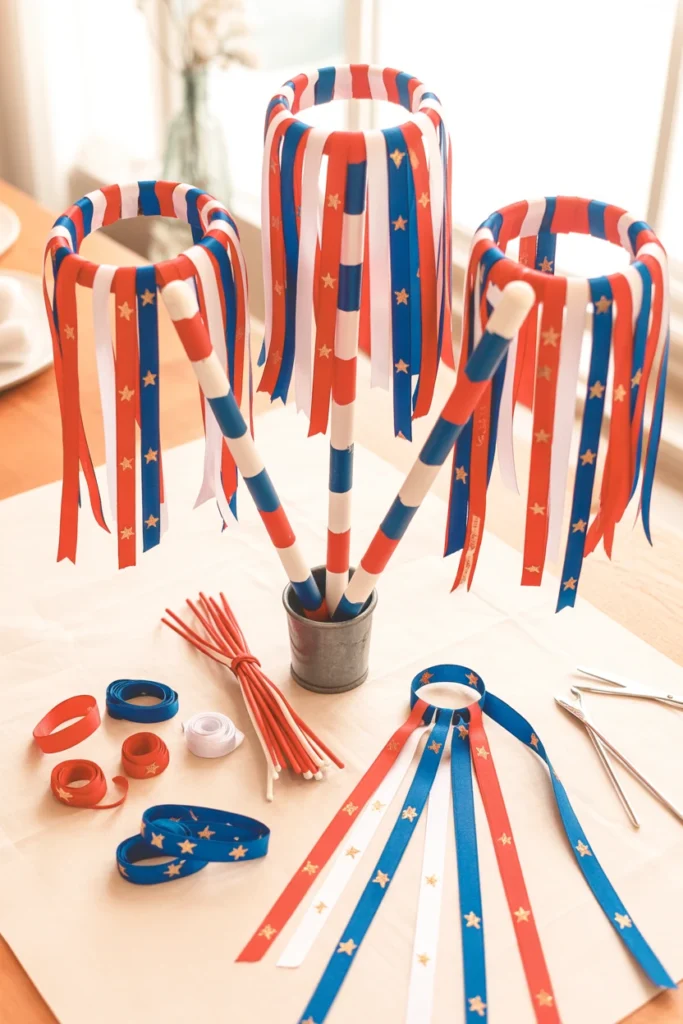
Cut a wooden dowel to approximately thirty centimeters in length. Sand any rough edges. Paint the dowel in alternating red, white, and blue sections. Allow to dry completely. Cut six to eight lengths of ribbon in red, white, and blue at approximately sixty centimeters each. Fold each ribbon in half and loop it through a small metal ring attached to the top of the dowel using a lark’s head knot. Fan the ribbons out around the ring so they hang freely in a full circle below the wand tip. Add gold or silver star-shaped ribbon details interspersed with the solid colored ribbons. Children wave their finished wands to create ribbons streams of patriotic color throughout the afternoon parade and the evening celebration.
Craft Tip: Attach the metal ring to the dowel top before distributing the wands to children by pre-drilling a small hole through the top of the dowel and threading the ring through it rather than simply taping or gluing the ring to the surface. A drilled-and-threaded ring connection holds the full weight of the ribbon streamers permanently without ever pulling away from the wood regardless of how vigorously the wand is waved. A taped or glued ring separates from the wood within minutes of vigorous waving by an enthusiastic child.
Parade Tip: Organize a spontaneous ribbon wand parade in the party space at a specific time during the afternoon so every child has a designated moment to use their finished wand in the collective, celebratory context it was designed for rather than simply carrying it home at the end of the party. A ribbon wand parade of six or eight children waving their completed wands simultaneously creates one of the most genuinely beautiful and most joyful visual moments of the entire Fourth of July celebration.
10. Patriotic Paper Bag Puppet
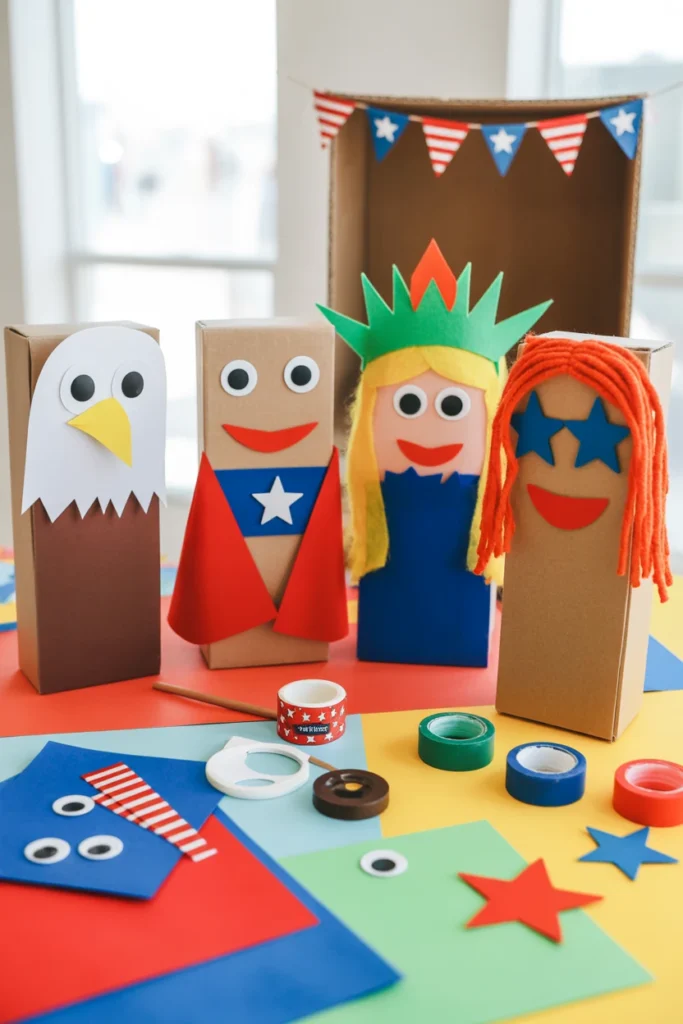
Give each child a small white or brown paper lunch bag. Children use red, white, and blue paint, markers, and craft materials to create a patriotic character puppet using the flat base of the bag as the puppet’s face. Provide googly eyes, star foam stickers, red and blue felt scraps for hair and accessories, and patriotic washi tape for clothing and costume details. Encourage children to create any patriotic character they imagine, a founding father, an astronaut, a bald eagle, Lady Liberty, or an entirely original Fourth of July hero of their own invention. The finished puppets are used in an impromptu puppet show at the end of the craft session.
Craft Tip: Place the paper bag flat on the table with the base flap facing upward at the top of the bag rather than at the bottom so children understand that the bag base is the puppet’s face and the opening at the bottom of the bag is where the hand goes inside. Demonstrating the correct bag orientation before children begin saves significant confusion and prevents the common mistake of children decorating the body of the bag rather than the base flap as the face. One demonstration with a finished example puppet is worth more than any amount of verbal instruction about which part of the bag to decorate.
Performance Tip: Set up a simple puppet theater from a large cardboard box decorated with patriotic bunting before the craft session begins so it is visible and waiting throughout the craft session as the destination for the finished puppets. A visible puppet theater motivates children to complete their puppets with genuine investment and creative care because the performance context gives the making process a clear and exciting purpose from the very first stroke of paint.
11. Stars and Stripes Paper Chain Garland
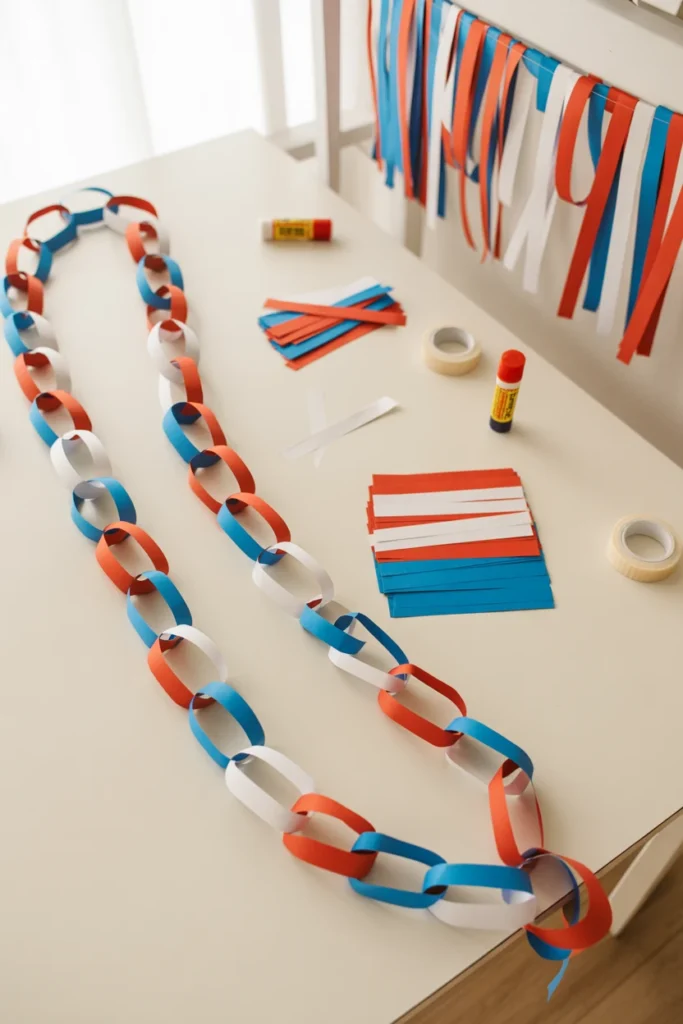
Pre-cut strips of red, white, and blue paper in consistent widths and lengths before the party begins. Give each child a pile of pre-cut strips in all three colors. Show them how to form the first link of the paper chain by looping a strip into a circle and securing with a glue stick or a small piece of tape. Each subsequent link is threaded through the previous link before being secured. Children build their chains as long as they choose. All finished chains are connected together at the end of the craft session into a single long communal garland that decorates the party space. The garland making activity is simultaneously a craft, a cooperative social activity, and a contribution to the party decoration.
Craft Tip: Provide pre-cut strips rather than asking children to cut their own because strip-cutting from a sheet of paper requires scissors control that younger children do not yet have and produces irregular, unusable strips that frustrate rather than engage. Pre-cut strips in consistent widths produce paper chains with uniform, beautiful links that look genuinely crafted rather than accidentally assembled. The pre-cutting step takes under ten minutes for a full party set of materials and the quality difference in the finished garland is immediately and completely apparent.
Community Tip: Announce at the start of the craft session that every child’s finished chain will be connected to every other child’s chain to make one very long communal garland for the party and that the total length of the garland depends on how many links every child makes. The communal goal motivates children to make their chains as long as possible and creates a shared investment in the collective result that individual craft projects rarely generate with the same consistency and the same enthusiasm.
12. Patriotic Salt Dough Star Ornaments
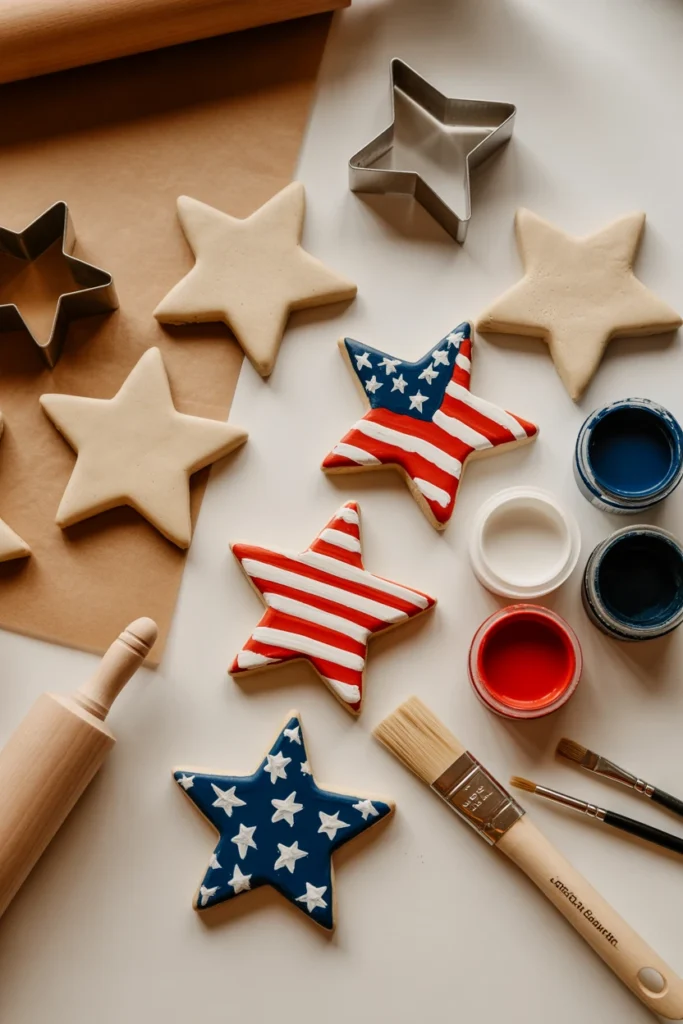
Mix a batch of salt dough from two cups of flour, one cup of salt, and three quarters of a cup of water. Divide the dough between children. Each child rolls their portion flat and uses a star-shaped cookie cutter to cut out one or two star shapes. Use a drinking straw to punch a hanging hole near the top point of each star before baking. Bake at 150 degrees Celsius for two hours until completely hard and dry. Allow to cool completely. Children paint their stars in patriotic designs using acrylic paint. Seal with a clear varnish when dry. The finished salt dough stars can be hung as ornaments, used as gift tags, or kept as holiday keepsakes.
Craft Tip: Make the salt dough on the morning of the party rather than the evening before so it is at the correct fresh, pliable consistency for rolling and cutting. Salt dough left overnight in the refrigerator becomes slightly stiffer and drier than freshly made dough and requires more pressure to roll flat and more tendency to crack at the edges when cut with a cookie cutter. Fresh dough rolls smoothly, cuts cleanly, and produces star ornaments with defined, crisp edges that hold their shape perfectly throughout the baking process.
Painting Tip: Wait until the salt dough stars are completely cool before distributing them to children for painting because warm salt dough stars are still slightly soft at the center even when the surface feels dry and the pressure of a child’s hand while painting can distort the star shape before it has fully hardened. Fully cooled and fully hardened stars accept paint cleanly without any surface deformation regardless of how firmly the child presses the brush against the surface.
13. Red White and Blue Suncatcher
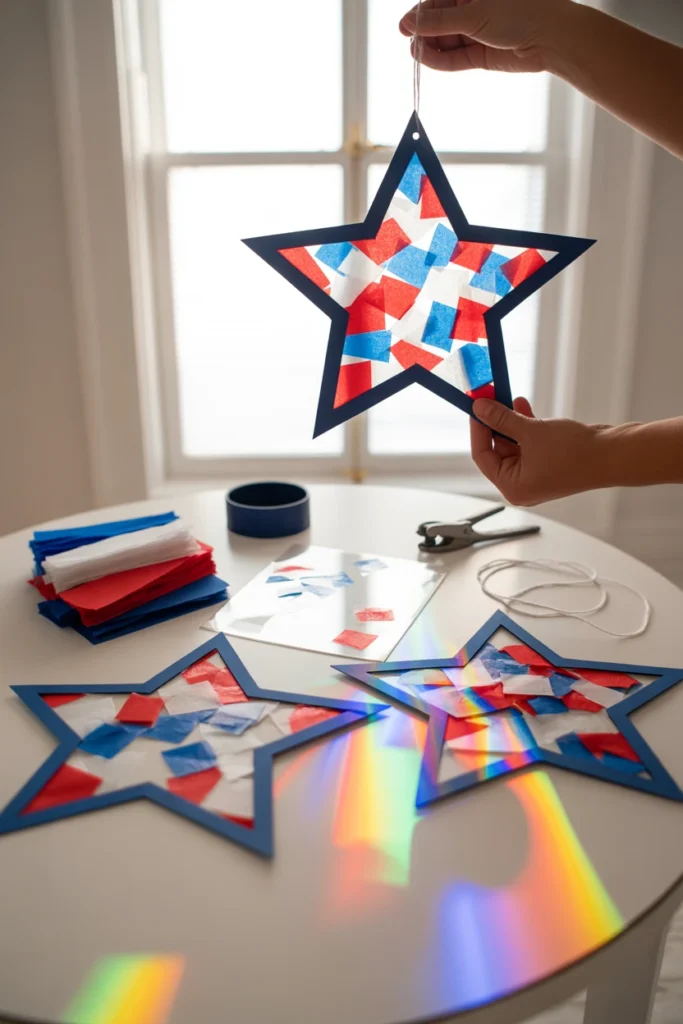
Cut a simple star or flag shape from black card or contact paper as the frame. Fill the interior of the shape with small pieces of red, white, and blue tissue paper or cellophane pressed onto a layer of clear contact paper laid sticky-side-up within the frame. Add a second layer of clear contact paper over the top to seal the tissue paper pieces permanently between the two sticky layers. Trim the excess contact paper to the frame edge. Punch a hole at the top of the finished suncatcher and thread a length of fishing line or ribbon through it for hanging. Hang in a window where the light will pass through the tissue paper colors and cast red, white, and blue light patterns across the surrounding walls and floor.
Craft Tip: Pre-cut the tissue paper into very small irregular pieces before the craft session rather than providing full sheets for children to tear themselves because very small pieces of tissue paper produce a mosaic-like stained glass effect in the finished suncatcher that is significantly more beautiful than the larger, more irregular pieces that children produce when tearing their own. The smaller the tissue paper pieces the richer and the more complex the color effect in the finished light-catching artwork.
Light Effect Tip: Test the hanging position of the finished suncatcher in the intended window before the party ends so children can see the red, white, and blue light patterns that their suncatcher creates when sunlight passes through it. The light effect is the most magical and the most beautiful quality of the suncatcher craft and it is also the quality that children will never experience if their suncatcher goes home in a bag rather than being held up to a window for at least thirty seconds before the end of the party. The light effect moment is the culmination of the entire craft and it should always be experienced before the suncatcher leaves the party space.
14. Patriotic Newspaper Sailor Hat
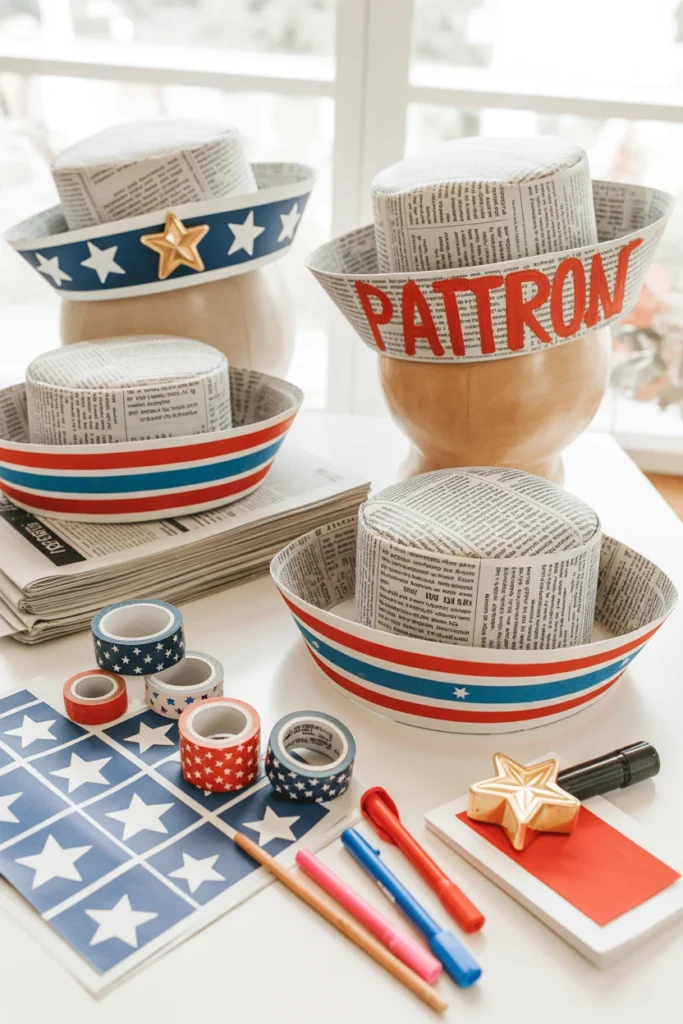
Fold a full sheet of newspaper into a classic sailor hat using the traditional origami-style fold. Decorate the finished hat with red, white, and blue star stickers, patriotic washi tape bands around the brim, and a large gold star stamp on the front center panel. Children wear their finished sailor hats throughout the afternoon celebration and the evening fireworks as both a wearable craft accessory and a patriotic costume element. Newspaper sailor hats are the fastest and the most universally beloved wearable craft on this list and the most likely to be worn voluntarily for the longest continuous period by the largest number of children.
Craft Tip: Use broadsheet newspaper rather than tabloid newspaper for the sailor hat fold because broadsheet pages produce a hat with enough coverage to sit properly on most children’s heads without slipping. Tabloid pages produce a hat that is too small to stay on most children’s heads and requires constant readjustment throughout the afternoon which makes it more frustrating than festive. One sheet of broadsheet newspaper per child is the correct material specification for a functional, properly fitting sailor hat.
Sizing Tip: After folding the basic hat shape, open the hat slightly at the base and insert two fingers to widen the opening gently before handing it to the child to decorate. A hat with a slightly widened opening fits the majority of children’s heads without needing further adjustment. A hat folded without this widening step is often too tight at the base to sit at the correct position on the child’s head and produces the particular frustration of a hat that sits too high and looks like a paper boat rather than a sailor hat.
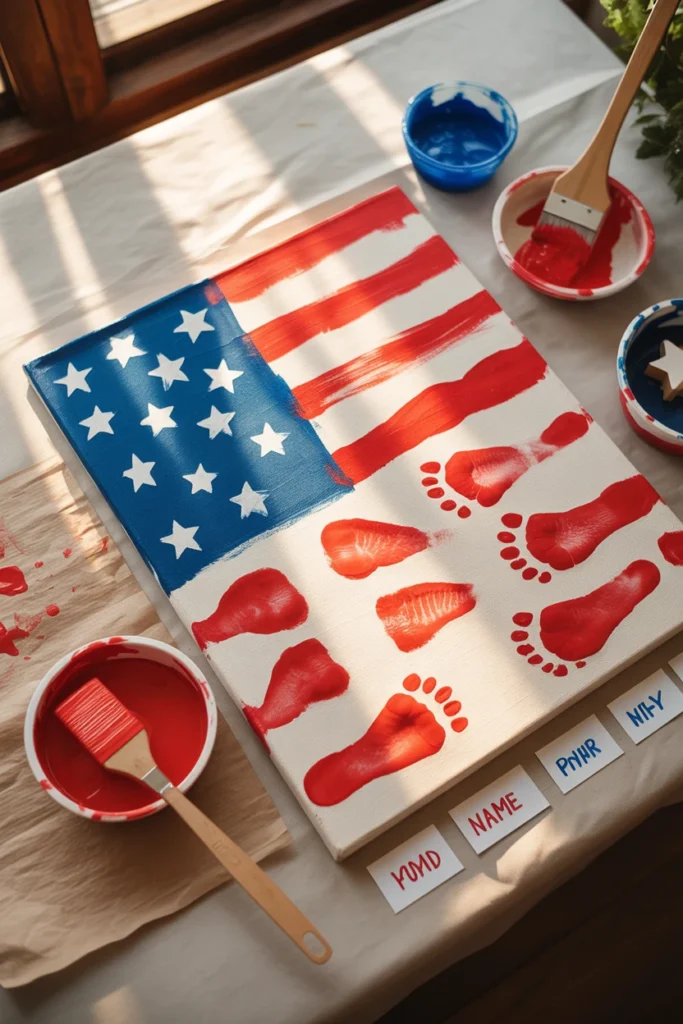
15. Stars and Stripes Footprint Flag Canvas
Stretch a white canvas flat on a protected table surface. Paint each child’s foot with red paint and press it firmly onto the canvas in horizontal rows to create the red stripes of the American flag across the right two thirds of the canvas. Allow to dry. Use a sponge brush to fill the top left corner of the canvas with blue paint for the canton section. Add white star hand-stamps or white paint dot stars across the blue canton. Write every participating child’s name along the bottom of the canvas in small text with the year. The finished footprint flag canvas is a collective keepsake artwork that captures the size of every child’s foot at this specific moment in time and belongs to the family or the party host as a permanently dated record of the celebration.
Craft Tip: Have one adult dedicated exclusively to the footprint application step throughout the craft session because the footprint requires precise positioning on the canvas, the correct amount of paint on the foot, firm even pressure during the print, and a steady hand during the lift to prevent smearing. A dedicated footprint helper ensures every child’s footprint is placed in the correct stripe position on the canvas and produced with the cleanest possible print quality regardless of how many children are participating in the activity simultaneously.
Keepsake Tip: Commission a simple wooden frame for the finished footprint flag canvas in the weeks following the party and give the framed artwork to the family whose home hosted the celebration as a permanent keepsake gift. A framed footprint flag canvas from the Fourth of July party is a genuinely extraordinary gift that communicates an extraordinary level of thought, care, and celebration of the specific moment in time it represents and it belongs on the wall of the hosting family’s home rather than in a drawer or a box where the particular magic of what was captured on its surface will eventually be forgotten.
Bottom Line
A craft is never just a craft for a child. It is an hour of complete absorption. It is the particular satisfaction of making something that did not exist before and that would not exist at all without their specific hands and their specific choices and their specific creative decisions. It is the moment at the end of the session when they hold up the finished thing and look at you and the expression on their face is the same one every child makes when they have made something genuinely beautiful and they know it. Every craft on this list was chosen to produce that moment. Choose the ones that suit the ages, the interests, and the energy levels of the children at your celebration. Lay out the materials with care. Give children the freedom to make their own creative decisions within the structure of the craft. And watch what they produce. Because what they produce will always be better, more personal, more genuinely beautiful, and more worth keeping than anything you could have bought for them at any store at any price.