Nails are the smallest detail of a Fourth of July outfit and somehow the most noticed. People will not necessarily comment on your shoes or your bag or even your dress but they will notice your nails the moment you hand someone a drink or reach across a table for a plate of something from the grill and if those nails are doing something genuinely beautiful in the red, white, and blue palette of the holiday the comment will be immediate and completely sincere. The problem with most Fourth of July nail guides is that they default to the obvious, red on one nail, white on the next, blue on the third, and call it patriotic. This list does something entirely different. These 19 4th of July nails ideas have been chosen because every single one of them takes the patriotic color palette and does something genuinely unexpected and genuinely beautiful with it. Something that honors the holiday without looking like it was executed in five minutes with three bottles of polish and no particular plan. Something that will photograph beautifully against every backdrop from a sparkler station to a fireworks sky to a cold drink held in a warm summer hand. These are the nails that make people stop mid-conversation to ask who did them. Whether that person is a professional nail technician or your own right hand holding a detail brush, this list has the idea you have been looking for.
The Nail Ideas
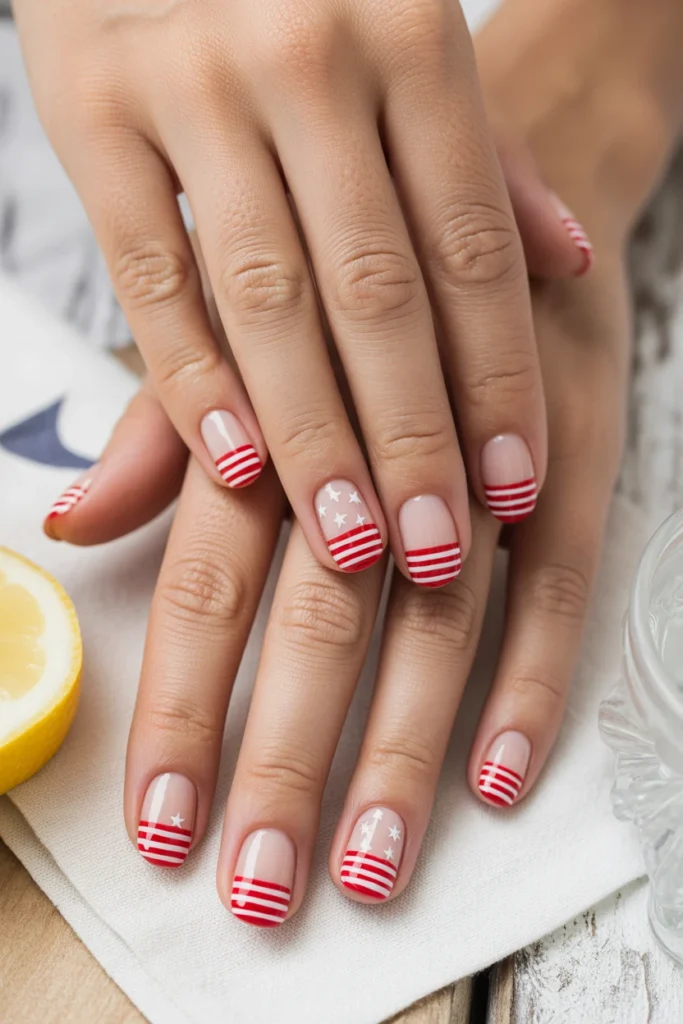
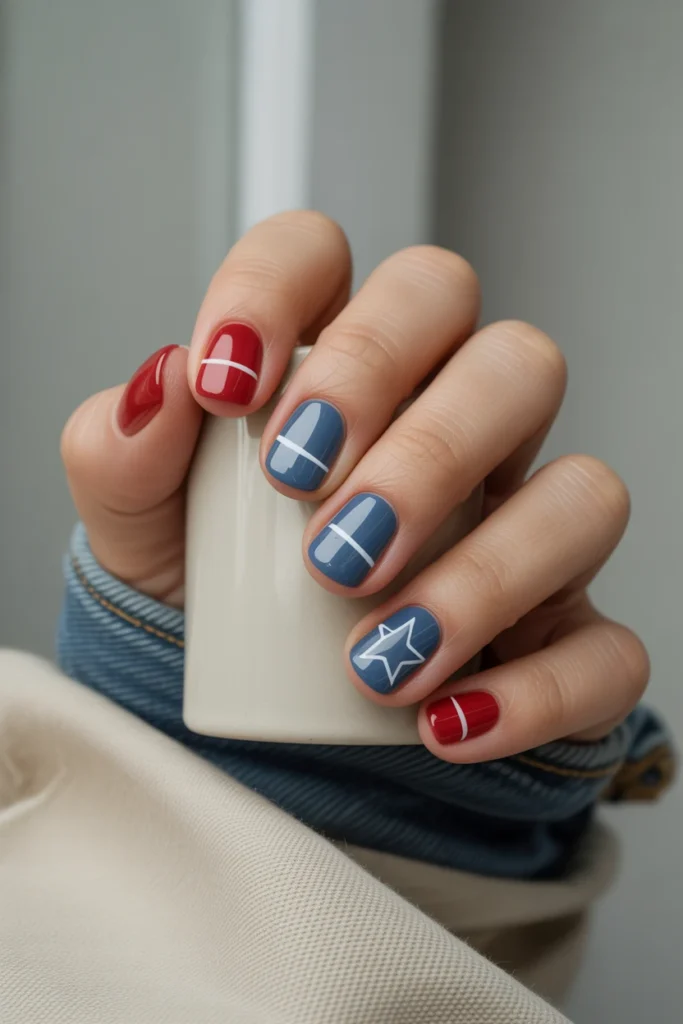
1. Stars and Stripes Negative Space Nails
Using a nude or clear base, apply thin red horizontal stripes across the lower half of the nail using a fine striping brush and small white star stickers or hand-painted dots in the upper left quadrant to create a miniature flag design that incorporates the natural nail as the negative space background. The result is a sophisticated, editorial interpretation of the American flag that looks like something from a high-end nail salon rather than a holiday craft project.
Presentation Tip: Use a fine striping brush with a single pull motion rather than multiple strokes to create each red stripe so the lines are clean, consistent, and perfectly straight from one edge of the nail to the other. A stripe drawn in a single confident pull looks professional. One built from multiple overlapping strokes looks uneven and hesitant and the confidence of the application is always visible in the finished result regardless of the quality of the polish being used.
Pairing Suggestion: Pair with a matte top coat rather than a glossy one so the negative space nail design has a subtle, editorial finish that photographs with a sophisticated softness rather than the high shine that can make intricate nail designs look busy and overwhelming in close-up images.
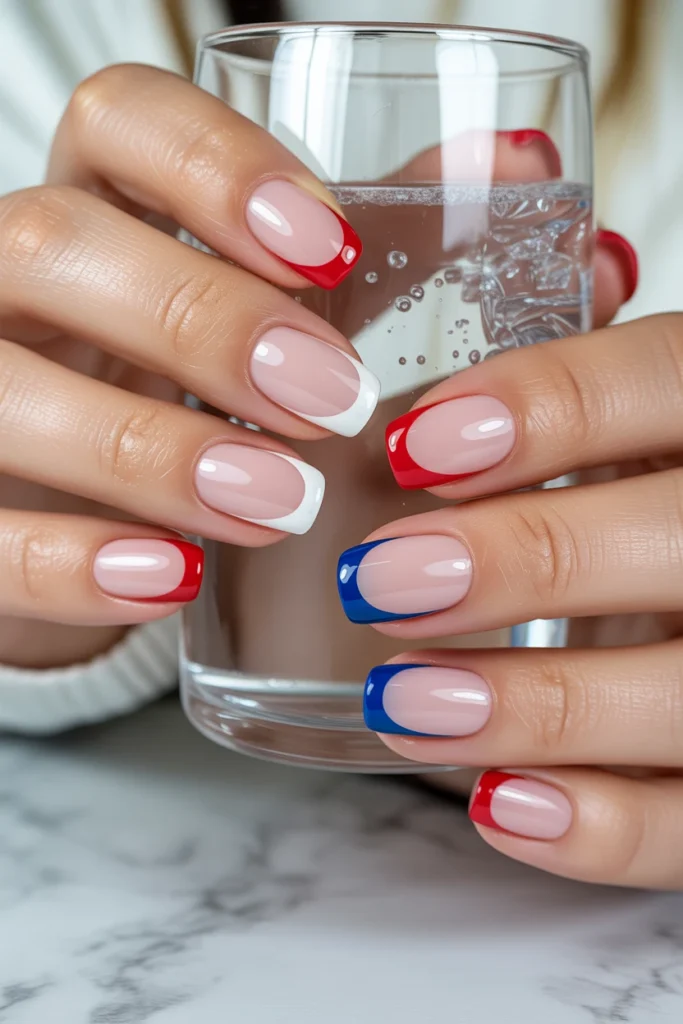
2. Red White and Blue French Tip Nails
Elevate the classic French manicure by replacing the standard white tip with three versions in rotation across the full set, red tips on some nails, white tips with a blue base on others, and blue tips on the remaining nails, creating a patriotic French tip set that is both immediately recognizable as a holiday nail and significantly more considered and elegant than a standard red-white-blue polish rotation would ever produce.
Presentation Tip: Use nail guides or tape to create the smile line of each French tip rather than attempting to paint freehand because the precision of the smile line is the single most important technical detail of a French manicure and a perfectly curved smile line applied with a guide looks professional in a way that a freehand smile line almost never does regardless of how steadily the brush was held during application.
Pairing Suggestion: Pair with a high-gloss top coat applied in two coats rather than one so the French tip edges are completely sealed and the transition between the tip color and the base is smooth rather than raised and the finished manicure maintains its salon-quality appearance for significantly longer than a single top coat layer would preserve it.
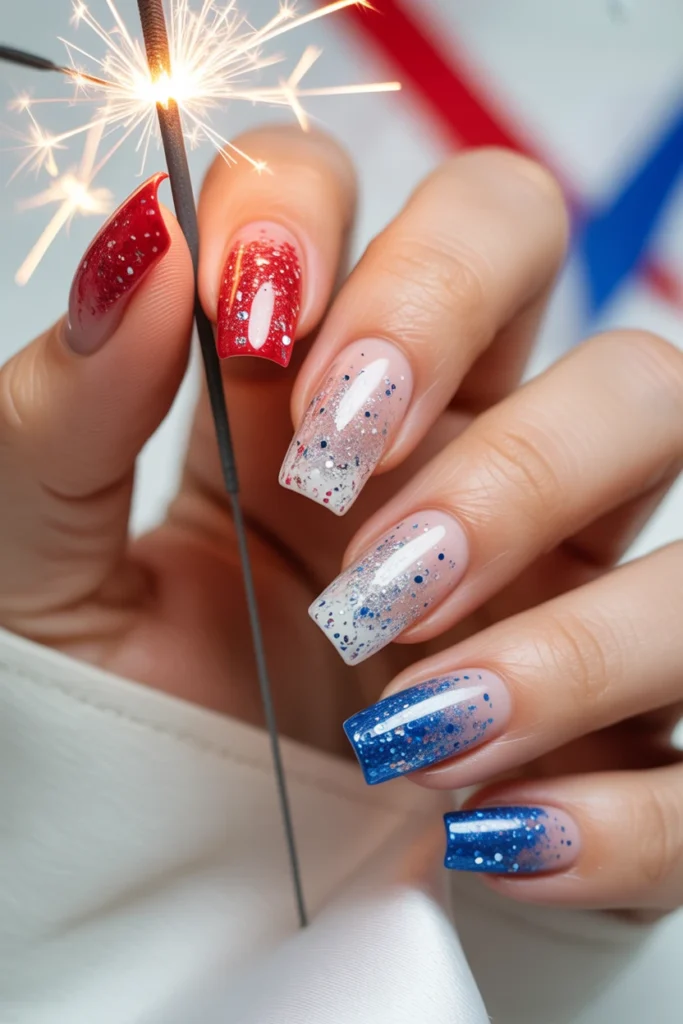
3. Patriotic Glitter Ombré Nails
Apply a red glitter gel or polish at the base of each nail and fade it through a white glitter transition into a blue glitter tip using a makeup sponge to dab and blend each color section for a gradient effect that moves from red through white to blue across the full length of the nail. The glitter ombré is one of those nail techniques that looks significantly more technically demanding than it actually is and produces one of the most visually spectacular patriotic nail results available.
Presentation Tip: Apply each glitter color in at least three thin sponged layers rather than one heavy application because thin layered sponging builds color gradually and produces a smooth, well-blended gradient while a single heavy application creates a harsh, unblended line between color sections that no amount of additional sponging can fully correct. Build slowly and the gradient will reward the patience.
Pairing Suggestion: Pair with a gel top coat cured under a UV lamp if available rather than a standard air-dry top coat so the glitter ombré is fully sealed and protected and the glitter does not snag on fabric or catch on surfaces in the way that unsealed glitter nails inevitably do within the first day of wearing them.
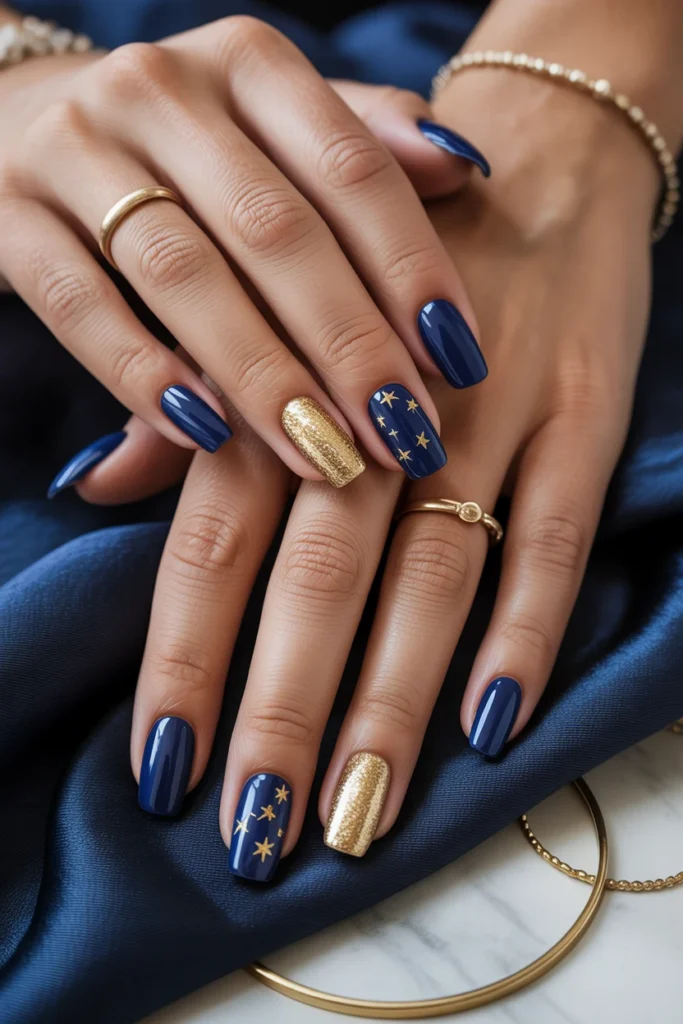
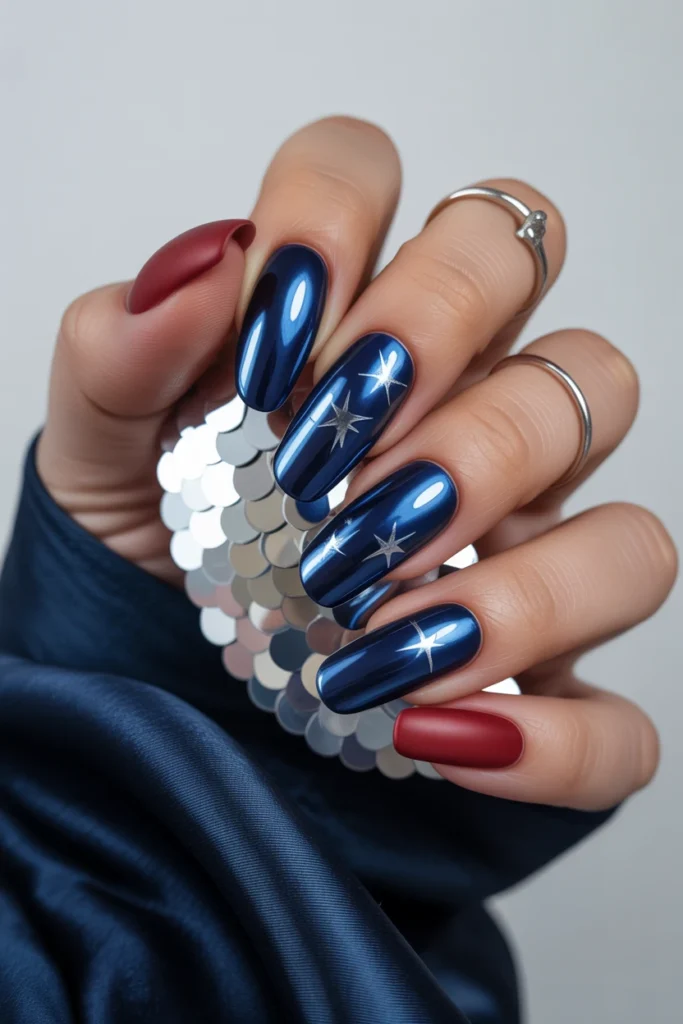
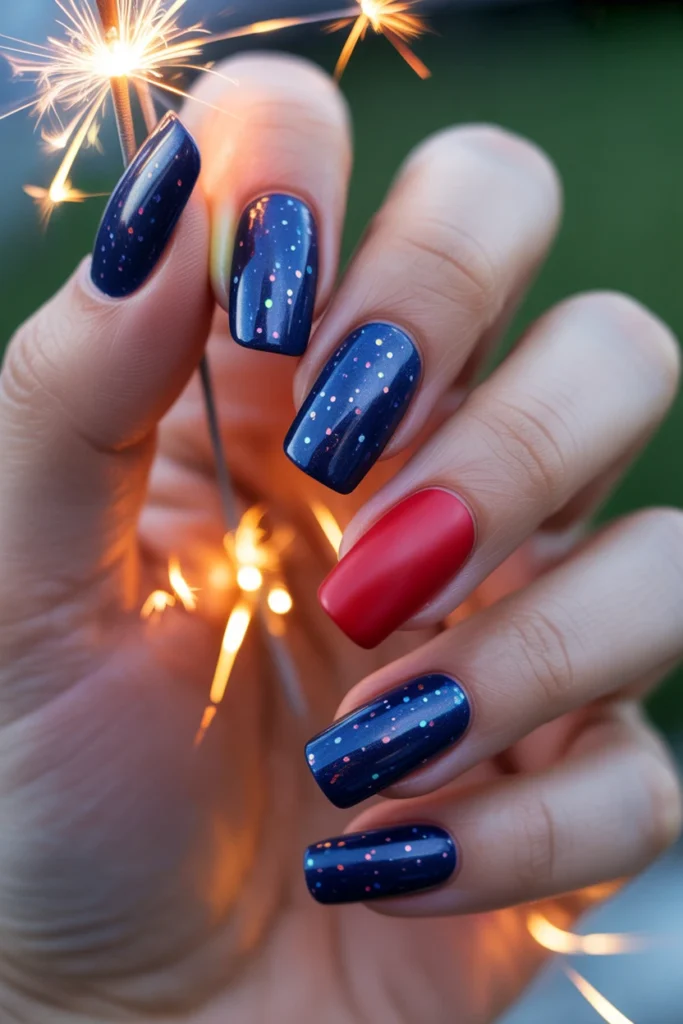
4. Navy Blue with Gold Star Accent Nail
Paint all nails in a deep, rich navy blue and use a fine detail brush or a nail stamping plate to add a scattering of small gold stars across one or two accent nails on each hand for a look that is simultaneously patriotic, sophisticated, and genuinely glamorous. The navy and gold combination is one of the most elegant color pairings available in nail art and the star motif connects it specifically to the Fourth of July without making the patriotic intention of the design feel heavy-handed or literal.
Presentation Tip: Apply the navy base in two thin coats rather than one thick coat because a thick single coat of dark polish takes significantly longer to dry fully, is prone to denting and smudging throughout the drying period, and produces a less smooth and less even surface than two thin coats applied with adequate drying time between them. Two thin coats of navy always produces a more professional result than one thick coat regardless of the quality of the polish.
Pairing Suggestion: Pair with a gold glitter accent on the ring fingernail of each hand in addition to the star details on the accent nail so the gold element is present in two different textures across the full set and the finished manicure has a multi-dimensional quality that a single gold star placement alone cannot achieve.
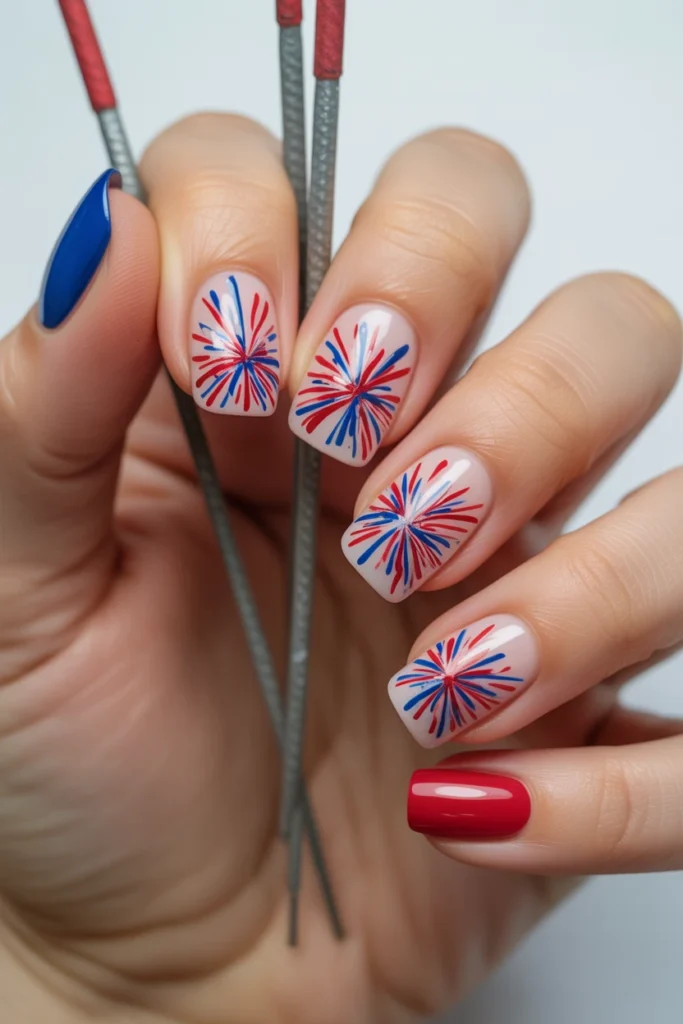
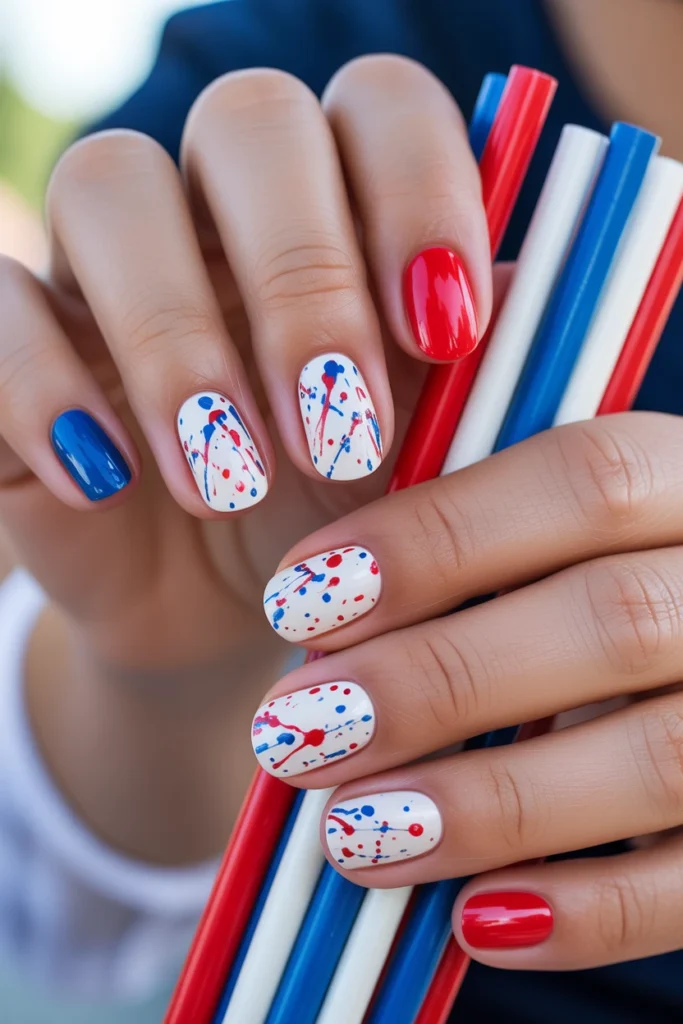
5. Firecracker Explosion Abstract Nails
Using a white or nude base, splatter thin lines of red and blue polish outward from a central point on each nail using a fan brush or a thin striping brush to create an abstract firecracker explosion effect that is simultaneously bold, artistic, and completely unlike any other Fourth of July nail design available. The abstract splatter technique produces a different result on every nail which means the full set has a cohesive theme but an organic variety that looks genuinely hand-crafted rather than reproduced.
Presentation Tip: Thin the red and blue polishes very slightly with nail polish thinner before applying them with the brush so the lines flow freely and naturally from the brush rather than dragging and breaking due to the resistance of a polish that is too thick for the fine, fluid line work the firecracker explosion effect requires. Slightly thinned polish produces the free, energetic lines of a real firecracker burst. Full-consistency polish produces broken, jagged marks that look like scratches rather than explosions.
Pairing Suggestion: Pair with a single accent nail on each hand painted in a solid red or blue rather than the abstract splatter so the set has a visual anchor point that balances the energy of the abstract design and prevents the full set of splatter nails from feeling visually overwhelming when all ten are worn together simultaneously.
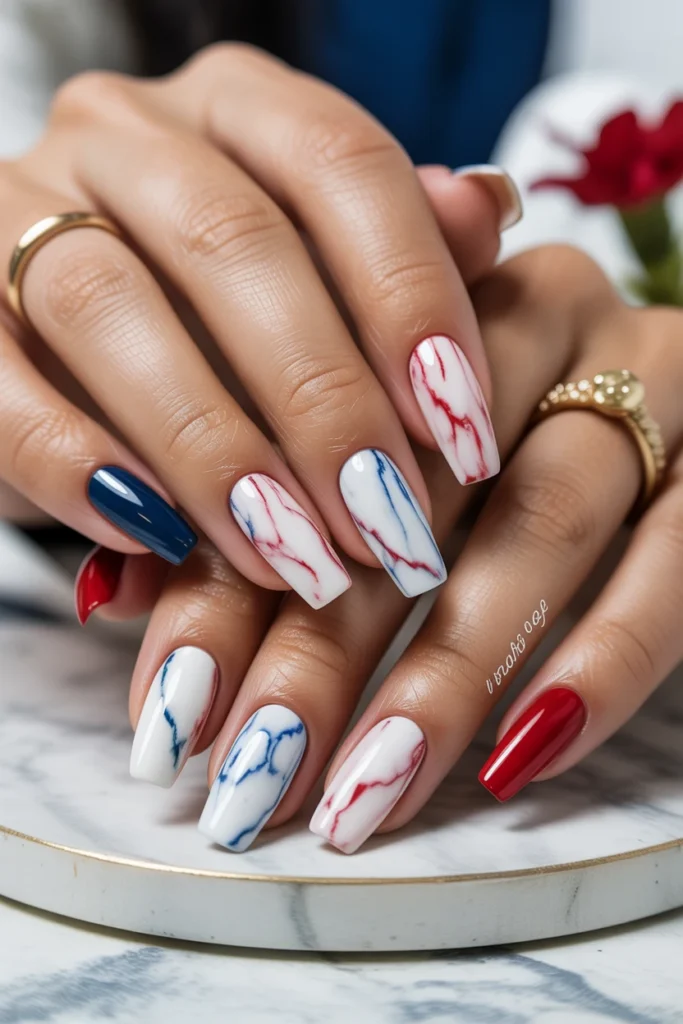
6. Red White and Blue Marble Nails
Create a marble effect using red, white, and blue by applying a white base coat, then using a thin brush dipped alternately in red and blue to draw thin, irregular veining lines across the surface of each nail, blending lightly where the colors meet with a fine brush dipped in nail polish thinner to create the soft, natural transitions of genuine marble. The patriotic marble nail is one of those designs that looks simultaneously like high-end nail art and a natural stone pattern and the combination of those two aesthetic registers is what makes it so consistently popular on Pinterest.
Presentation Tip: Keep the veining lines sparse and irregular rather than dense and uniform because real marble has more empty space than vein and a nail art marble that overcrowds the surface with veining lines looks like a crayon drawing rather than a stone surface. Less veining applied with more confidence always produces a more convincing marble effect than more veining applied with hesitation.
Pairing Suggestion: Pair with a single accent nail on each hand in a solid deep navy or a rich red to ground the marble set in one of its dominant colors and give the full manicure a visual resting point that the all-marble set, however beautiful, sometimes lacks when worn across all ten nails simultaneously.
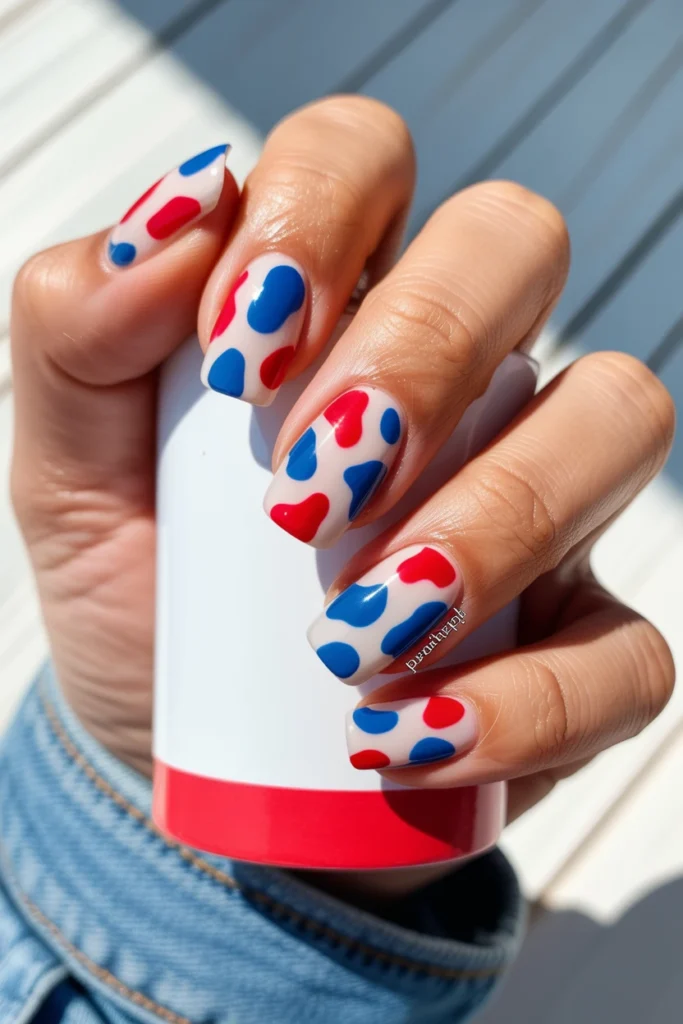
7. Patriotic Cow Print Nails
Apply a white base coat to all nails and use a thin brush to paint irregular cow print spots in red on some nails and blue on others, varying the size and shape of each spot to replicate the organic randomness of a genuine cow print pattern. The result is a playful, trend-forward nail that takes one of the most consistently popular nail art patterns of recent years and renders it in the patriotic color palette of the Fourth of July in a way that is simultaneously seasonal and completely on trend.
Presentation Tip: Vary the size of the cow print spots deliberately across each nail, using larger spots in the center of the nail and smaller ones toward the edges, so the print has a natural, organic distribution that looks like a genuine animal pattern rather than a series of same-sized shapes applied at regular intervals. The variation in scale is what makes cow print look authentic rather than decorative and authenticity is always the more beautiful result.
Pairing Suggestion: Pair with a glossy top coat applied generously so the cow print spots are fully sealed beneath a smooth, even surface and the playful, graphic quality of the pattern is emphasized by the high shine rather than muted by a matte finish that would reduce the visual contrast between the white base and the colored spots.
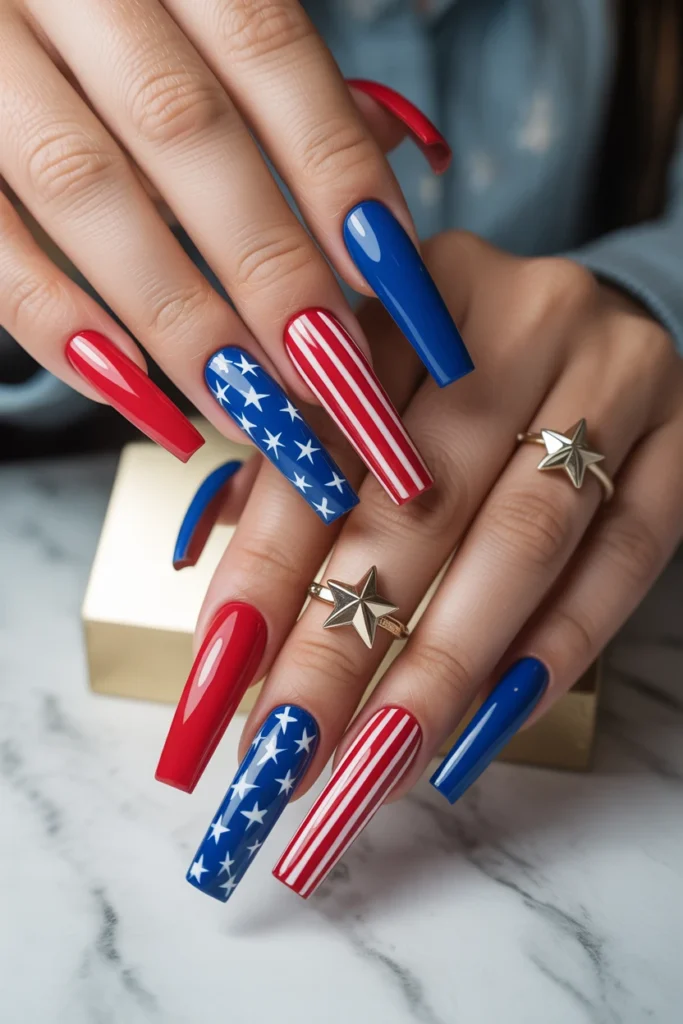
8. Stars and Stripes Coffin Nails
On a longer coffin or almond nail shape, paint alternating nails in red and blue and use the remaining nails as the canvas for detailed hand-painted stars and stripes designs, thin white stripes across the red nails and small white stars scattered across the blue nails for a full patriotic nail set that uses the length and shape of the coffin nail to maximize the detail and the visual impact of the design in a way that shorter nail shapes simply cannot accommodate.
Presentation Tip: File the coffin nails to a consistent length and shape before applying any polish so the full set has a uniform silhouette that allows the nail art to be the visual focus rather than the irregularity of the nail shapes competing with the design for attention. Consistent nail shape and length is the foundation of every professional-looking nail set and the polish and art applied on top of an inconsistent foundation will always look less impressive than the same design applied on a perfectly consistent one.
Pairing Suggestion: Pair with a small star charm on the ring fingernail of each hand, applied using nail glue and a pair of tweezers before the final top coat, so the stars and stripes coffin set has a three-dimensional accent element that photographs beautifully and adds a tactile glamour to the design that flat nail art alone cannot achieve.
9. Navy Blue Chrome with Star Stamping
Apply a navy blue base coat and once fully dry, buff a blue or silver chrome powder over the surface using a chrome applicator sponge to create a high-shine, mirror-like chrome finish, then use a nail stamping plate with a star motif and a clear stamping polish to apply a pattern of stars across the chrome surface. The combination of the metallic chrome base and the stamped star pattern is one of the most technically impressive and visually spectacular Fourth of July nail designs available.
Presentation Tip: Apply the chrome powder only over a no-wipe gel top coat cured under a UV lamp rather than over a standard air-dry polish because chrome powder adheres properly and produces the mirror-like finish it is known for only when applied over a cured gel surface. Applied over air-dry polish the same chrome powder produces a dull, uneven metallic effect that bears no resemblance to the spectacular mirror finish that makes chrome nails so consistently popular on Pinterest.
Pairing Suggestion: Pair with two accent nails on each hand painted in a matte red rather than the chrome navy so the set has a deliberate contrast between the high-shine chrome and the matte red that makes both finishes look more dramatic in comparison to each other than either one would look worn across a full set of ten identical nails.
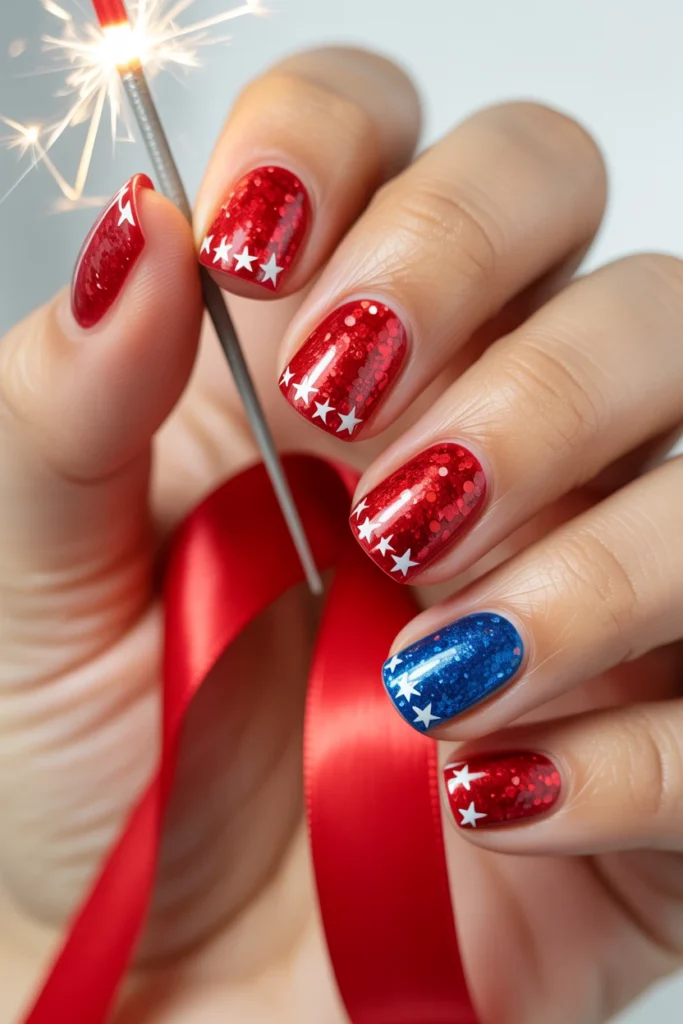
10. Red Glitter with White Star Tips
Apply a rich red glitter polish or a red gel with red glitter gel over the top across all nails, then use a fine detail brush and white nail art paint to hand-paint small stars along the tips of each nail for a design that references the flag pattern without replicating it literally and that uses the glitter of the red base to add a celebratory sparkle to the holiday-appropriate star tip detail.
Presentation Tip: Paint the white star tips before applying the final top coat rather than after so the star edges are sealed beneath the top coat rather than sitting on top of it where they will chip and peel significantly faster than stars that are protected by the top coat layer above them. Sealed nail art always lasts longer than unsealed nail art regardless of the quality of the paint used to create it.
Pairing Suggestion: Pair with a blue glitter accent nail on the ring fingernail of each hand so the red glitter and white star tip set has a blue element that completes the patriotic palette and the ring fingernail accent provides a focal point that draws the eye to the most universally photographed finger of the full manicure set.
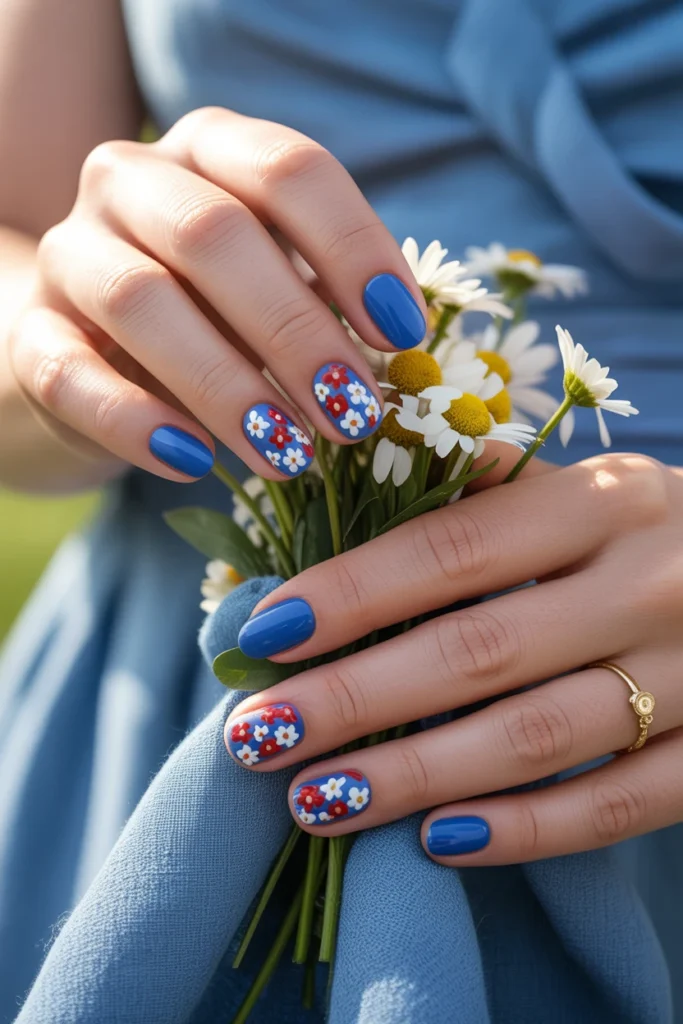
11. Patriotic Floral Nails with Blue Base
Apply a deep navy or cobalt blue base coat to all nails and use a fine detail brush to hand-paint small red and white flowers, daisies, roses, or abstract blooms, across two or three accent nails on each hand for a patriotic floral nail that manages to be simultaneously feminine, summery, and holiday-appropriate without looking overtly patriotic in the way that a straightforward red, white, and blue polish rotation always does.
Presentation Tip: Paint the flowers using the dot technique, a larger central dot of white surrounded by small petal dots of red arranged in a flower shape, rather than attempting to paint detailed floral petals freehand, because the dot technique produces charming, consistent flowers that look intentional and skilled while freehand floral painting on a nail surface requires a level of fine motor skill and artistic confidence that most people do not have available on both hands simultaneously.
Pairing Suggestion: Pair with a small gold dot of nail art paint at the center of each flower once the petals are dry so every bloom has a warm gold center that adds depth and dimension to the floral design and connects the patriotic blue and red of the flowers to the gold jewelry and accessories the outfit is likely wearing alongside them.
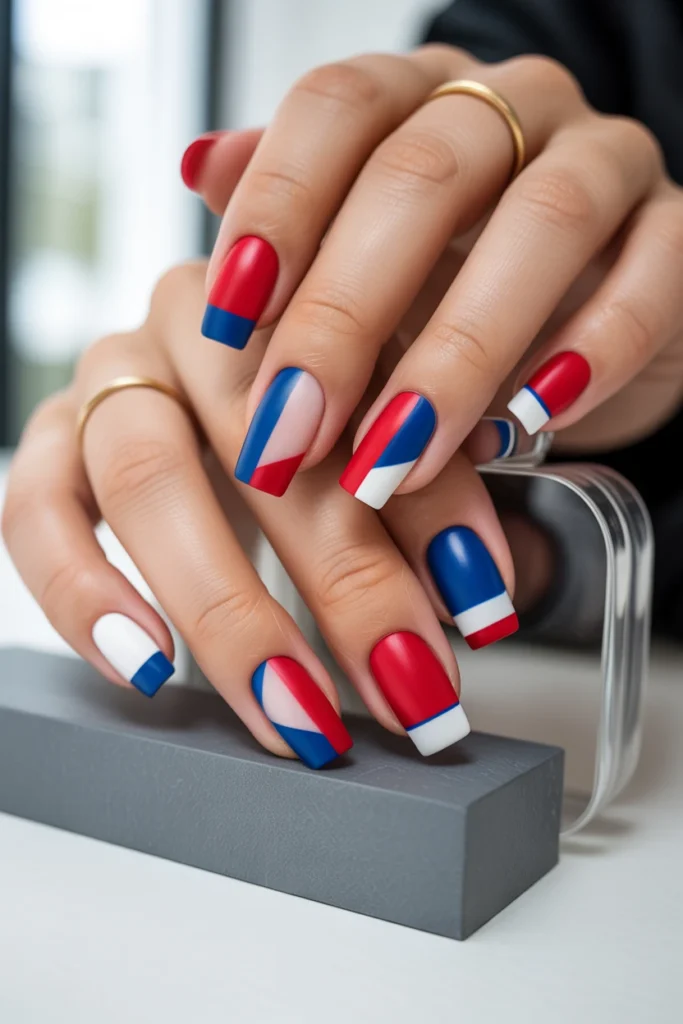
12. Red White and Blue Geometric Nails
Using thin nail art tape or striping tape, mask off geometric sections of each nail and paint them in alternating red, white, and blue to create a set of clean, graphic geometric nails where triangles, rectangles, or diagonal color blocks divide each nail into two or three precisely delineated color sections. Remove the tape while the polish is still slightly wet to reveal clean, sharp edges between each color section for a result that looks architecturally precise and genuinely sophisticated.
Presentation Tip: Remove the nail art tape at a forty-five degree angle away from the nail rather than pulling it straight up and away from the surface because the angled removal pulls the tape away from the fresh polish edge rather than dragging the still-wet polish upward with the tape and blurring the clean geometric line that makes this nail design so visually striking. The angle of tape removal is the single most important technical detail in geometric tape nail art.
Pairing Suggestion: Pair with a matte top coat applied over the geometric design so the clean, architectural lines of the color blocking are emphasized by the flat, non-reflective finish and the geometric precision of the design is not softened or blurred by the rounded, light-catching quality of a high-gloss top coat.
13. Stars and Stripes Minimalist Line Nails
Using a fine liner brush and white nail art paint, draw a single thin horizontal stripe across a red base on some nails and a single small star outline on a blue base on others for a minimalist, editorial interpretation of the stars and stripes theme that requires only two colors, a liner brush, and a steady hand to produce a result that looks more considered and more deliberately artistic than a full detailed flag design would on the same nail surface.
Presentation Tip: Practice the line strokes and the star outline on a piece of paper or on a nail tip before applying them to the actual nails so the motions are familiar and confident when it matters. A line drawn with a confident, practiced hand looks intentional and professional. One drawn with an unfamiliar, hesitant motion looks uncertain and the difference between confident and hesitant line work on a nail is immediately and completely visible to everyone who looks at the finished result.
Pairing Suggestion: Pair with a glossy top coat on the red stripe nails and a matte top coat on the blue star nails so the two different nail designs within the same set have different finishes that add an additional layer of intentional contrast to the minimalist design and make the set look more considered and more detailed than the simplicity of the individual elements would suggest.
14. Navy Blue with Holographic Glitter
Apply a deep navy base coat and while it is still slightly tacky, press a holographic loose glitter or apply a holographic glitter top coat over the entire surface so the navy base shows through the holographic shimmer and creates a deep, galaxy-like effect that shifts between navy and every color of the rainbow as it catches the light. At a Fourth of July fireworks display these nails will look like tiny personal firework shows happening at the ends of your fingers.
Presentation Tip: Apply the holographic glitter top coat in a thin, even layer rather than a thick one because a thin layer allows the navy base to remain visible through the holographic shimmer and creates the deep, dimensional galaxy effect the design is known for. A thick layer obscures the navy entirely and reduces the finished nail to a standard holographic glitter with no depth or complexity behind the sparkle.
Pairing Suggestion: Pair with two accent nails on each hand painted in a solid red with a matte finish so the holographic galaxy navy nails have a bold, flat red contrast that makes the holographic shimmer of the navy look even more spectacular in comparison and the full set has both a statement nail and an anchor nail working together rather than ten identical holographic nails with no focal point.
15. Firecracker Splatter Nails
Dip a thin straw into red nail polish, hold it approximately one centimeter above the nail surface, and blow gently through the opposite end of the straw to splatter tiny droplets of red polish across a white base in a random explosion pattern, then repeat with blue polish for a multi-color splatter that replicates the visual burst of a real firecracker in nail art form. Repeat across all nails for a cohesive set or vary the base color between white and navy for additional depth.
Presentation Tip: Protect the skin around the nails with petroleum jelly or liquid latex before applying the splatter technique because the straw method produces splatter that lands on the skin surrounding the nail as well as on the nail itself and removing splatter from petroleum jelly-protected skin is a simple wipe rather than an acetone-and-cotton-pad cleanup that takes longer than the nail art itself.
Pairing Suggestion: Pair with a single accent nail on each hand painted in a solid glossy red or navy so the splatter set has one nail of visual calm amid the energetic abstract pattern of the remaining nine and the full set reads as deliberately designed rather than uniformly chaotic across every nail simultaneously.
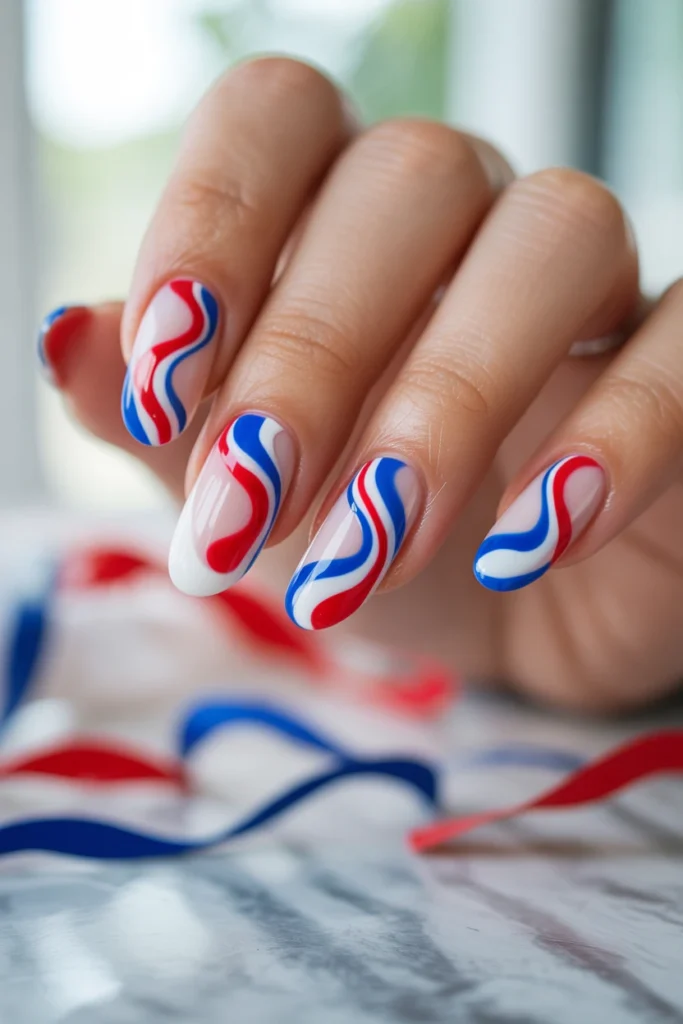
16. Patriotic Swirl Nails in Red White Blue
Apply a white base coat and while it is still wet, drop small amounts of red and blue polish onto the surface of the nail and use a thin brush or a toothpick to swirl the colors through each other in long, fluid, organic curves. Work quickly before the polishes begin to dry and the swirling motion creates a fluid, painterly design that is completely unique on every nail and that looks like an abstract artwork in the patriotic color palette rather than a nail design that was executed according to a fixed template.
Presentation Tip: Use a nail art mixing medium or a small drop of nail polish thinner added to the red and blue polishes before dropping them onto the wet white base so the colors remain fluid and swirl-able for slightly longer than they would at their standard consistency. The extra working time the thinner provides makes the difference between swirls that are loose, fluid, and organic and swirls that drag and break because the polish began to set before the swirling motion could be completed.
Pairing Suggestion: Pair with a high-gloss top coat applied generously across the full set so the swirl design is protected beneath a smooth, even surface and the colors of the swirls remain as vibrant and as clearly distinct from each other as they were when the design was first created rather than dulling and blending further as an unsealed swirl design always will over time.
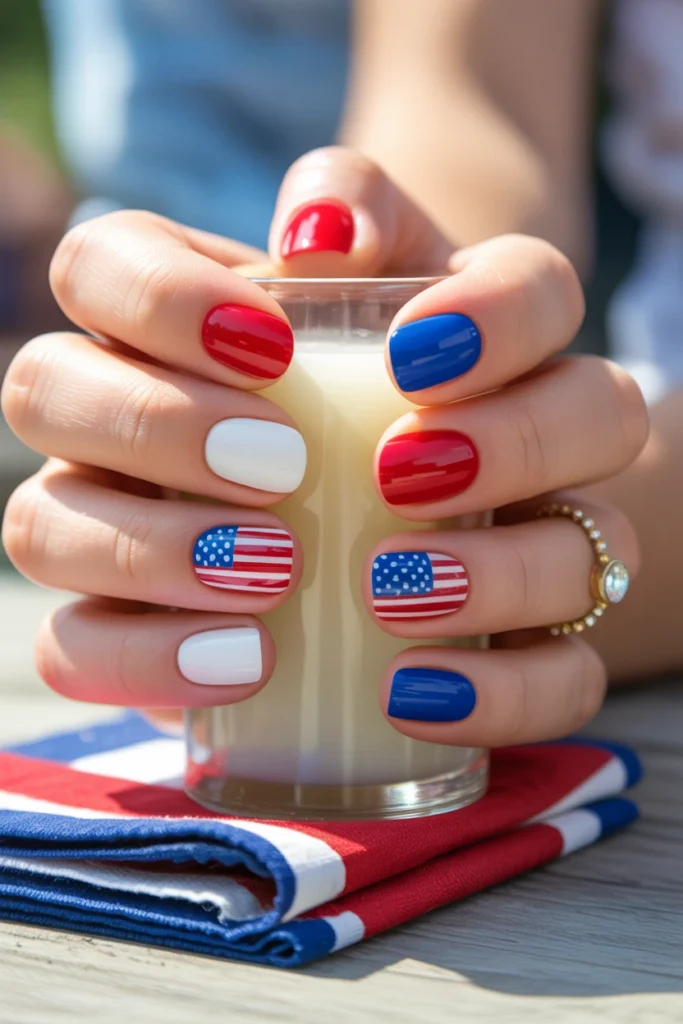
17. American Flag Accent Nail Set
Paint all nails in either a solid red, white, or blue rotating across the full set and reserve the ring fingernail of each hand as the accent nail for a detailed hand-painted American flag design, thin white stripes on a red base with a small blue rectangle in the upper left corner containing tiny white star dots, creating the flag in miniature on the single nail that is most visible in the hand position most commonly photographed in social media images.
Presentation Tip: Use a magnifying glass or a nail art lens if available when painting the flag detail on the accent nail because the scale of the design requires a level of detail that is genuinely easier to achieve with visual magnification than without it and the investment in a cheap nail art magnifying clip that attaches to a phone or a makeup mirror is immediately and completely justified by the difference in the precision of the finished result.
Pairing Suggestion: Pair with small rhinestone accents placed at the corner of the flag rectangle on the accent nail using a dotting tool and nail glue so the American flag detail has a subtle sparkle element that catches the light and photographs beautifully without adding enough visual complexity to the already-detailed flag design that it becomes overwrought rather than elegant.
18. Red White and Blue Jelly Nails
Apply a sheer, jelly-finish red polish over a white base on some nails and a sheer jelly blue over a white base on others, leaving some nails in a sheer jelly white alone so the full set has all three translucent patriotic colors in their softest and most glass-like form. Jelly nails are one of the most consistently popular nail trends on Pinterest and the patriotic version is both unusual and genuinely beautiful in the way that translucent color on nails always manages to be.
Presentation Tip: Build the jelly effect through three to four thin coats of sheer polish rather than two thicker ones because the translucency of a jelly nail is only achieved when the color is built gradually and the depth of the sheer layers creates the glass-like quality the design is known for. Two thick coats produce opacity where transparency is the entire aesthetic point and the thinness of each individual layer is the technical foundation of the entire jelly nail result.
Pairing Suggestion: Pair with a single accent nail on each hand in a holographic or chrome finish in silver or gold so the soft, translucent jelly nails have one nail of high-shine contrast that catches every light source at the party and draws attention to the full set in a way that an all-jelly manicure with no accent element would rarely achieve on its own.

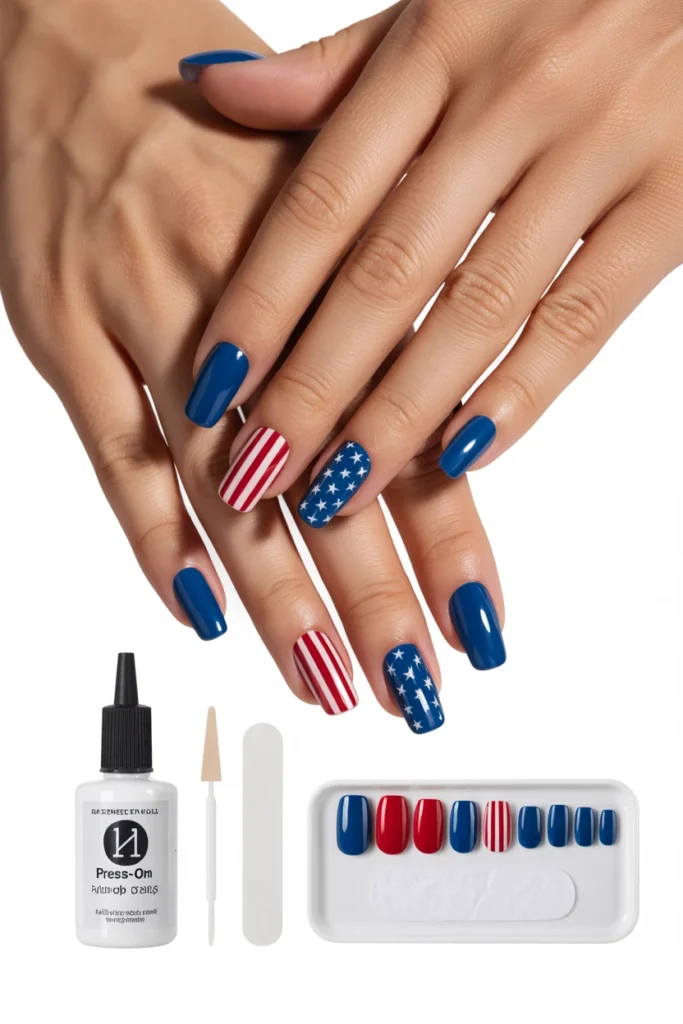
19. Stars and Stripes Press On Nail Set
For the Fourth of July guest who wants spectacular patriotic nails without the time, the skill, or the cost of a salon appointment, a custom or pre-made press-on nail set in a stars and stripes design is the most practical and the most consistently underestimated option on this list. Quality press-on nails applied correctly with nail glue rather than the adhesive tabs that come with most sets last for up to two weeks and are completely indistinguishable from a salon set in photographs and in person.
Presentation Tip: Apply press-on nails over a clean, oil-free nail surface by wiping each natural nail with a cotton pad soaked in rubbing alcohol before application so the nail glue bonds fully to the natural nail plate rather than to a residue of oils and hand cream that will cause the press-on to lift within hours rather than lasting the full two weeks that a properly prepared surface and a quality nail glue can provide. The preparation of the natural nail before application is the single most important factor in the longevity of any press-on nail set.
Pairing Suggestion: Pair with a small bottle of nail glue kept in the bag throughout the Fourth of July celebration so any press-on nail that lifts during the day, which can happen with the most active and the most hands-on party activities, can be reattached immediately and discreetly without interrupting the celebration and the full set remains intact from the first sparkler to the last firework of the evening.
Bottom Line
Fourth of July nails are the smallest detail of the holiday outfit and somehow the one that gets the most attention, the most compliments, and the most saves on Pinterest. Every idea on this list was chosen because it does something genuinely beautiful with the patriotic color palette rather than simply painting three fingers three different colors and calling it festive. Whether you spend twenty minutes on a jelly nail set or two hours on a detailed flag accent nail, the effort you put into your nails this Fourth of July will be noticed, admired, and photographed more times than almost any other element of your celebration look. Choose the design that excites you most, gather the supplies, and give yourself the nails this holiday deserves.